


JP2121
New member
Hello, I have had a Mesa 50 Caliber (with the El84s) for about 6 years. I picked it up in the local guitar center used bin for a decent deal, it was made in 1988. About two weeks after I bought it, it started overheating and red plating within minutes of firing up. It pretty much sat on a shelf looking good and waiting for me to dig into it someday. Well...after plugging that **** 50 cal back in about a week ago, it gave me about 8 minutes of that tone I remember just dying for and then went red plating on me again! That was it, time to get on top of this. I am an engineer (electrical and controls) for my day job and had done a few amp repairs over the years for me and my friends but after cracking it open, it looked like it needed more than I had ever done before!
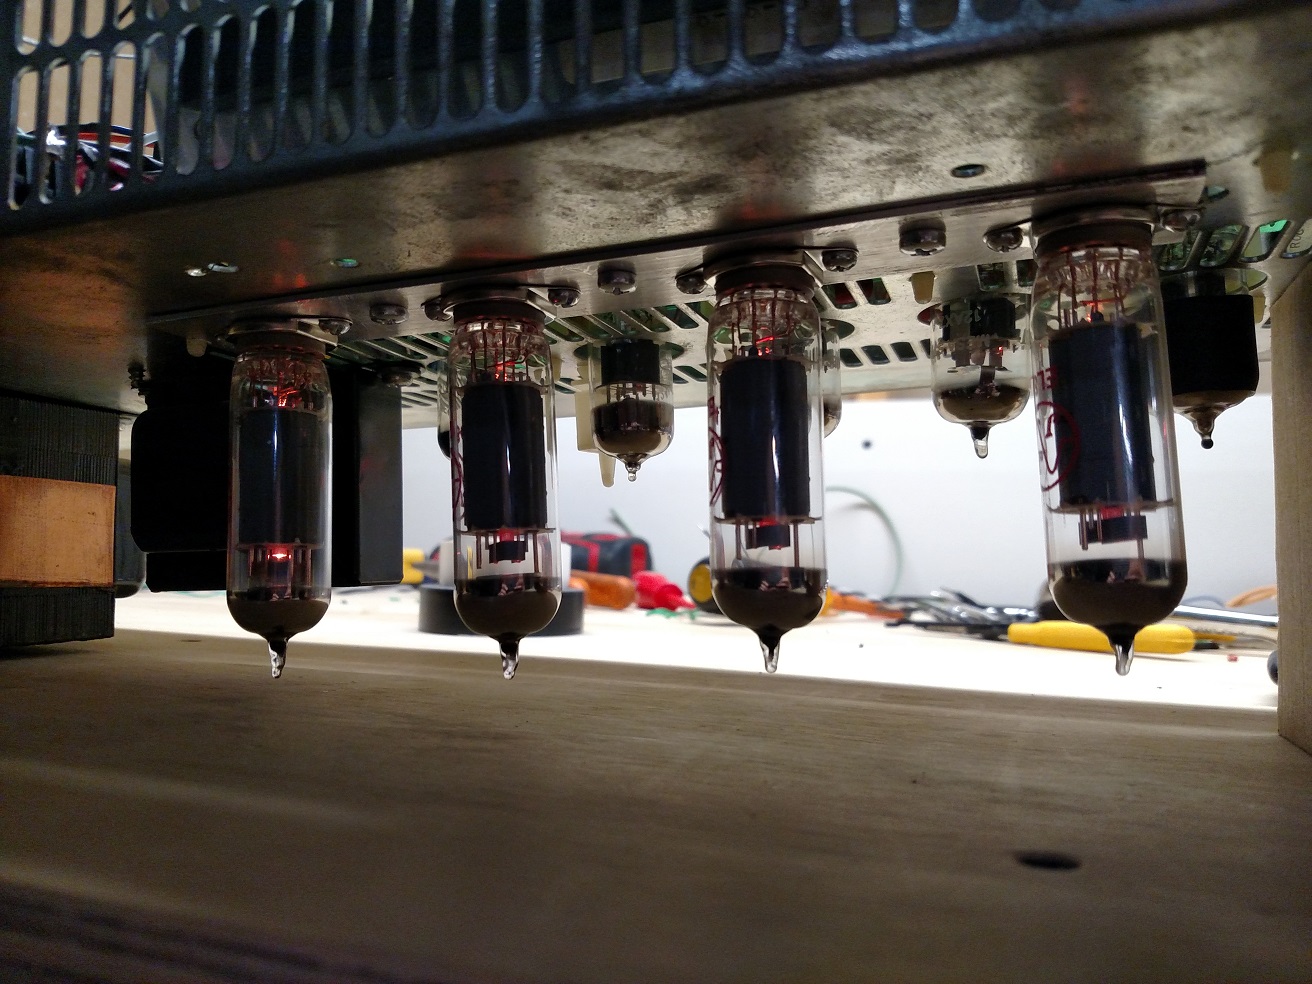
The PCB had been worked on at some point for what looked like this exact problem. I have read many other stories about the red plating too. The PCB was in rough shape and when I did some measurements, pin 7 of the power tubes had around 485VDC. That is getting up there but didn't really scare me too much. The bias seemed to be decent around -16VDC and about 15mA were flowing to the tube. I found all the electrolytic caps were fine, the coupling caps were not leaking DC by and the amp was really quiet (hum wise) when it actually worked. I tried some other tubes but it still got way too hot and then it seems like a tube would collapse and one side of the voltage supply would get dragged down to about 250VDC and the other at 400VDC. After I let everything cool for awhile, it would work for another few minutes. I thought perhaps the sockets had some bad solder joints but some of the pins couldn't be touched up since they were burned out! A couple output tubes were somewhat loose in their sockets too. It seemed like all the issues had to do with the power tubes so I focused my efforts there.
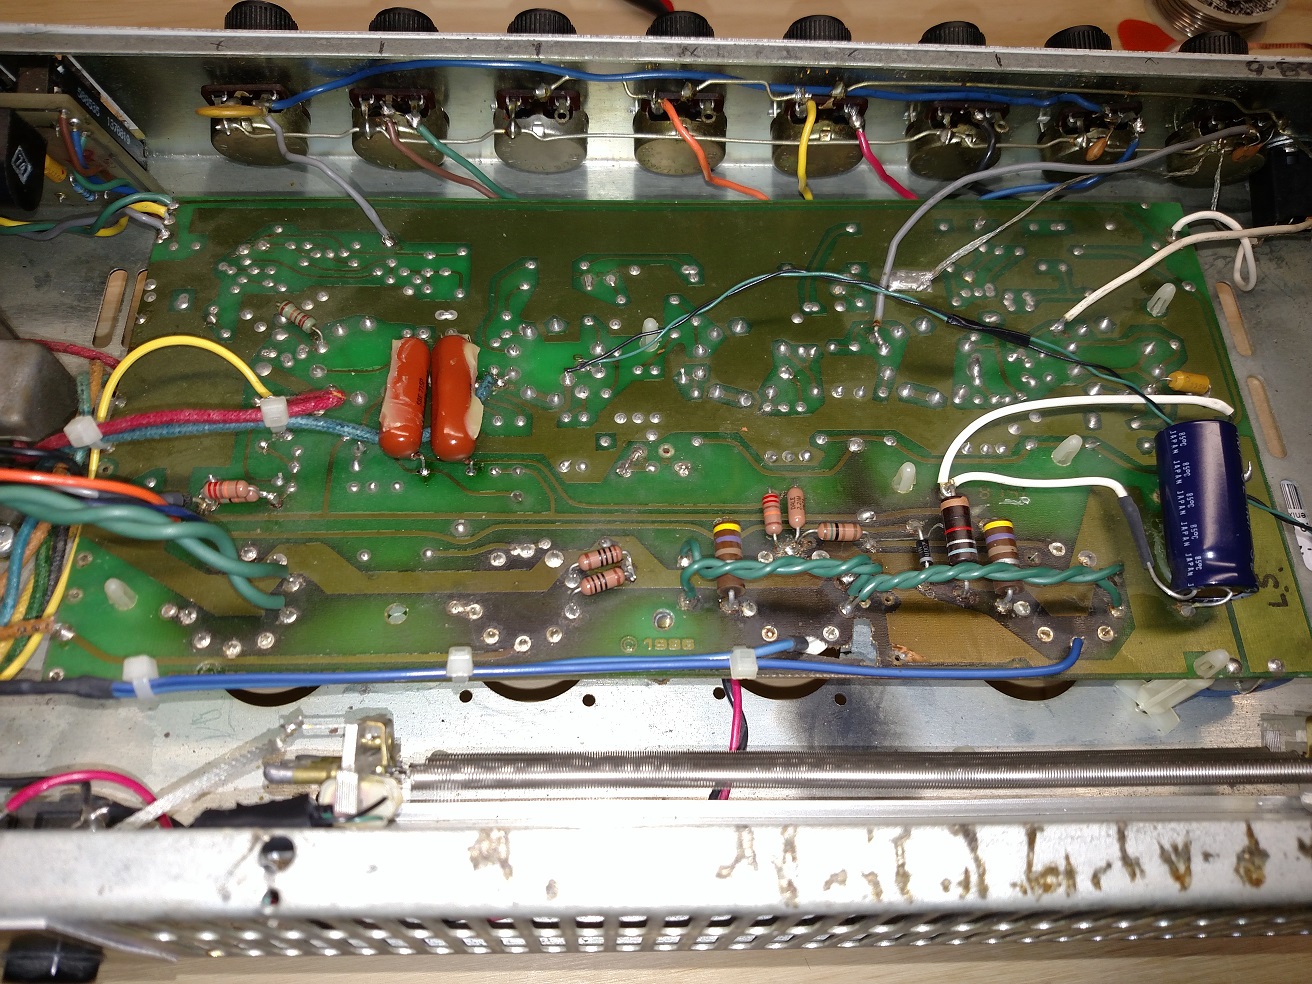
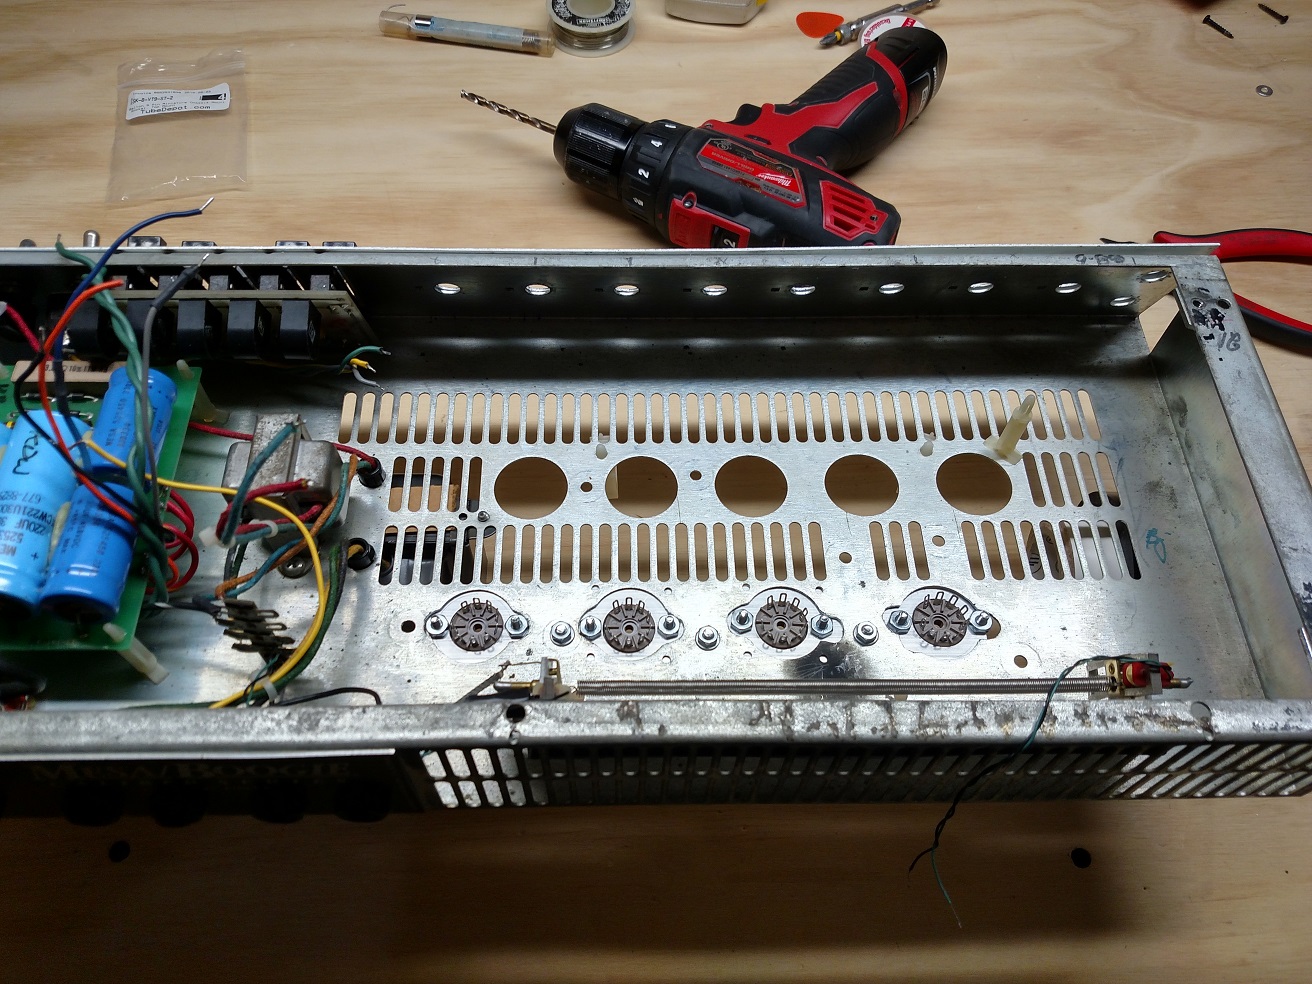
I started removing some of the components here. You can see where the previous work had been done. They removed a tone of traces and flipped parts to the top side!
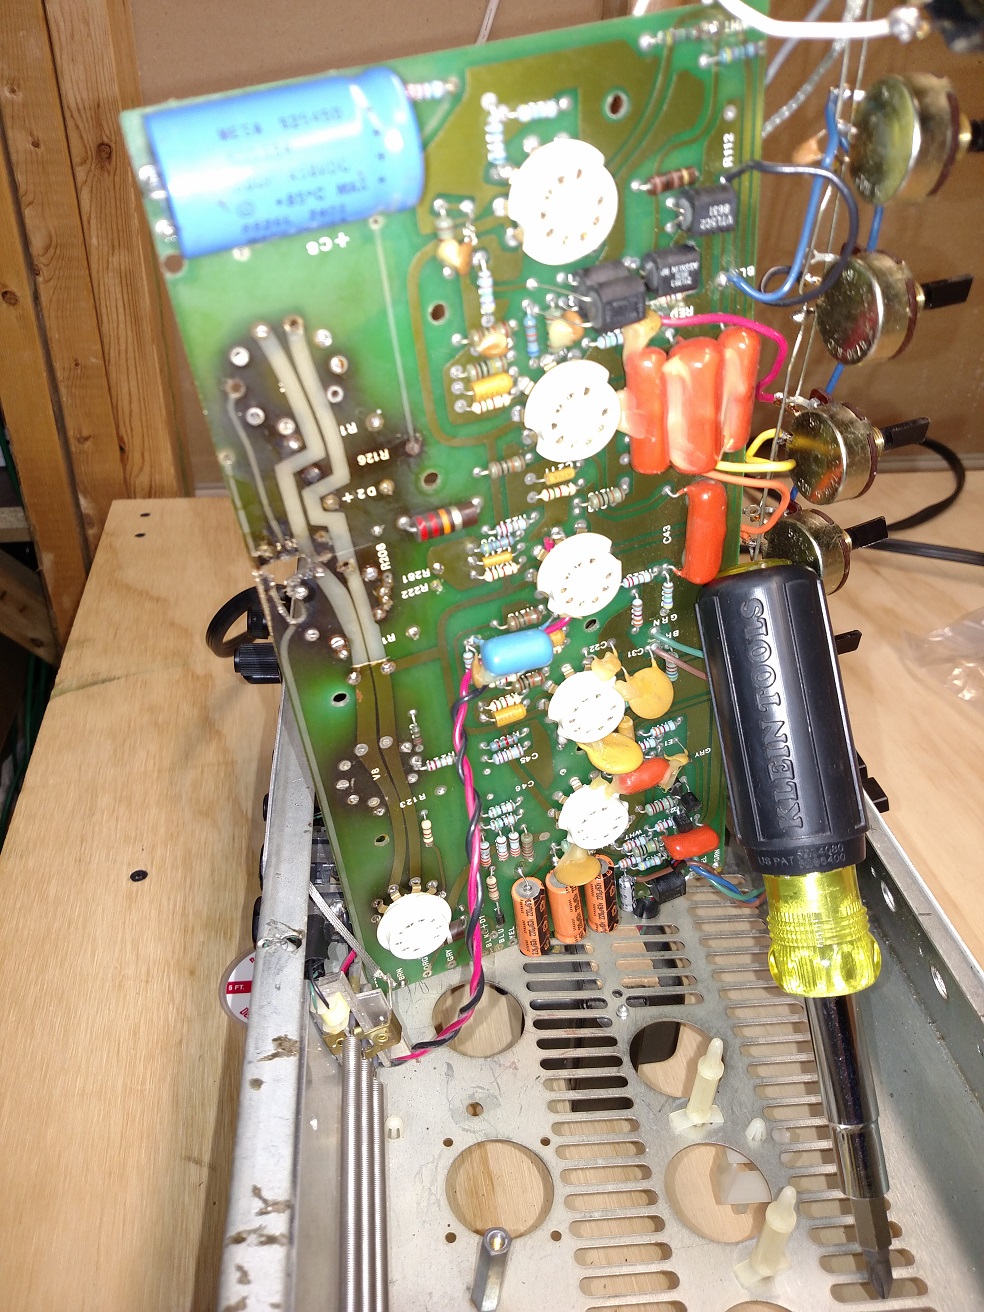
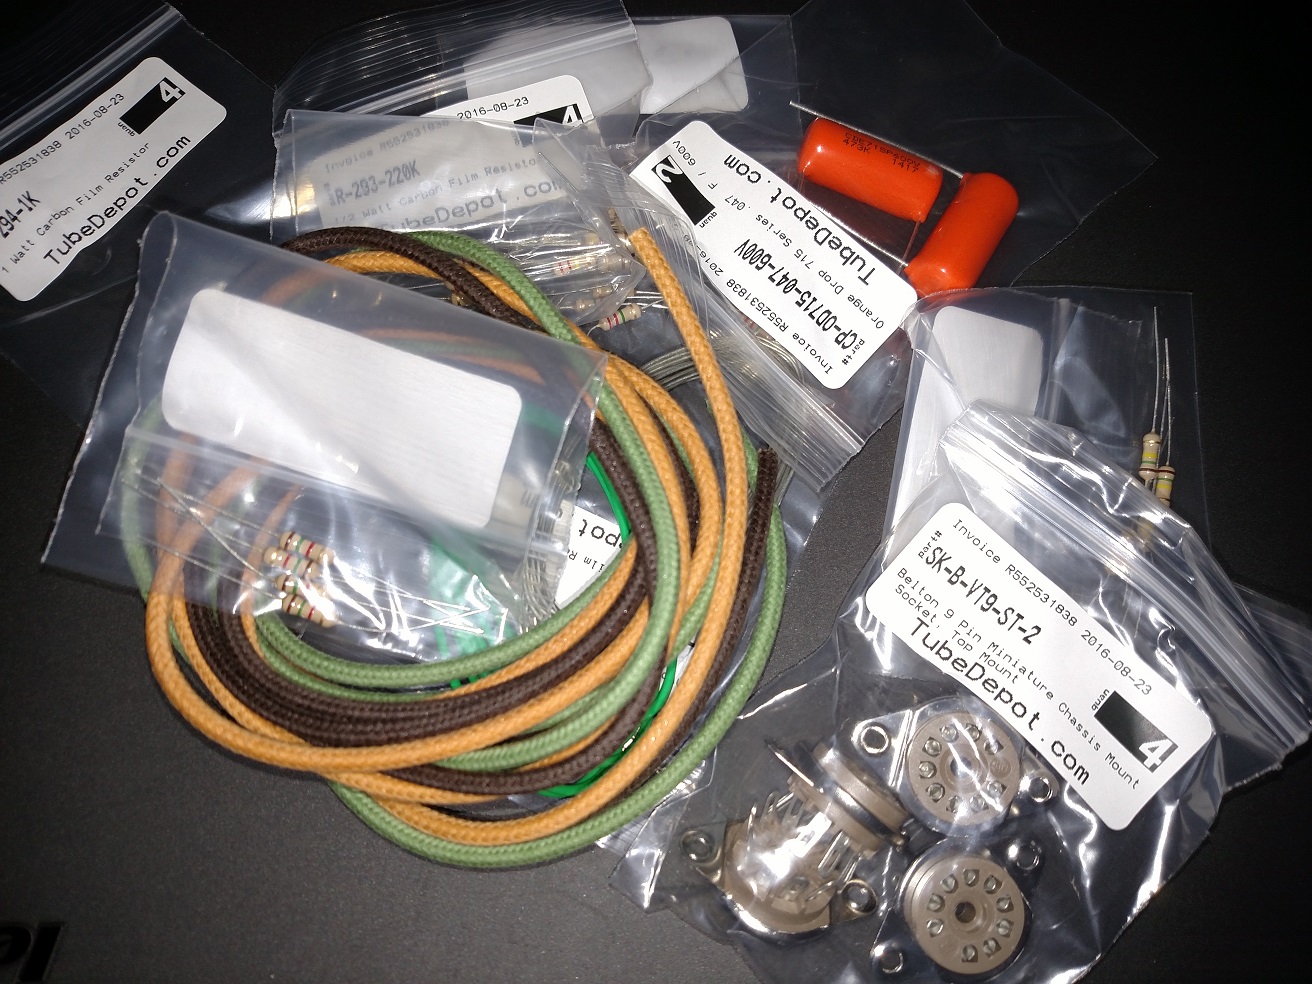
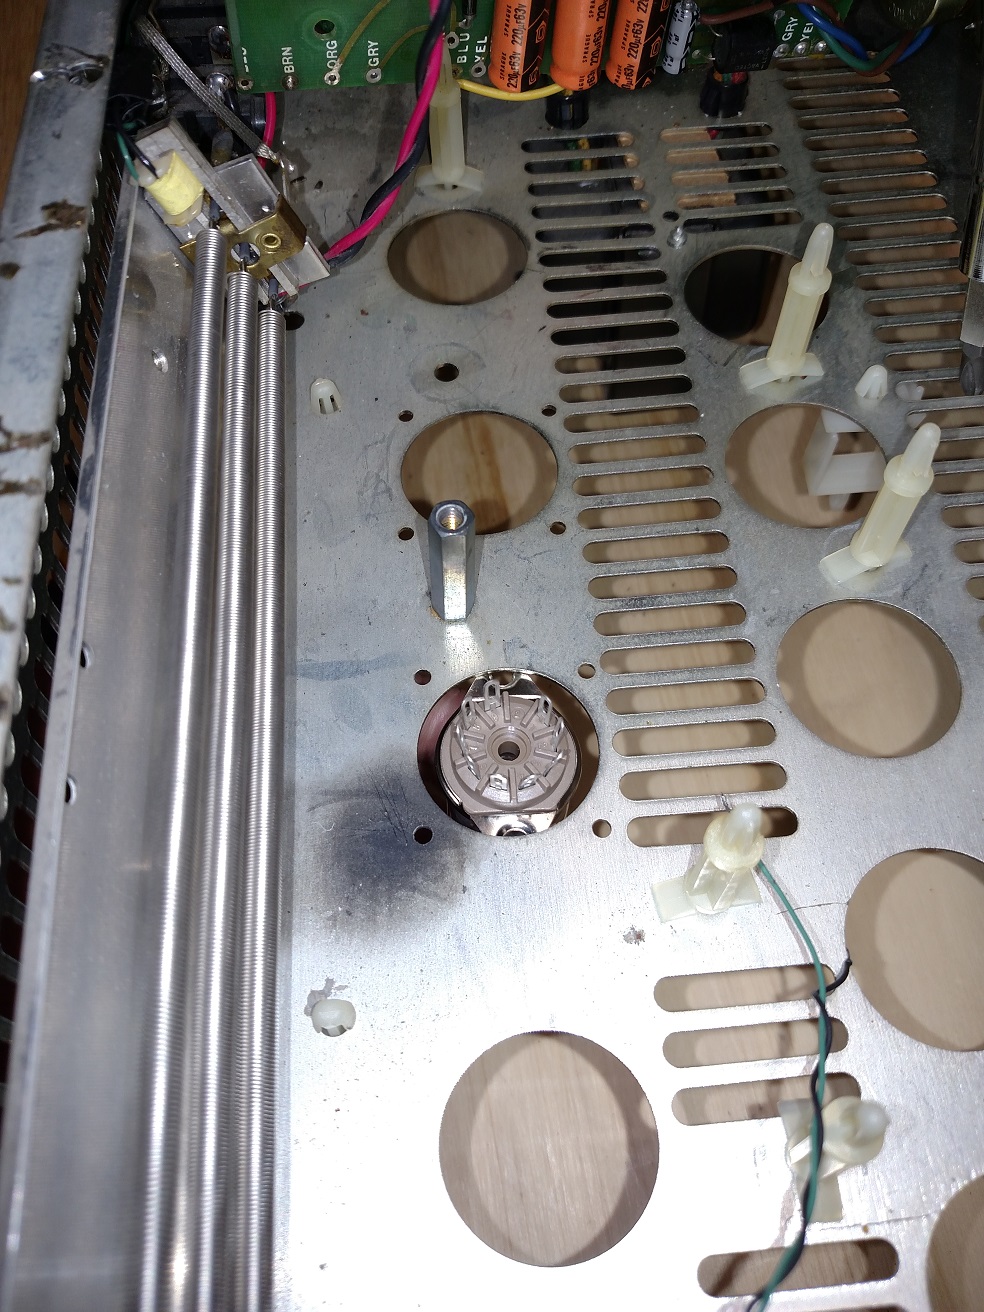
After seeing the extent of the burned out PCB, I decided to move the power tubes off the board. I found there was enough room to mount new sockets right on the chassis where the old ones poked through so I ordered up some of the parts I needed and went to work. I took a small plate of aluminum and mounted my sockets in it, then attached it to the chassis. I need to make a bit more room for the bolts to fit. Working out pretty good so far! Then I removed all of the old sockets and components that had to do with the power section all the way back to the coupling caps.
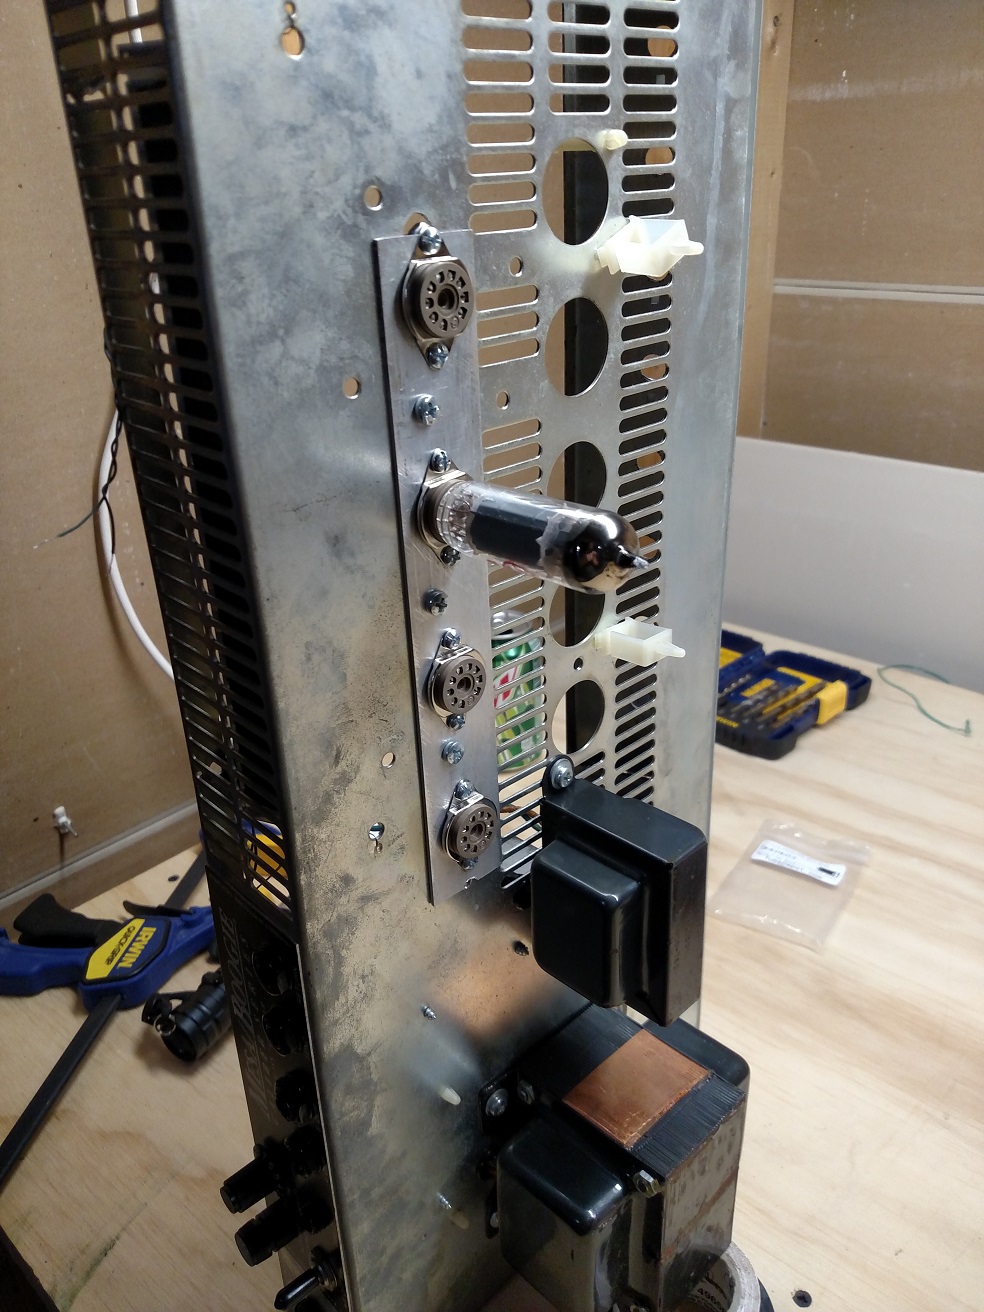
Almost looking professional....almost.
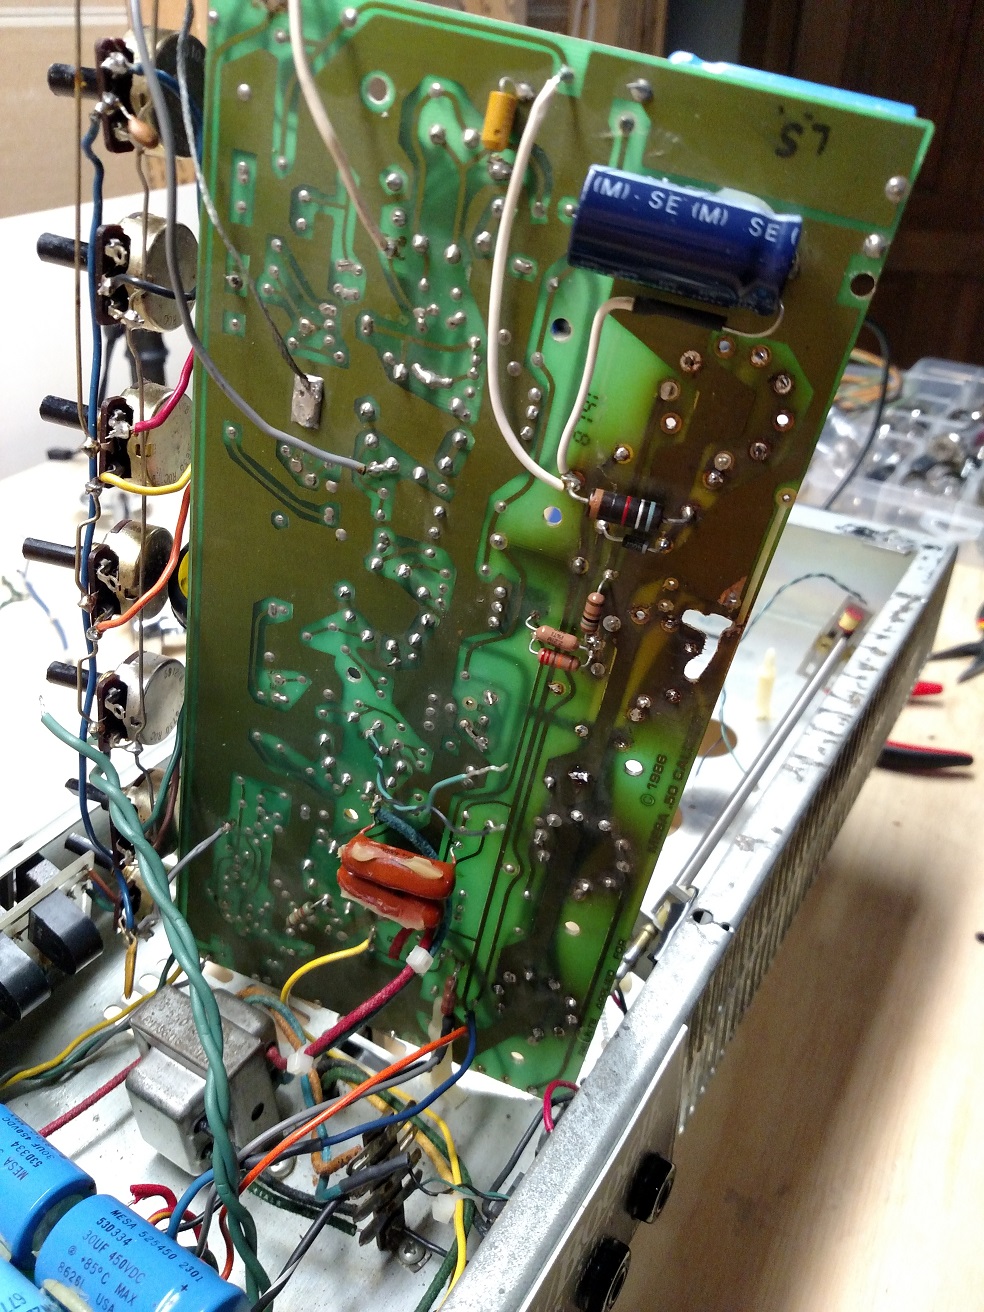
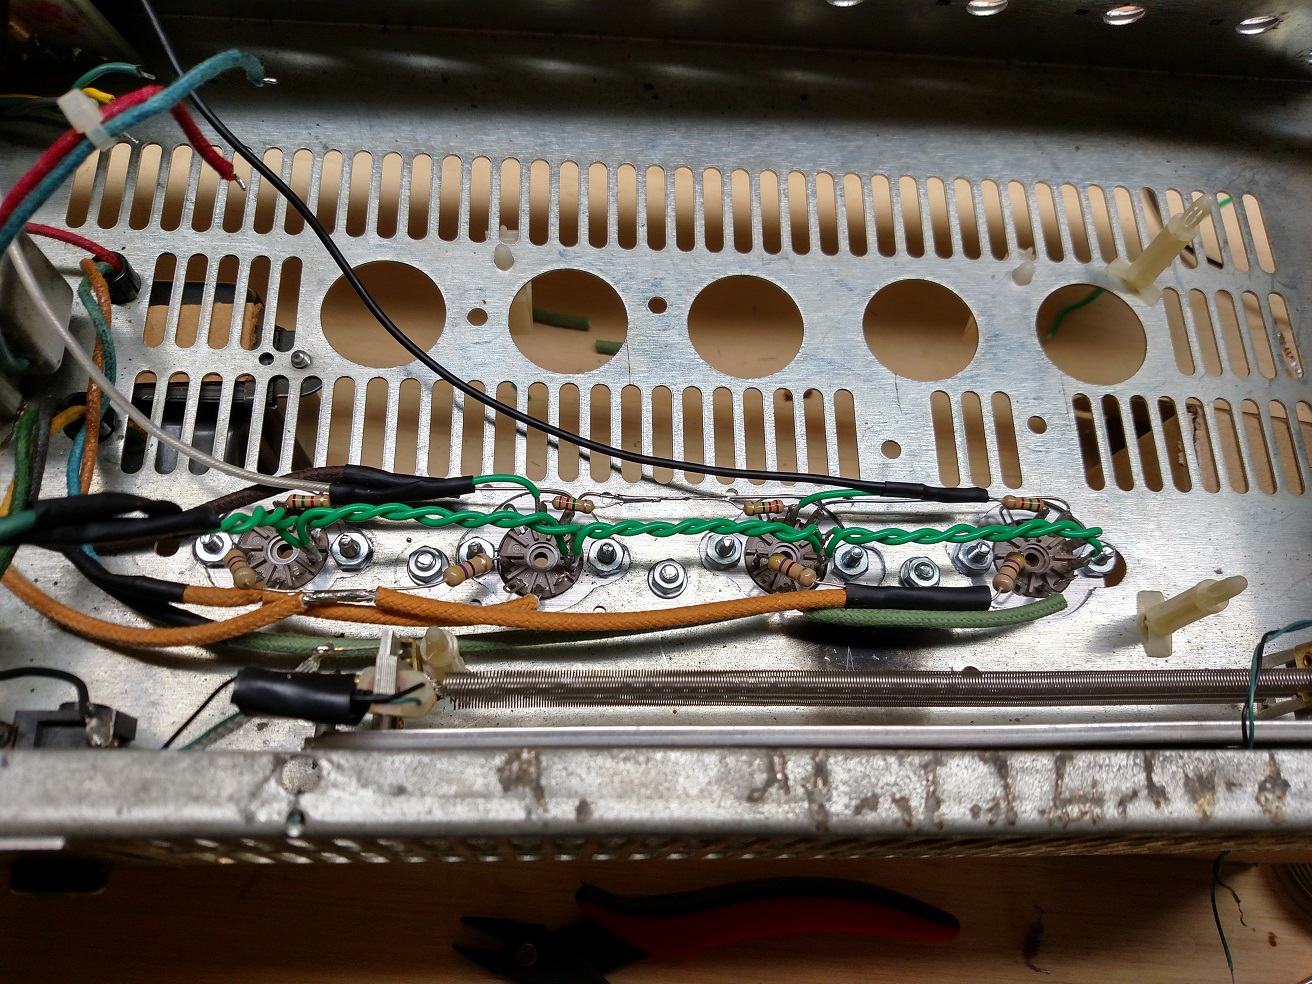
Once it was mounted I went to work wiring it up with the proper components that I specified off the schematic, and also confirmed on the PCB. This 50 Caliber has a lead channel but I only found a schematic for the non-lead version. No huge deal though, I did reference the 50+ schematic a few times which seems to be very similar on the preamp and eq and power supply. The heater wiring was a pain but I got through it. Overall, not so hard but I poured over the schematics and PCB for days to make sure I knew what I was removing and what everything did!
Got the PCB back in the chassis and reattached all the loose wiring. I almost cut out the entire bad section of the PCB before reinstalling it but decided if I didn't hear any bad humming when it was running, that I wouldn't worry about it....if it actually worked after I did this! I got all my shrink tubing and zip ties added and before fully wiring everything back in, I checked to see if the filaments would power up. That test worked out so I went ahead and tested some of the wiring that was already installed....so far so good. I then finished up the rest, with it powered off and drained. Fired it back up and carefully took it off Stand-By...nothing blew up so I went ahead tested all the usual stuff. The plate voltage was now at a more reasonable 415VDC, the bias was at -19VDC. I did a quick check to see if any sound would come through using a guitar and it did! It seems that the sockets were trashed and I bet that's why the plate volts were so high. I likely would have chased my tail to no end trying to get what was in there to work correctly long term!
One of the pain in the butt things with the sockets previously being mounted inside the chassis was there was no good way for me to put my bias tester in. I have a thing that plugs on all four sockets at once and lets me measure the actual current flowing for setting the bias on different tube amps. This is a fixed bias amp so not much to do after you measure it but it is a nice check to see where the tubes are operating or if you have one that is way mismatched.

I left the amp on and watched it closely for around ten minutes to see how it would heat up. No issues so far so I went ahead and tried playing through it. I'm I metal head so I went right for the crunch. This amp needs to have a foot switch to operate properly and get the lead channel working. Well the sound was making me real happy but it was so **** loud I didn't know what the deal was and the Lead Master knob wasn't responding. I went back in the amp and sure enough, the wire from the Lead Master pot had broken off. I quickly soldered that back in place and....bam...we were in business.
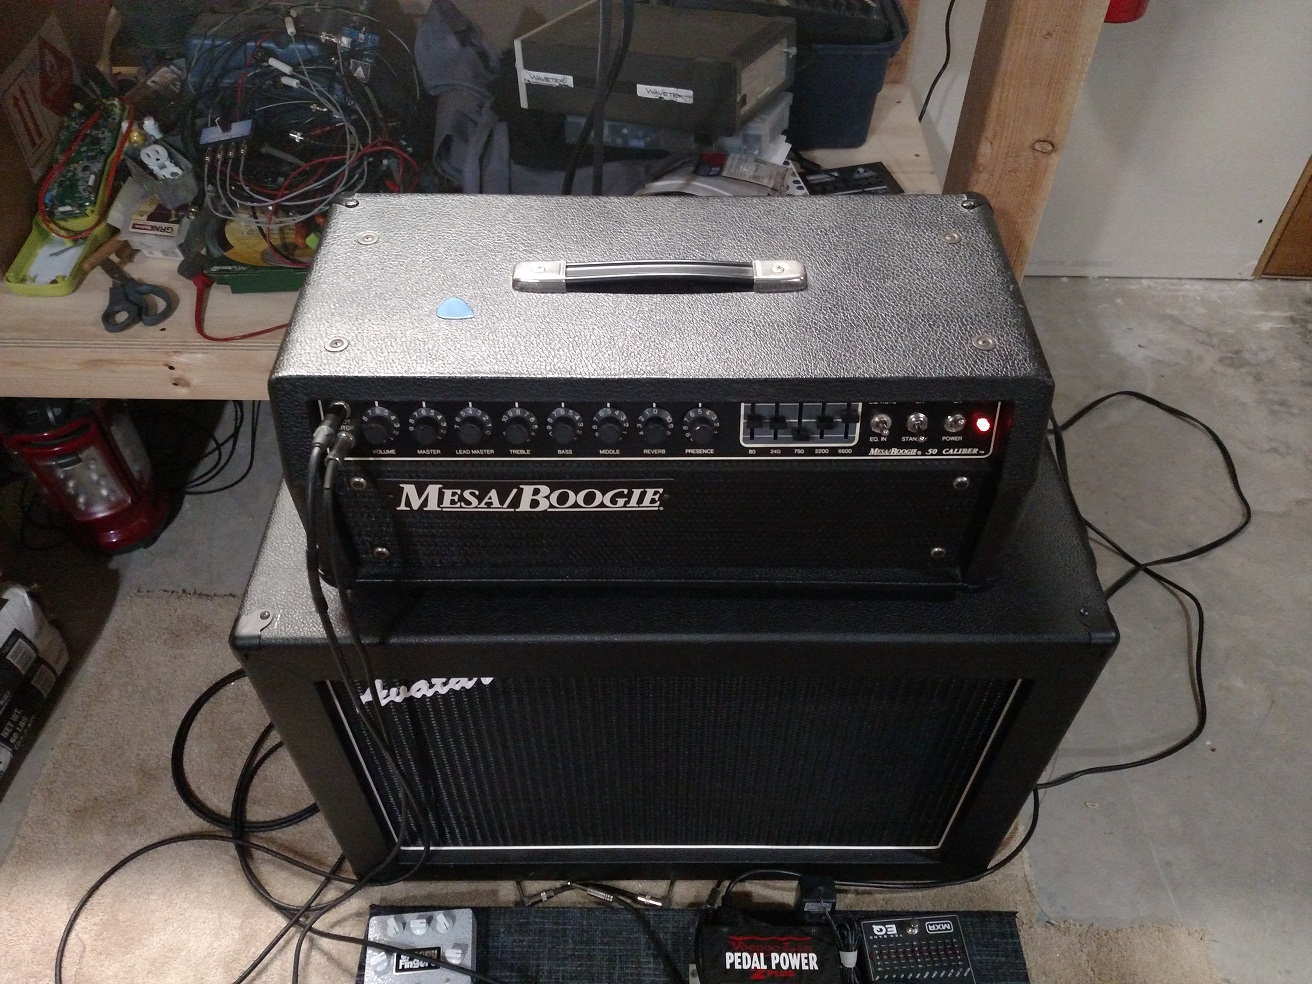
The front settings are so **** important on this thing, much like my quad preamp. The knob labeled Volume is really the gain, and then there is the Master knob and Lead Master. So I set the Volume at 3.5, Master at 5 and the Lead master at a comfortable level. Everything else was set to a 5 and reverb was off. It kills it on the harder rock stuff with no pedals but just the slightest boost from a tube screamer is all it takes to handle the heaviest songs you can conjure up. I really like note definition and the pedal just gets the last 10% I have a Marshall 4x12 with 75 watt Celestions in it and this amp works like a dream with it! The 2x12 in the picture doesn't seem to sound right. Plus I can switch the Marshall between 16 and 4 ohms to match the 50 Cal's 4 ohm output. I will post some sound samples and a video in another post. It is ridiculous! I was happy to find that it still had almost no hum present after I moved everything!
I think I will put a small fan in it to keep it even cooler. There is no comparison though, the old way the tubes were installed were just asking for trouble. It got so hot in there even when working properly. Now it is certainly very warm to the touch but not pits of hell stuff.
It really is a great head and now it's put to work recording and jamming.
I am probably skipping over all sorts of details but go ahead and let me know if there are any questions. Thanks for reading! -Jeff
The PCB had been worked on at some point for what looked like this exact problem. I have read many other stories about the red plating too. The PCB was in rough shape and when I did some measurements, pin 7 of the power tubes had around 485VDC. That is getting up there but didn't really scare me too much. The bias seemed to be decent around -16VDC and about 15mA were flowing to the tube. I found all the electrolytic caps were fine, the coupling caps were not leaking DC by and the amp was really quiet (hum wise) when it actually worked. I tried some other tubes but it still got way too hot and then it seems like a tube would collapse and one side of the voltage supply would get dragged down to about 250VDC and the other at 400VDC. After I let everything cool for awhile, it would work for another few minutes. I thought perhaps the sockets had some bad solder joints but some of the pins couldn't be touched up since they were burned out! A couple output tubes were somewhat loose in their sockets too. It seemed like all the issues had to do with the power tubes so I focused my efforts there.
I started removing some of the components here. You can see where the previous work had been done. They removed a tone of traces and flipped parts to the top side!
After seeing the extent of the burned out PCB, I decided to move the power tubes off the board. I found there was enough room to mount new sockets right on the chassis where the old ones poked through so I ordered up some of the parts I needed and went to work. I took a small plate of aluminum and mounted my sockets in it, then attached it to the chassis. I need to make a bit more room for the bolts to fit. Working out pretty good so far! Then I removed all of the old sockets and components that had to do with the power section all the way back to the coupling caps.
Almost looking professional....almost.
Once it was mounted I went to work wiring it up with the proper components that I specified off the schematic, and also confirmed on the PCB. This 50 Caliber has a lead channel but I only found a schematic for the non-lead version. No huge deal though, I did reference the 50+ schematic a few times which seems to be very similar on the preamp and eq and power supply. The heater wiring was a pain but I got through it. Overall, not so hard but I poured over the schematics and PCB for days to make sure I knew what I was removing and what everything did!
Got the PCB back in the chassis and reattached all the loose wiring. I almost cut out the entire bad section of the PCB before reinstalling it but decided if I didn't hear any bad humming when it was running, that I wouldn't worry about it....if it actually worked after I did this! I got all my shrink tubing and zip ties added and before fully wiring everything back in, I checked to see if the filaments would power up. That test worked out so I went ahead and tested some of the wiring that was already installed....so far so good. I then finished up the rest, with it powered off and drained. Fired it back up and carefully took it off Stand-By...nothing blew up so I went ahead tested all the usual stuff. The plate voltage was now at a more reasonable 415VDC, the bias was at -19VDC. I did a quick check to see if any sound would come through using a guitar and it did! It seems that the sockets were trashed and I bet that's why the plate volts were so high. I likely would have chased my tail to no end trying to get what was in there to work correctly long term!
One of the pain in the butt things with the sockets previously being mounted inside the chassis was there was no good way for me to put my bias tester in. I have a thing that plugs on all four sockets at once and lets me measure the actual current flowing for setting the bias on different tube amps. This is a fixed bias amp so not much to do after you measure it but it is a nice check to see where the tubes are operating or if you have one that is way mismatched.
I left the amp on and watched it closely for around ten minutes to see how it would heat up. No issues so far so I went ahead and tried playing through it. I'm I metal head so I went right for the crunch. This amp needs to have a foot switch to operate properly and get the lead channel working. Well the sound was making me real happy but it was so **** loud I didn't know what the deal was and the Lead Master knob wasn't responding. I went back in the amp and sure enough, the wire from the Lead Master pot had broken off. I quickly soldered that back in place and....bam...we were in business.
The front settings are so **** important on this thing, much like my quad preamp. The knob labeled Volume is really the gain, and then there is the Master knob and Lead Master. So I set the Volume at 3.5, Master at 5 and the Lead master at a comfortable level. Everything else was set to a 5 and reverb was off. It kills it on the harder rock stuff with no pedals but just the slightest boost from a tube screamer is all it takes to handle the heaviest songs you can conjure up. I really like note definition and the pedal just gets the last 10% I have a Marshall 4x12 with 75 watt Celestions in it and this amp works like a dream with it! The 2x12 in the picture doesn't seem to sound right. Plus I can switch the Marshall between 16 and 4 ohms to match the 50 Cal's 4 ohm output. I will post some sound samples and a video in another post. It is ridiculous! I was happy to find that it still had almost no hum present after I moved everything!
I think I will put a small fan in it to keep it even cooler. There is no comparison though, the old way the tubes were installed were just asking for trouble. It got so hot in there even when working properly. Now it is certainly very warm to the touch but not pits of hell stuff.
It really is a great head and now it's put to work recording and jamming.
I am probably skipping over all sorts of details but go ahead and let me know if there are any questions. Thanks for reading! -Jeff