


Blaklynx
Well-known member
Hi all. This is very belated NAD for my Mighty Roadster.
I've had a Mesa Rectoverb for about 3~4 years and as time went on the Roadster was in my sights, however. the price always put me off.
The short story how I got my Roadster...
I was in China last year for 3 weeks from July 1st for work reasons. Near the end of my second week I decided to check a local website for musos in Melbourne, Australia (where I live) and in the For Sale section the mighty Roadster amp is advertised for a price I couldn't believe.
I contacted the guy and told him to consider it sold on the premise the amp is in good shape. I couldn't believe he told me I was the first to contact him even though it was advertised for 3 days. The site generates a lot of traffic in the For Sale section. Oh well, suited me.
He held onto it until I got back (generous of him). I checked it out and then and there I bought it for $1500 (at the time, the AU and US dollar was on-par). It came with spare power tubes, 4 spare preamp tubes and the RJM Mini Amp Gizmo (with cable). No footswitch but the RJM takes care of all the switching anyway. I've never seen a Roadster sell for so low. They usually sell around AU$1800~$2200 second hand, amp only or with footswitch.
The amp is in great condition, as new. I changed the power tubes for TAD EL34B's (it had 6L6's) and replaced the preamp tubes:
V1 = 5751 Sylvania
V2 = 12AX7 Mesa
V3 = 12AX7 JJ
V4 is xxxx
V5 is xxxx
V6 = 12AX7LPS Sovtek
The amp sounds great and with no issues. I run it through a horizontal 2x12 Recto cab w/V30's (I have a story for that, too)
So 5 weeks ago I decided a mod was required.
One thing I never really liked was the knobs. In general, they're good high quality knobs but difficult to see the position. On the Roadster, I coloured the knob indicator with red nail polish and it helped but decided enough is enough and replaced the knobs with chicken head knobs.
The chicken head knobs are about 2mm too long on the tip end and they will hit the bottom end of the next knob or hit the checker plate when rotated. For whatever reason, Mesa has placed the knobs too close in pitch distance to each other. Other amps that I own the pitch distance is greater.
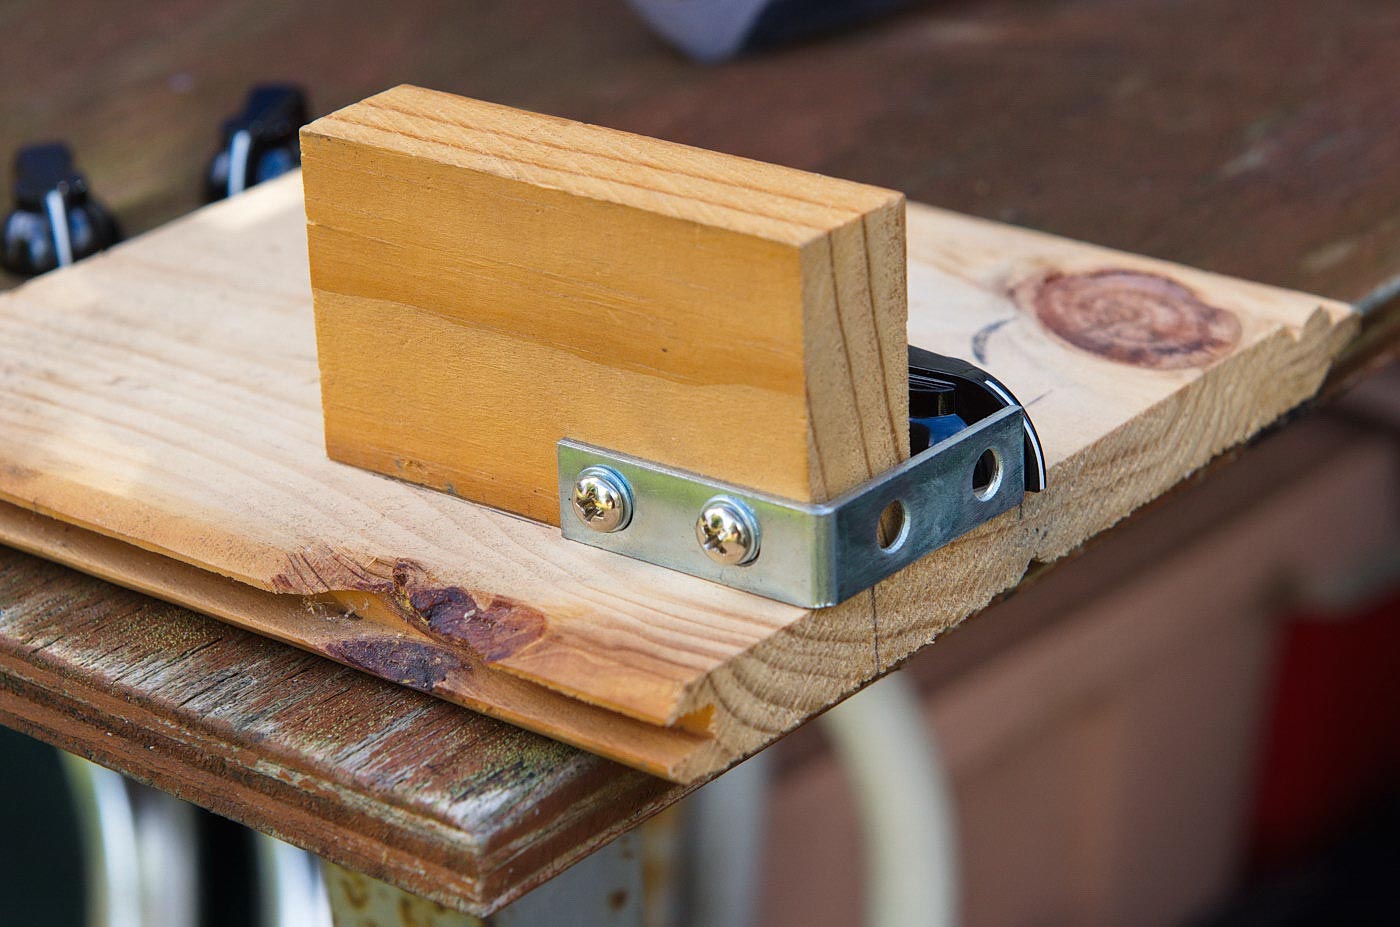
So the engineer in me said, "I need to cut the tips accurately, so make a jig!"
I thought I'd share my home made jig on modifying the chicken head knobs with photos further below. After about 45 minutes of filing 24 knobs and another 45 minutes of checking clearance on amp and making some minor tweaks to some knobs, they all work beautifully.
In total about 2.5 hours was spent replacing the knobs. This included filing, removing old knobs, checking and doing minor tweaks of new knobs and finally installing the new knobs making sure rotation travel was equal from zero to max.
Enjoy the photos.
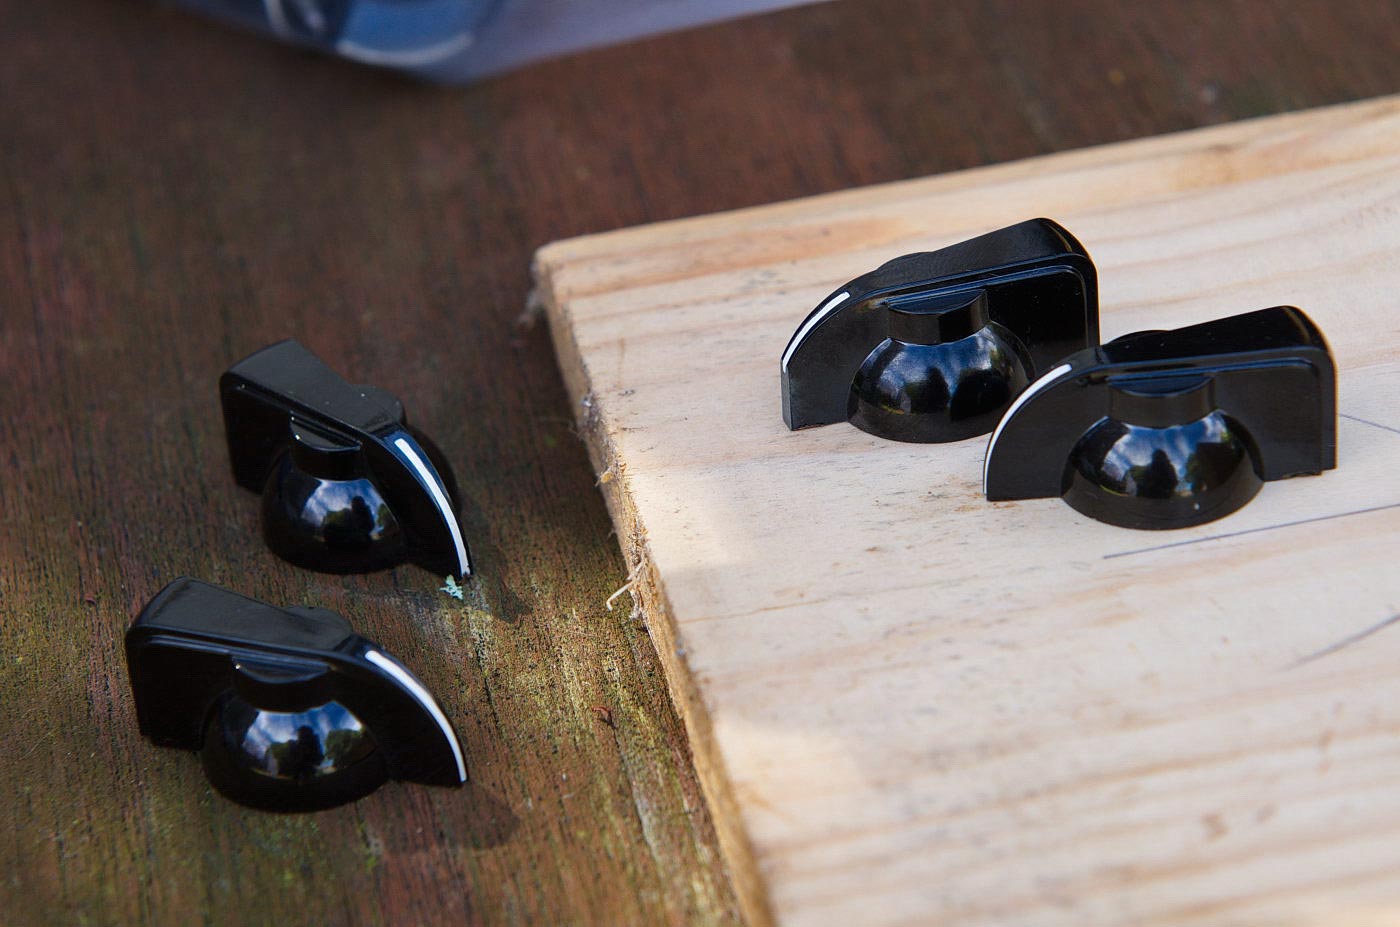
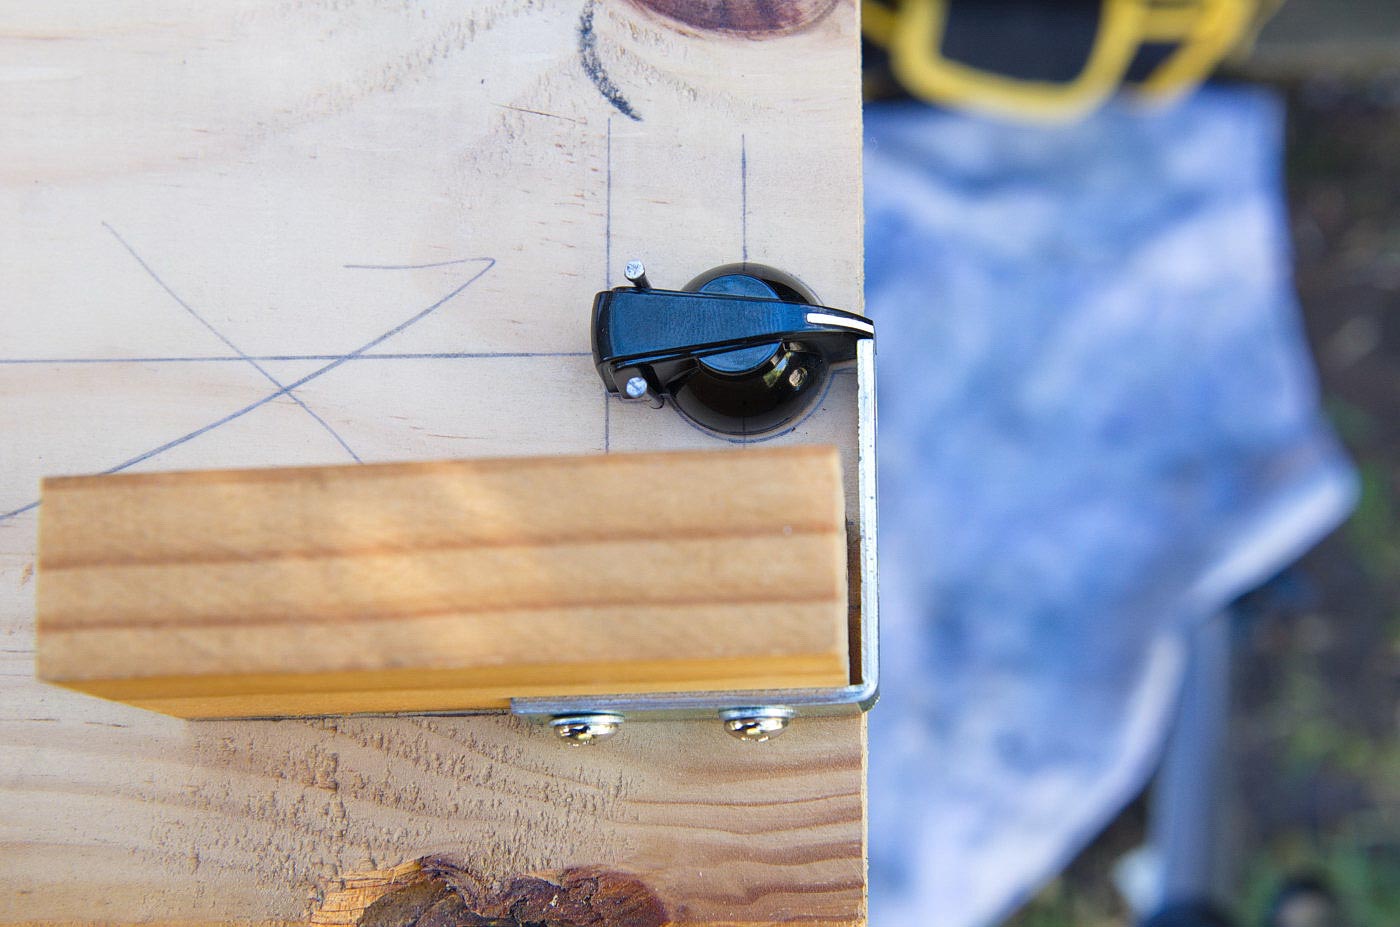
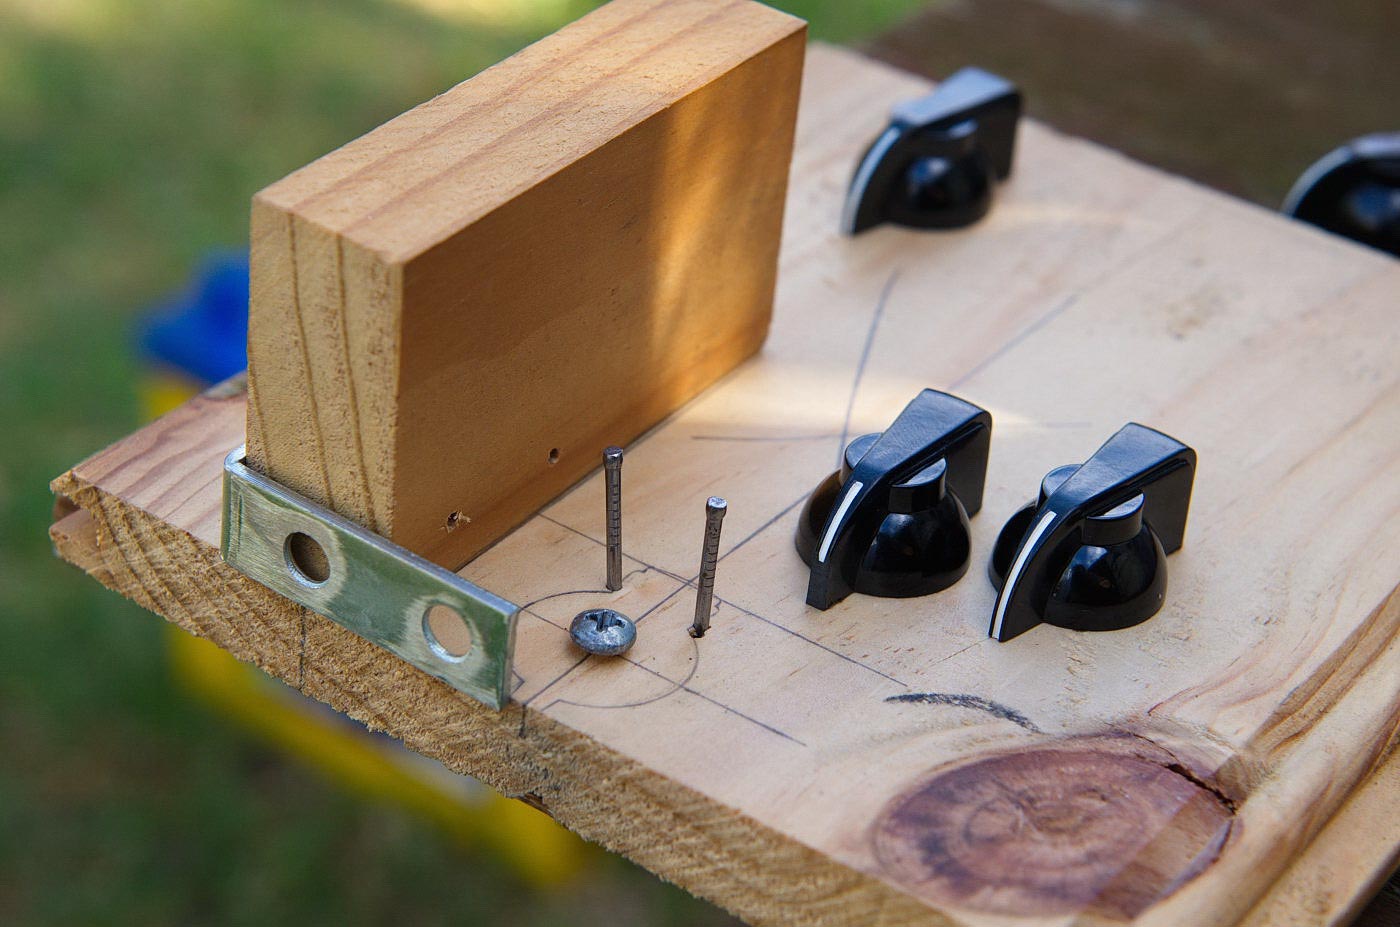
Some knobs ready to be filed (one already filed):
Jig with knobs:
Top view of jig:
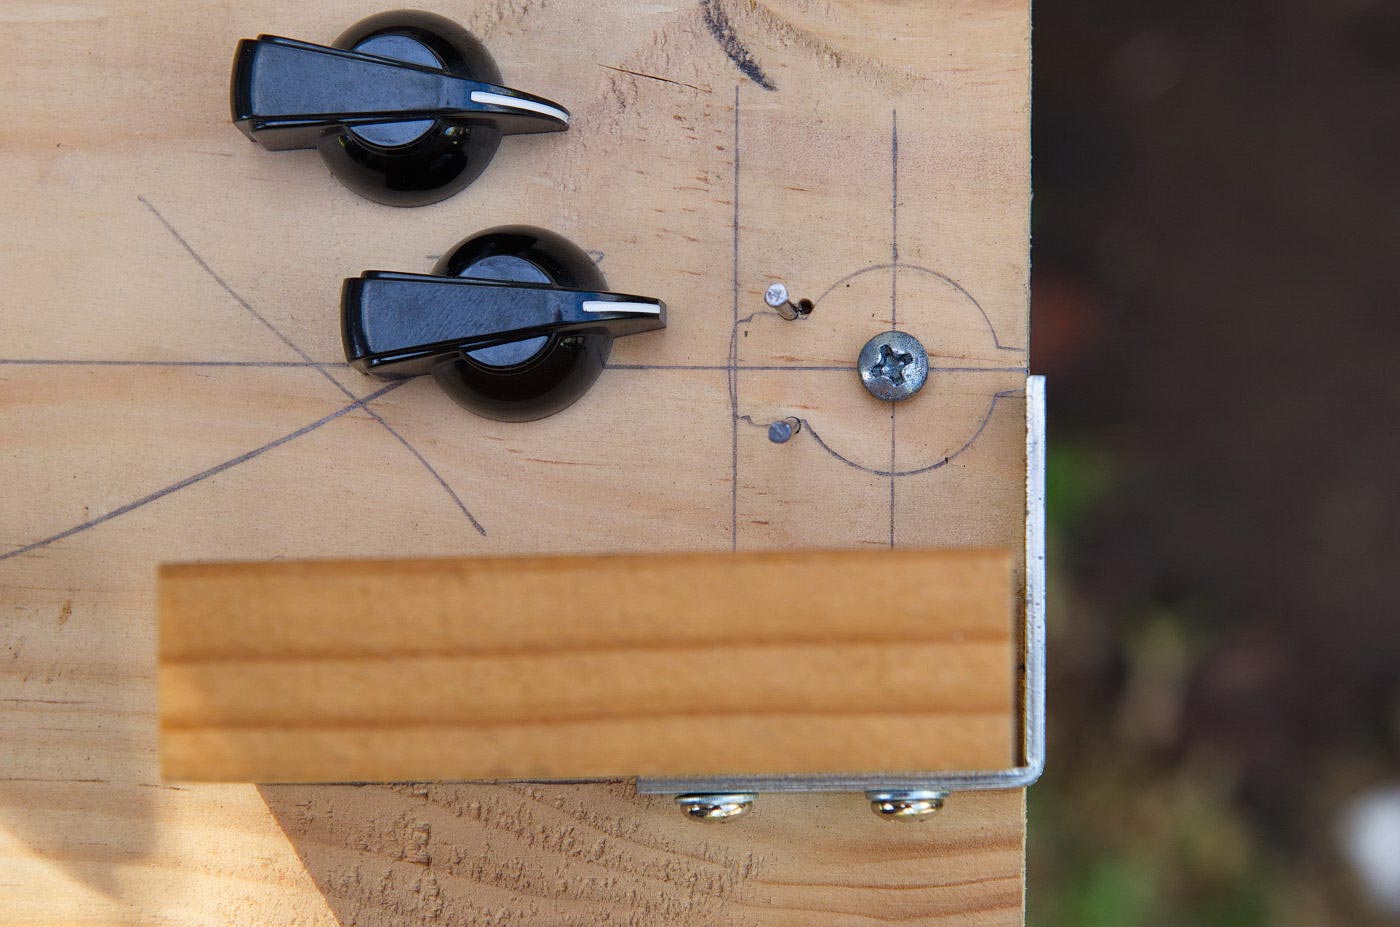
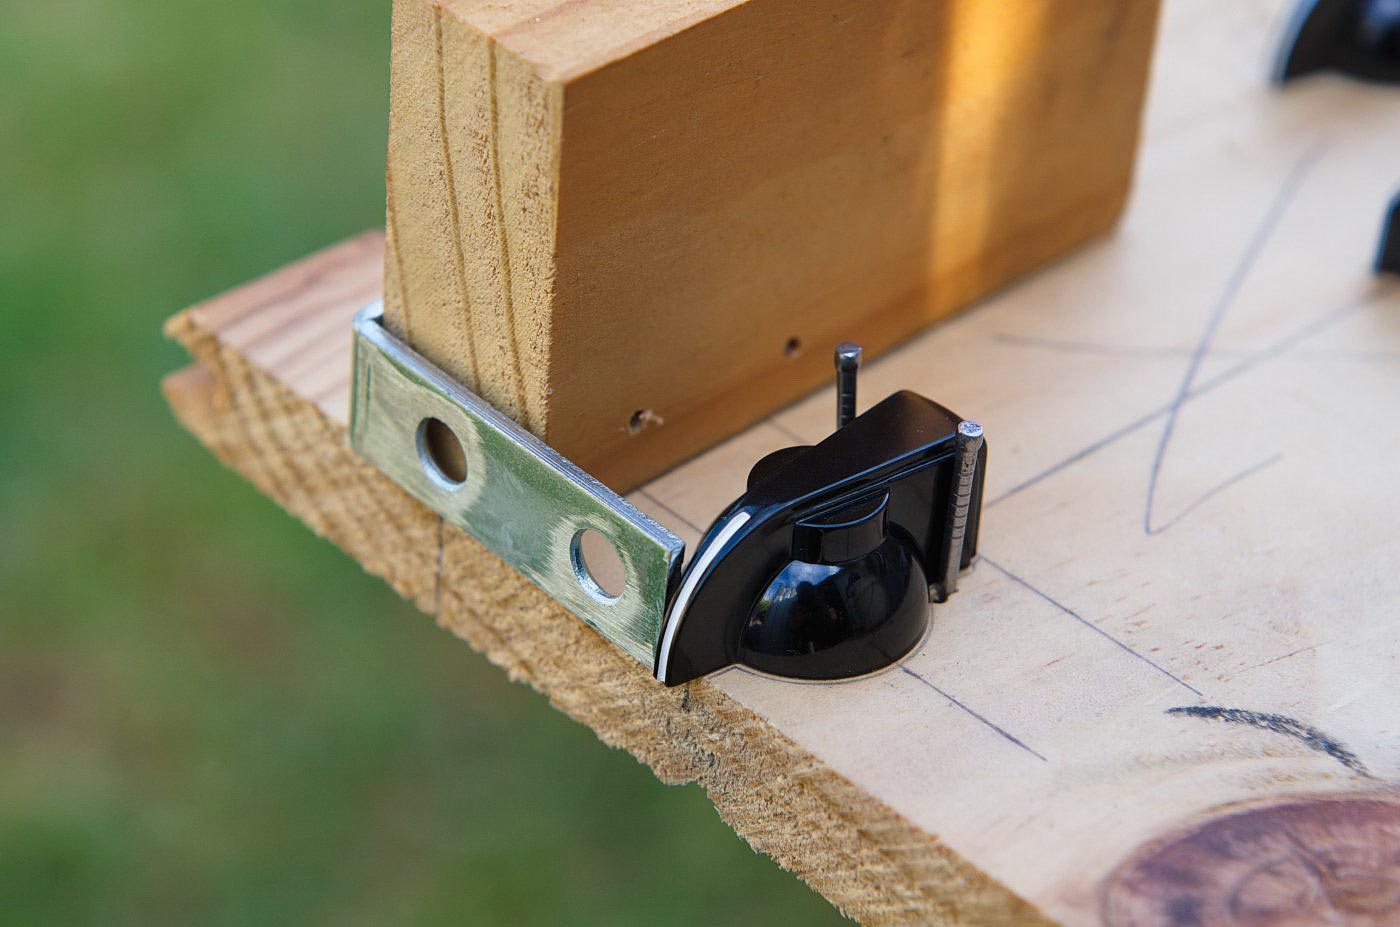
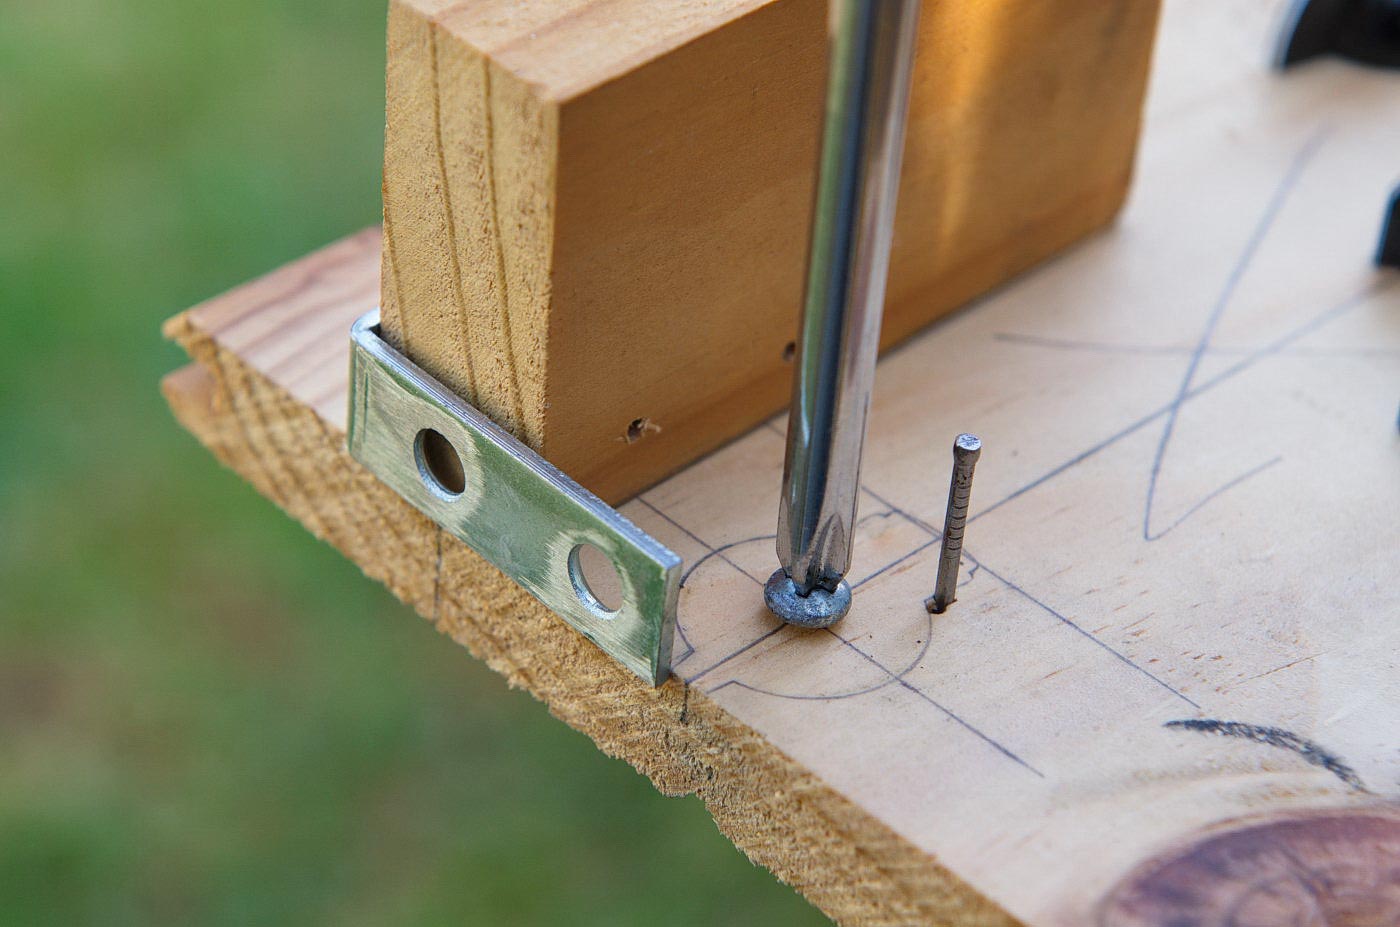
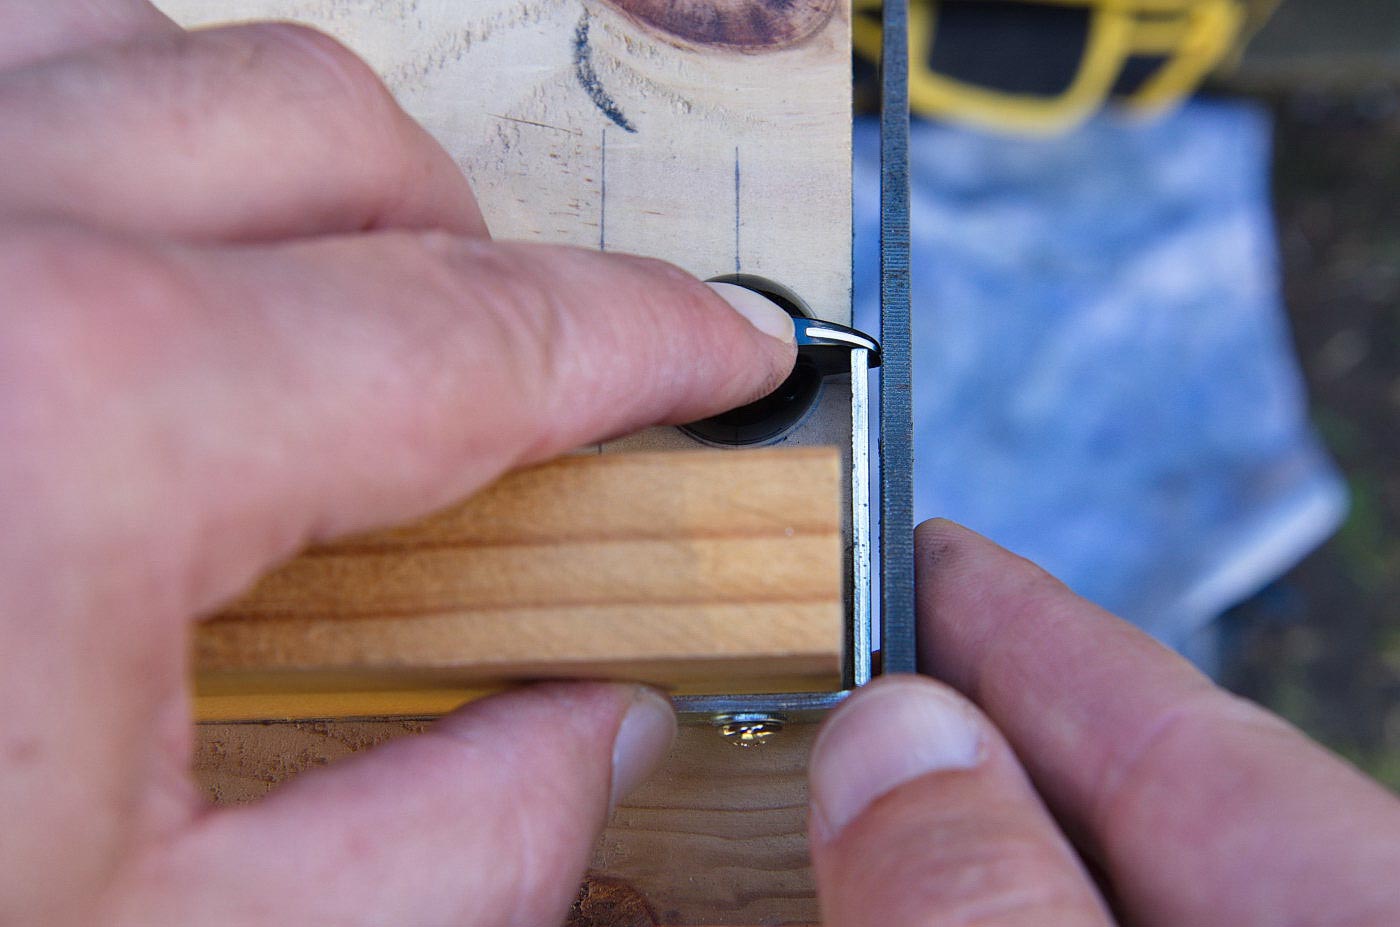
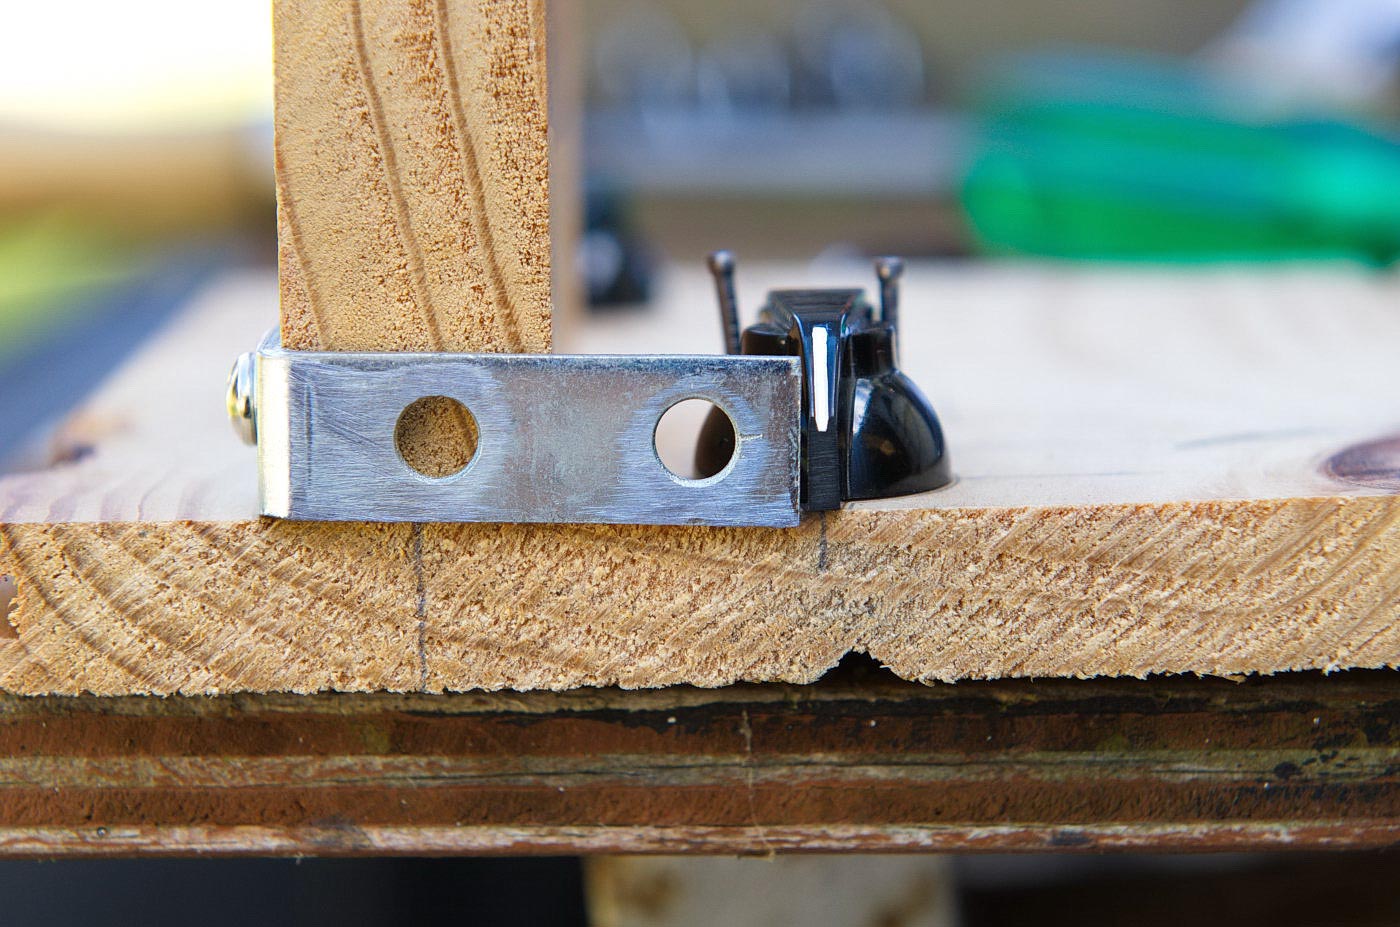
Adjustment screw to hold knob. This screw is adjusted up / down slightly to make sure the knob does not move in any direction. The screw must have a dome head that is slightly larger in diameter than the insert in the knob. As the screw is raised / lowered, this will accommodate any size difference in diameter of the inserts in the knob. If the screw is too high, the knob will rock; if it's too low, the knob will slide around. The screw has to be adjusted perfectly so the knob does not move at all.
The two nails are required to stop the knob rotating. These nails are a fine-fit with very little clearance, 0.10mm (less than a sheet of photocopy paper thickness). Where some knobs had a little play rotation-wise, I put single ply rag (an old t-shirt) between one nail and the knob. Worked great to stop rotation and didn't mark the knob surface.
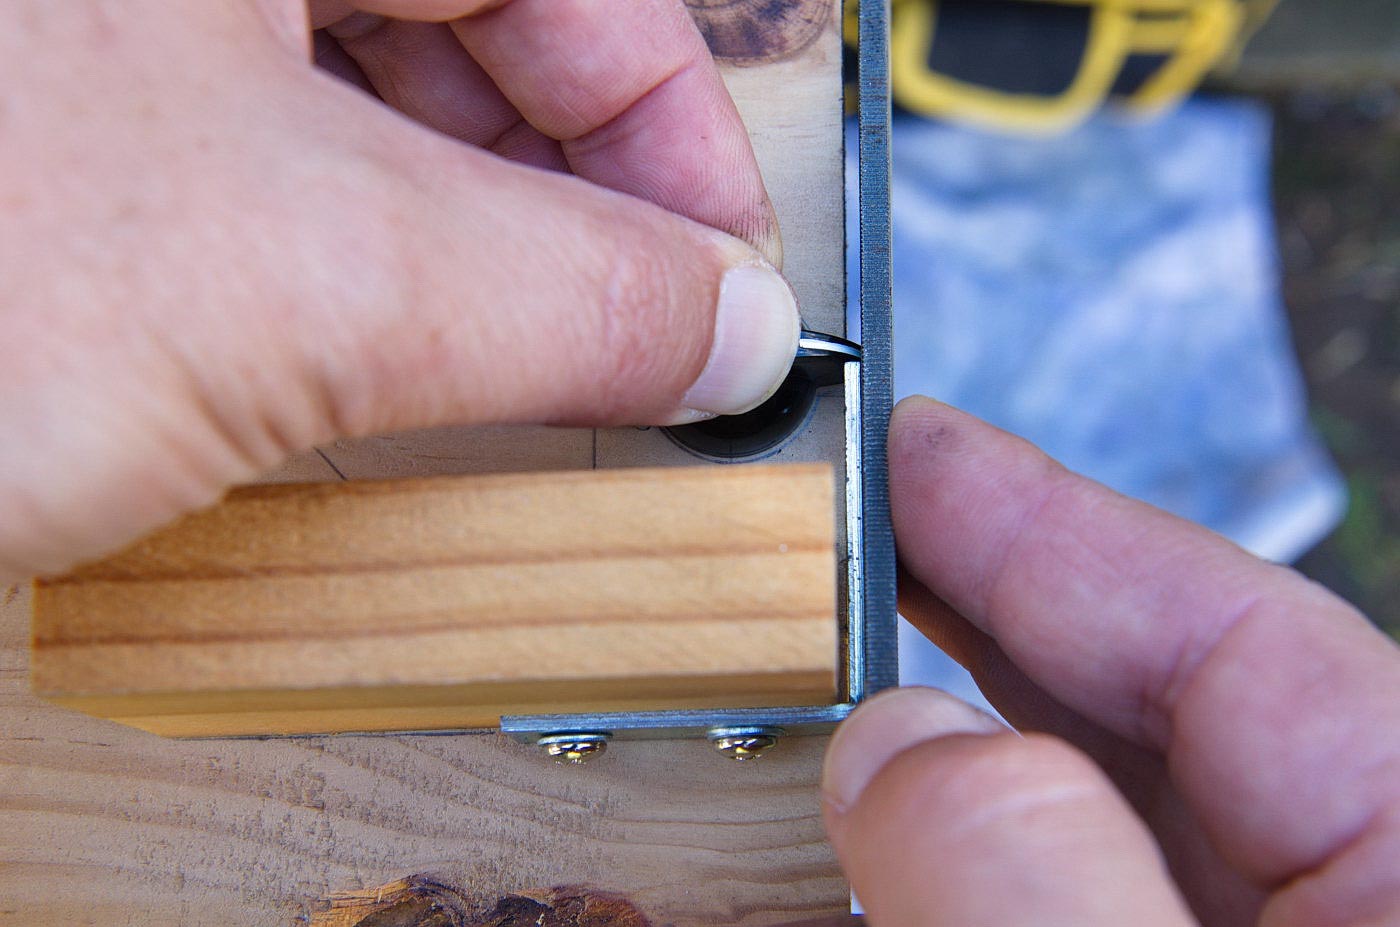
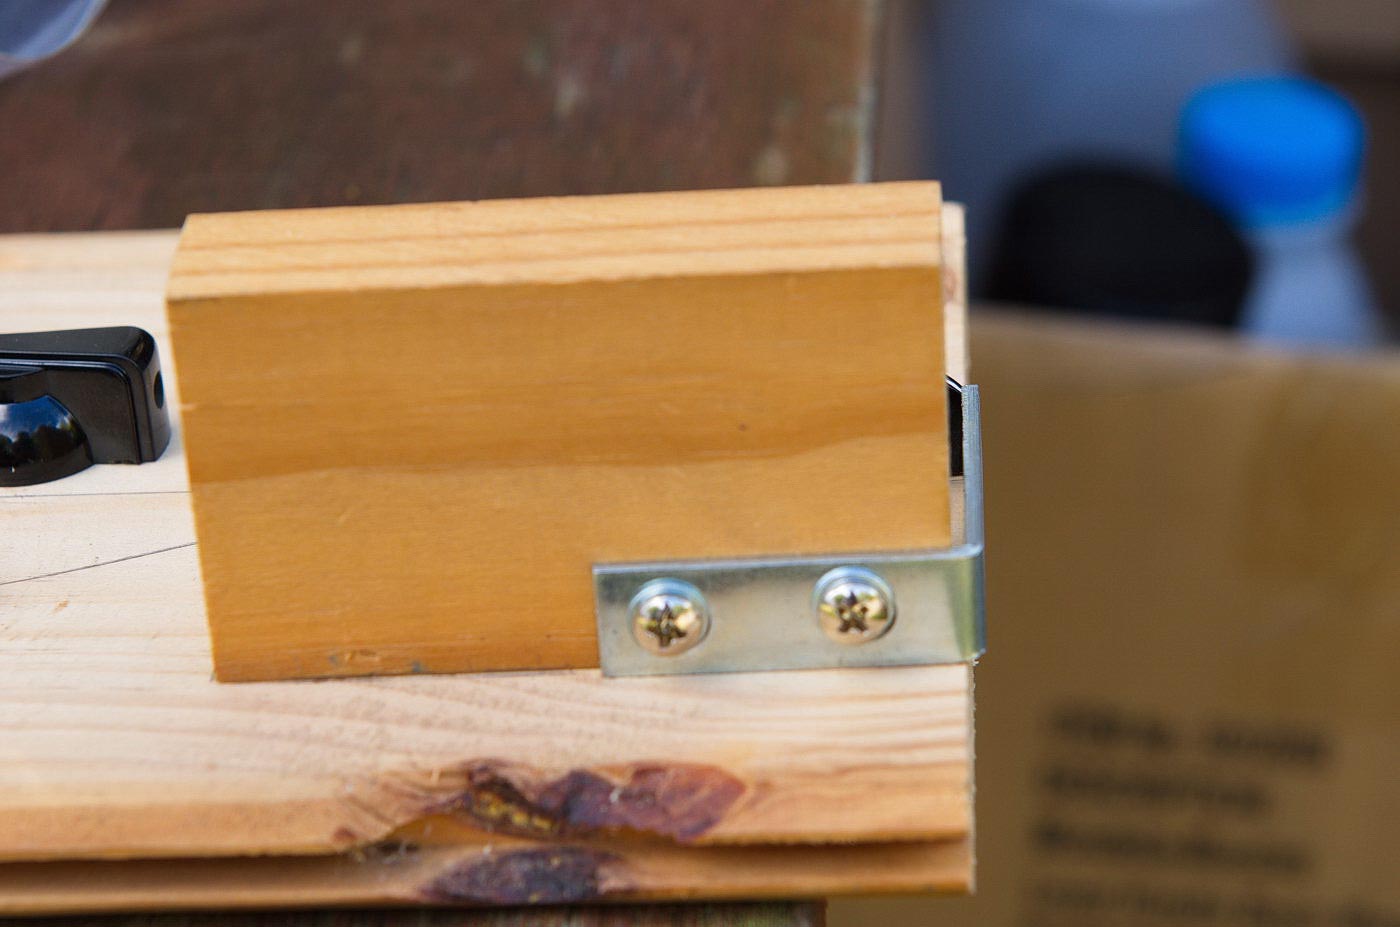
The right angled bracket is adjusted forward / backward to change the cutting depth. I was lucky that the thickness of the bracket was about 1.6mm, which was pretty much the amount I had to file off; 2.0mm would have been OK, too. I rested the angled bracket against the flat face of the base timber so I didn't have to worry too much about the bracket flexing when I filed. Keep in mind you don't need to press hard; light strokes, even pressure and parallel cuts are what is the most important when filing.
The bracket is also 90 degress to the knob and the face of the bracket helps the file to cut straight and true. Once the file scrubs or sits on this face evenly as you stroke, it's time to stop filing. You don't want to file the bracket down because you'll change the surface and end up with the last few of the knobs not being the same as the first few knobs. Care is key here. You can see light filing marks on the bracket (after 22 knobs where filed).

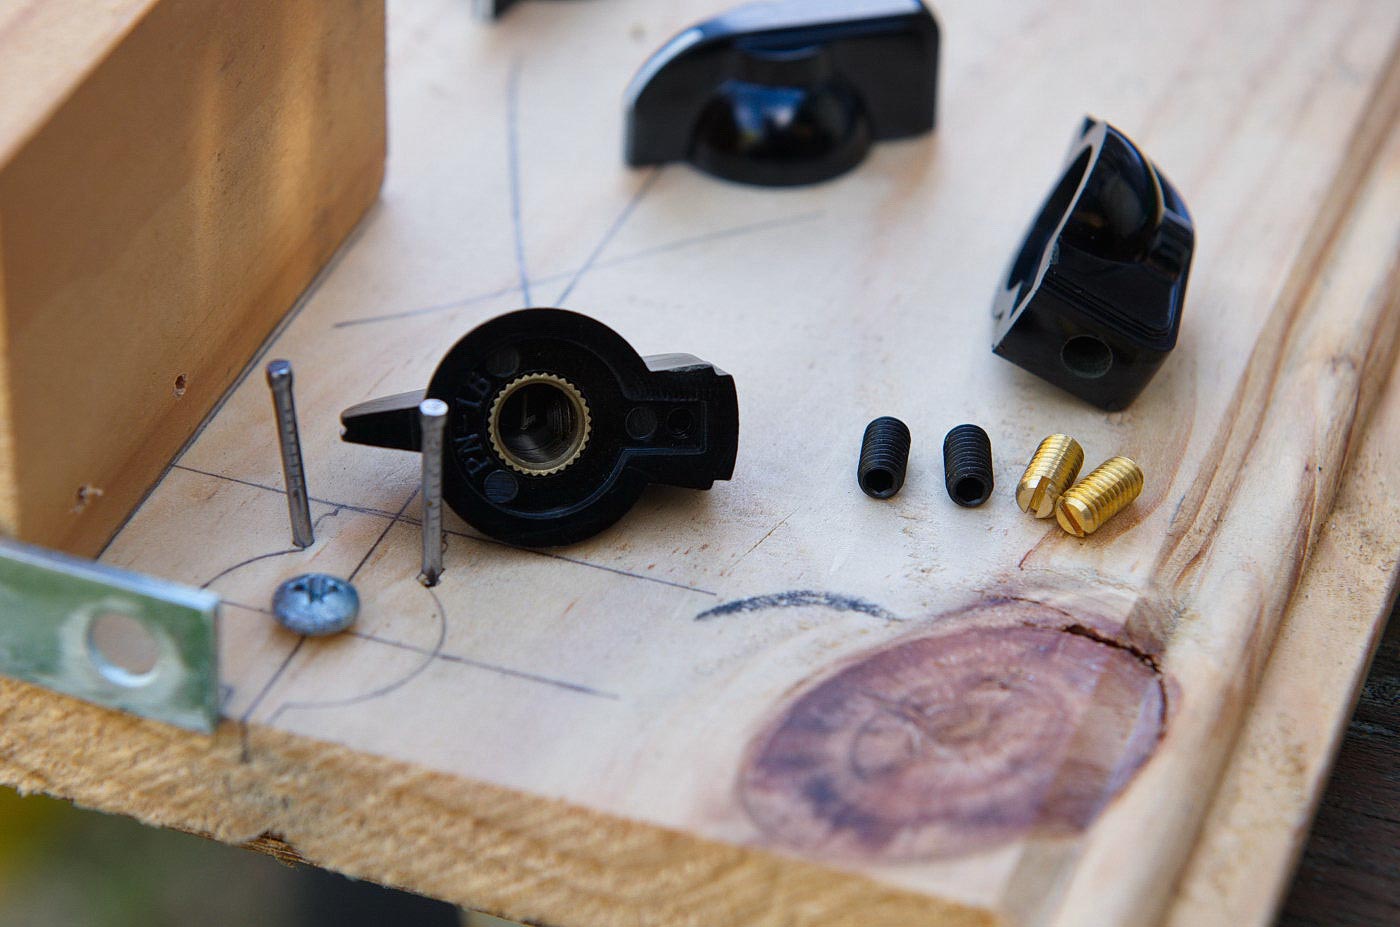
Inserts in the knob. The size of the chamfer on the inserts varies slightly between knobs. The chamfer of the insert is what touches the dome head of the screw. I also had to change the grub screws from slotted to hex key. If they are not changed, it'll be impossible to fit the knobs on the amp unless you take the chassis out.
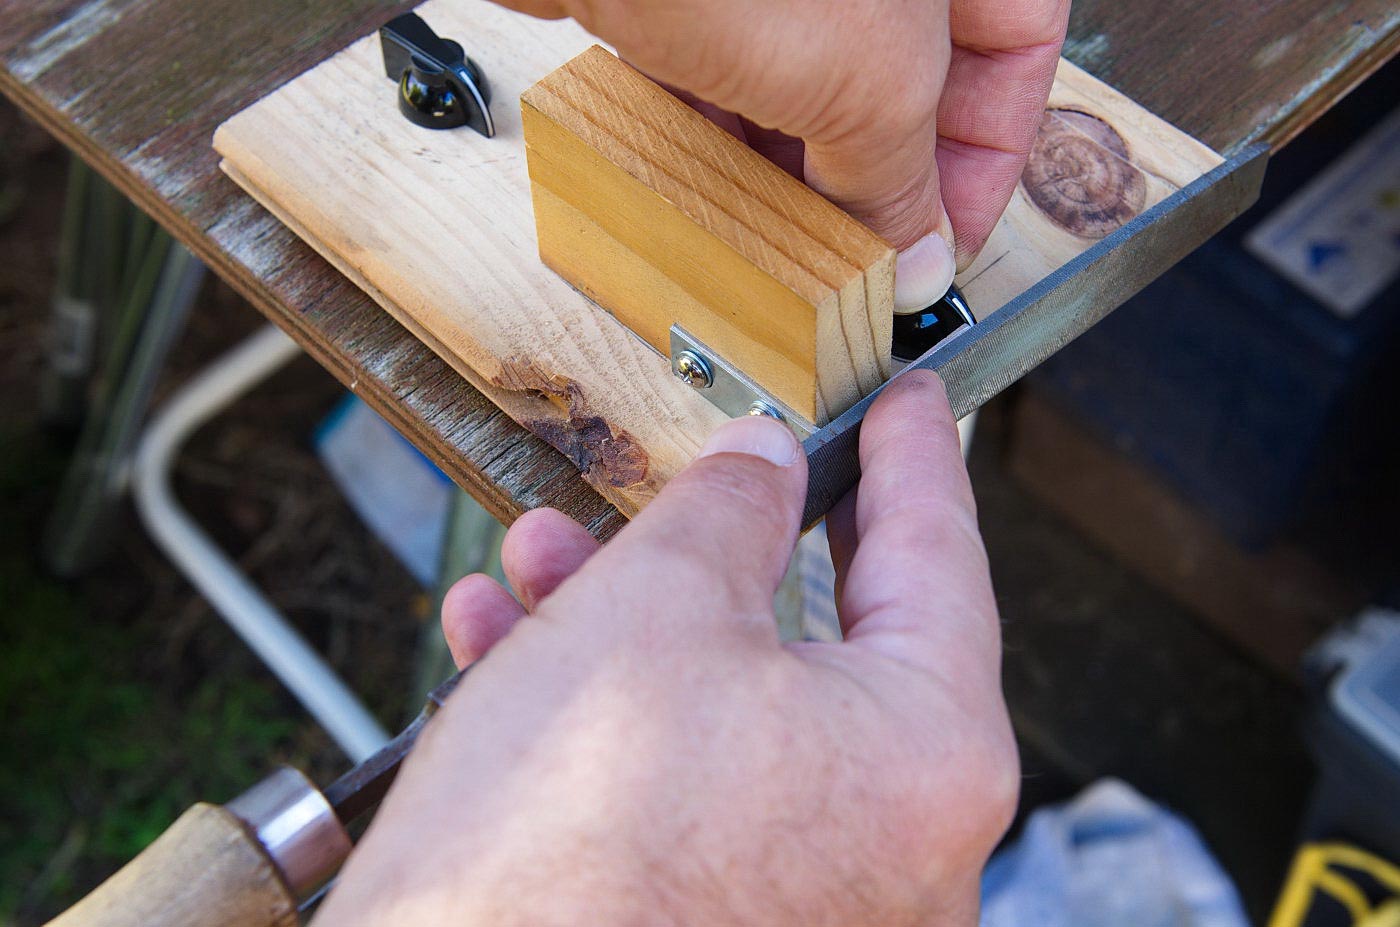
Held down ready to file:
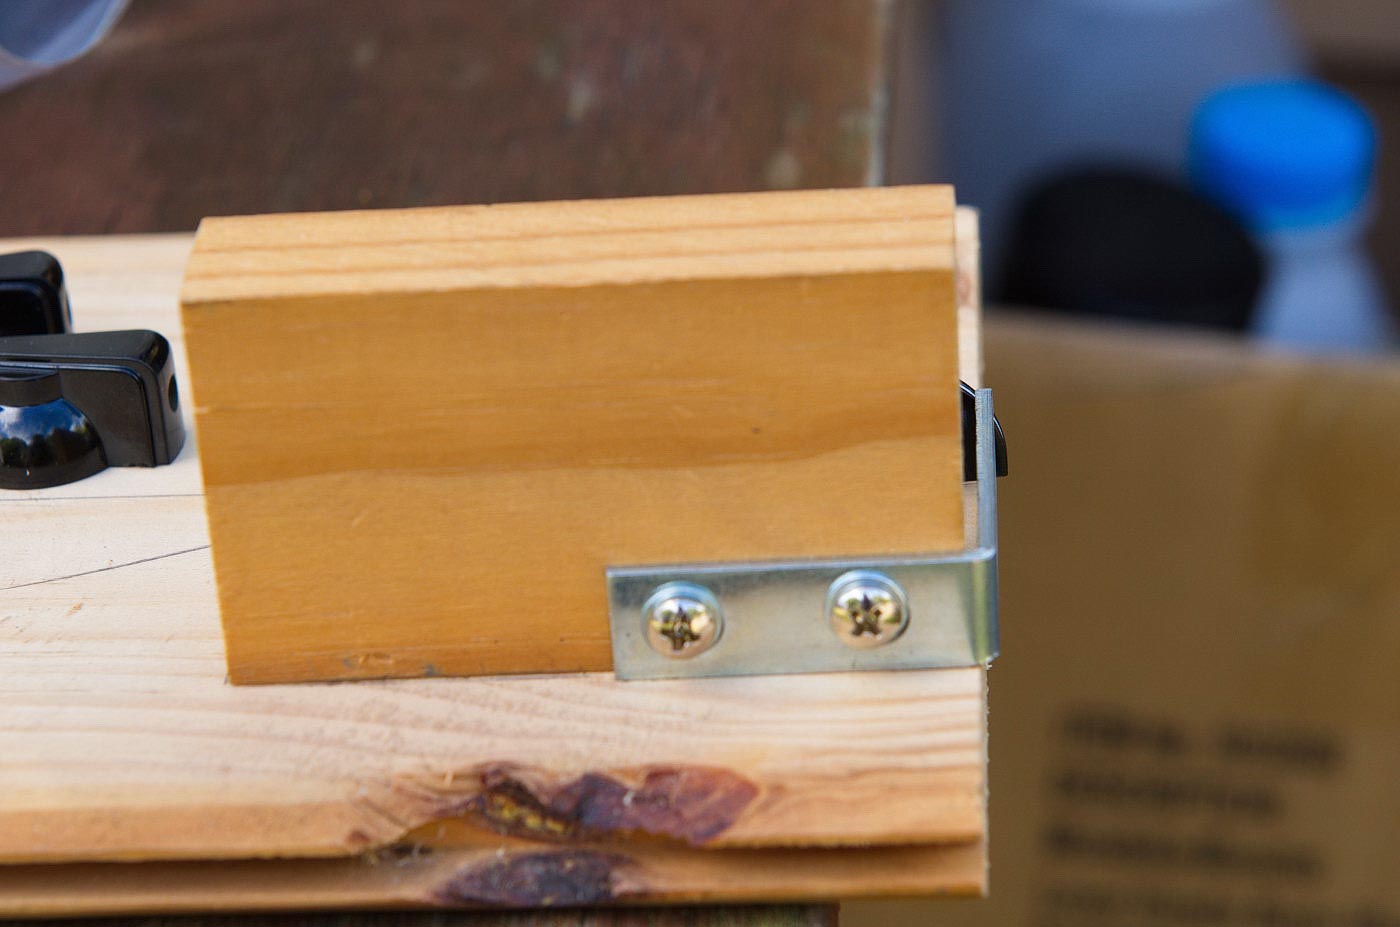
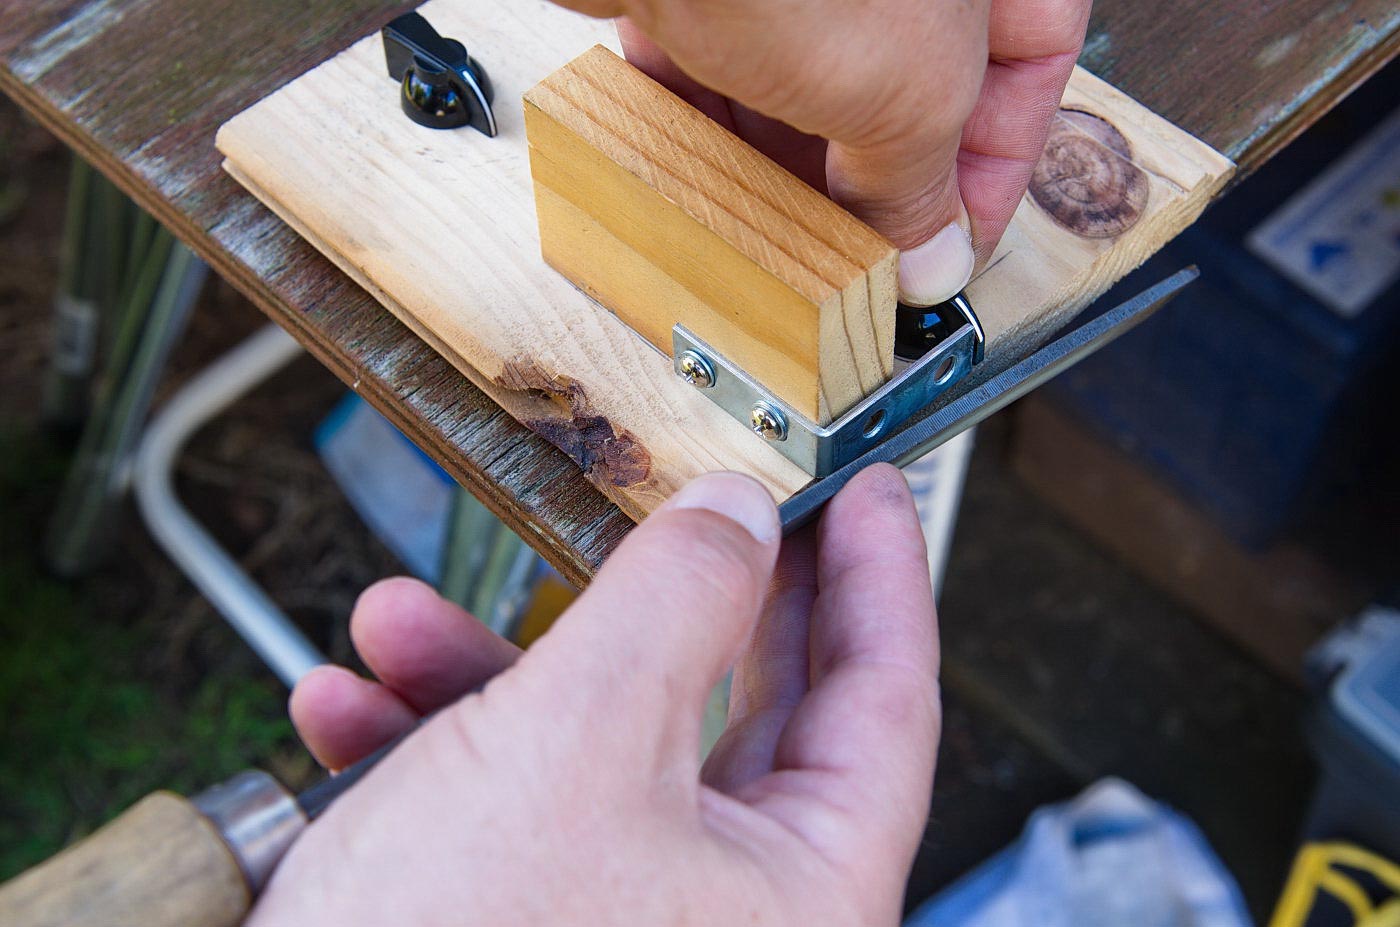
Filed down:
The filed knob:
Before and after:

So, to the Mighty Roadster...........
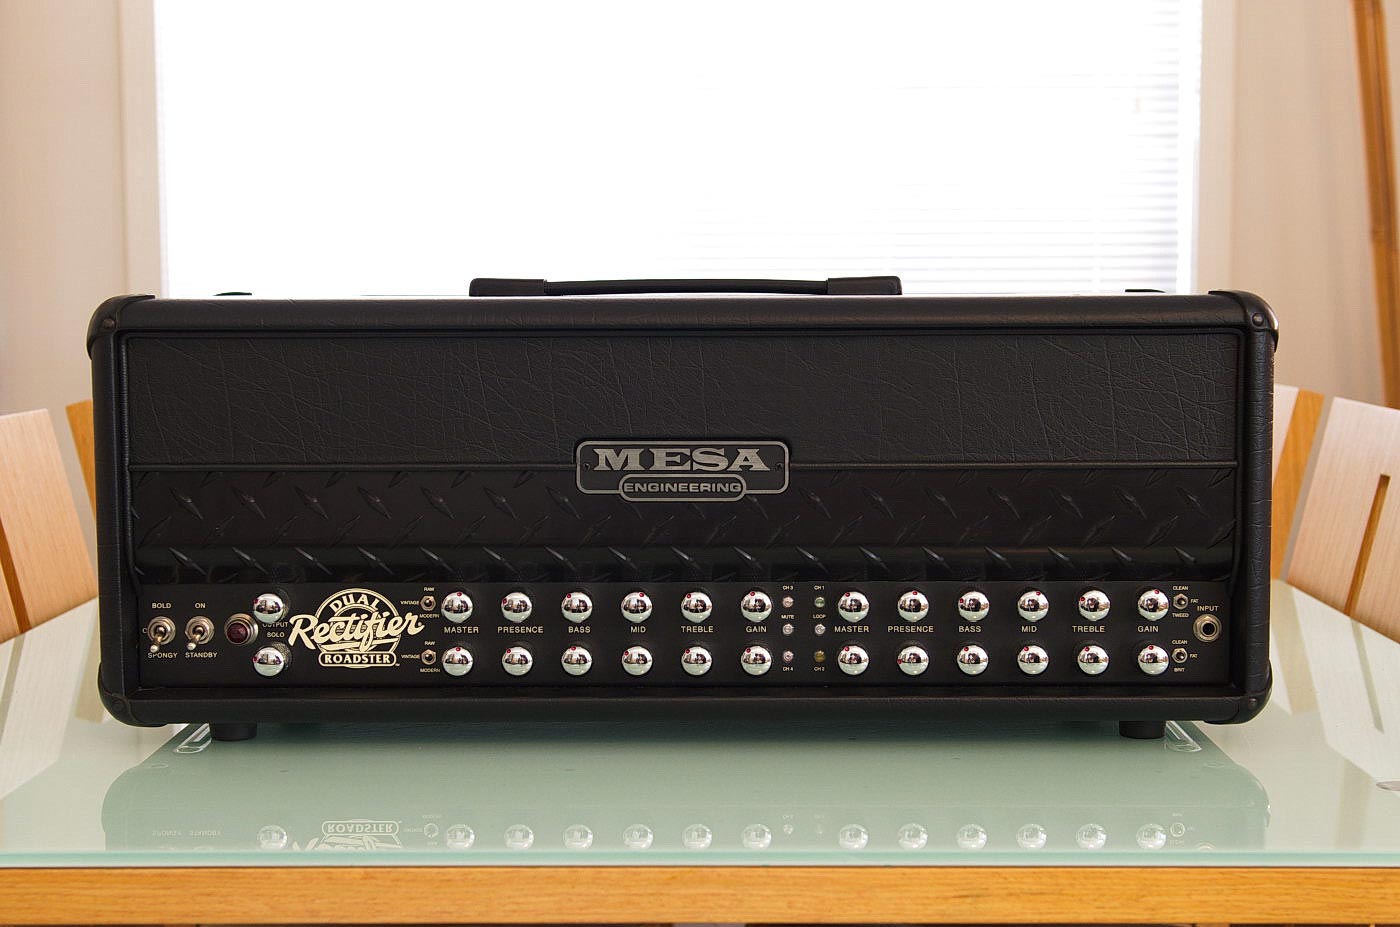
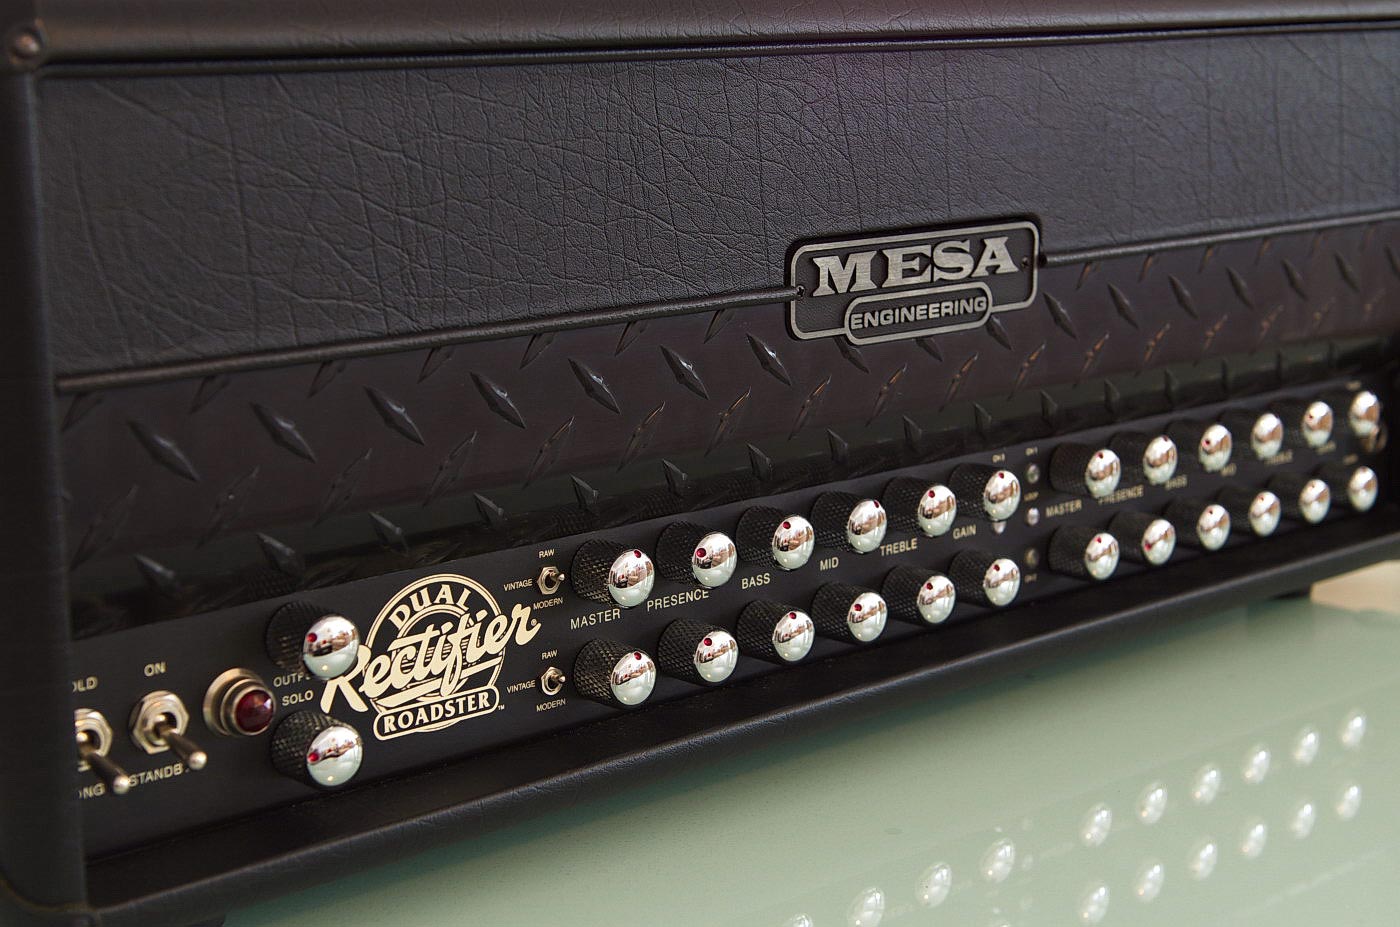
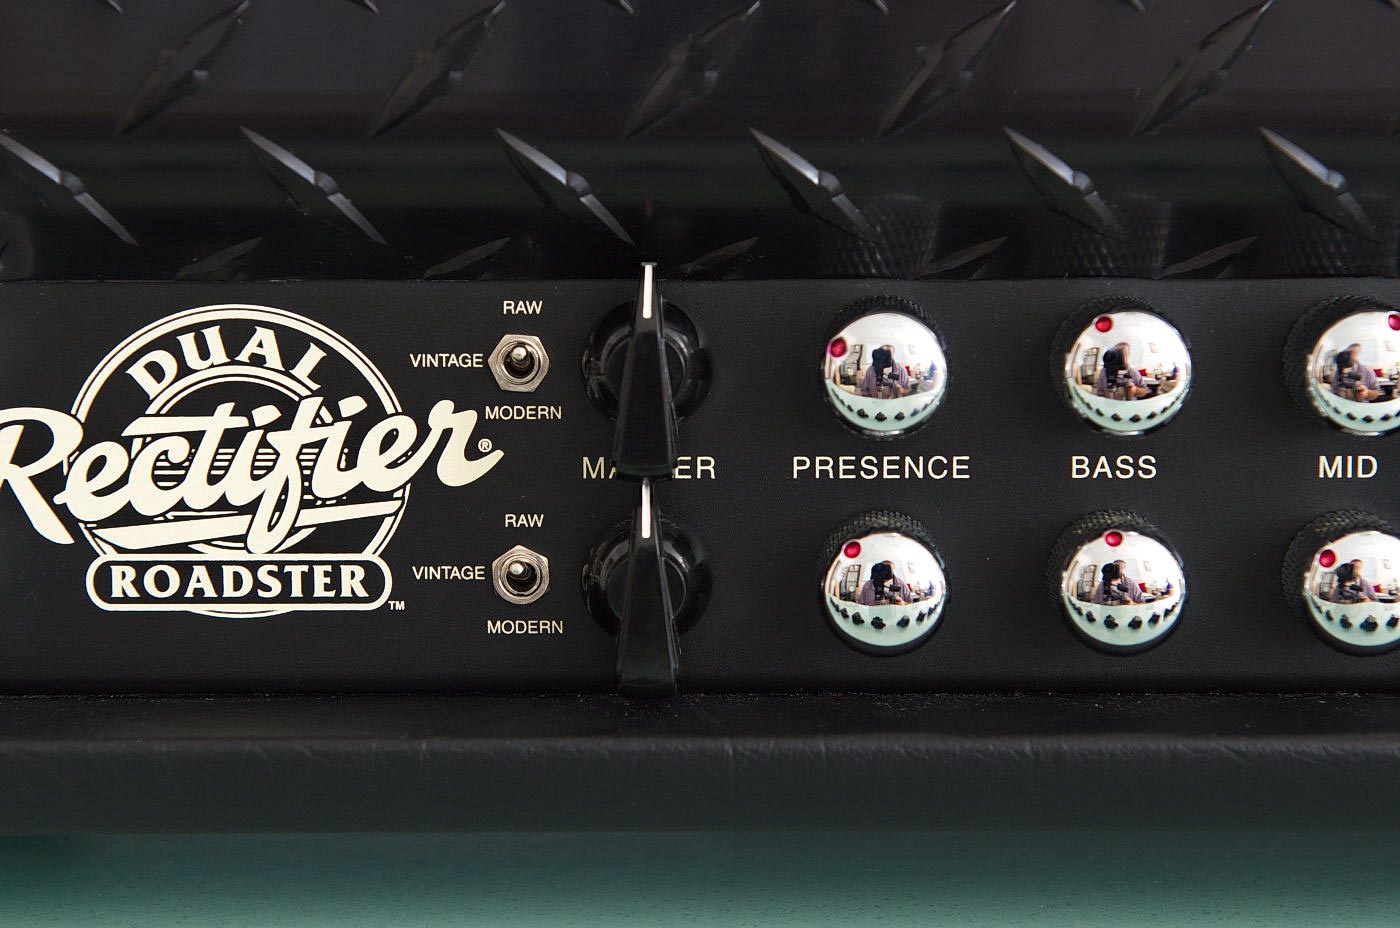
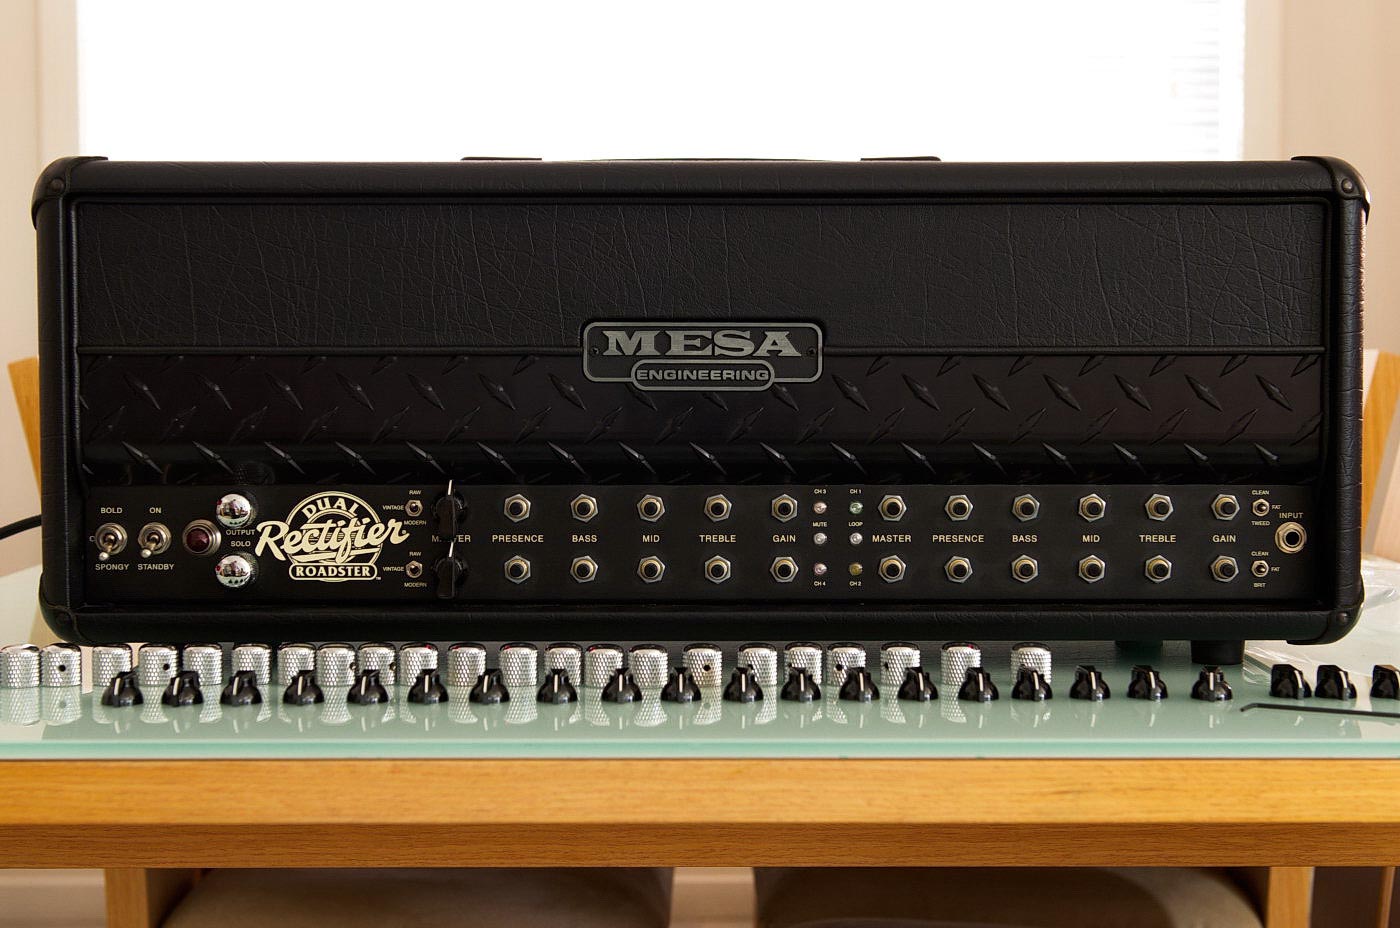
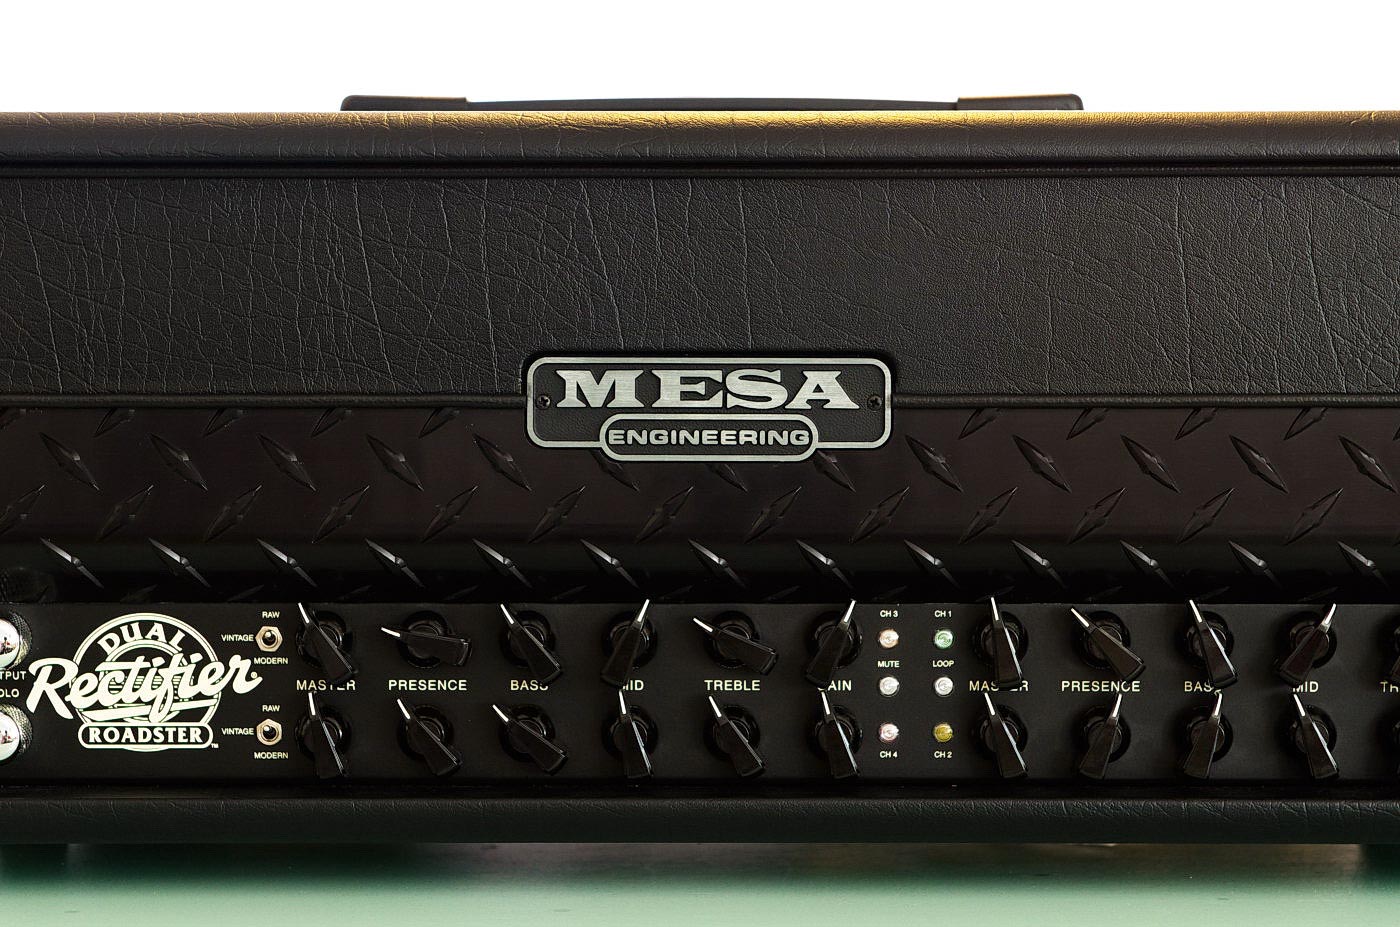
As you all know the Roadster with original knobs. I painted the depression with some Candy Apple Red nail polish but it's still difficult to see in dark-ish conditions.
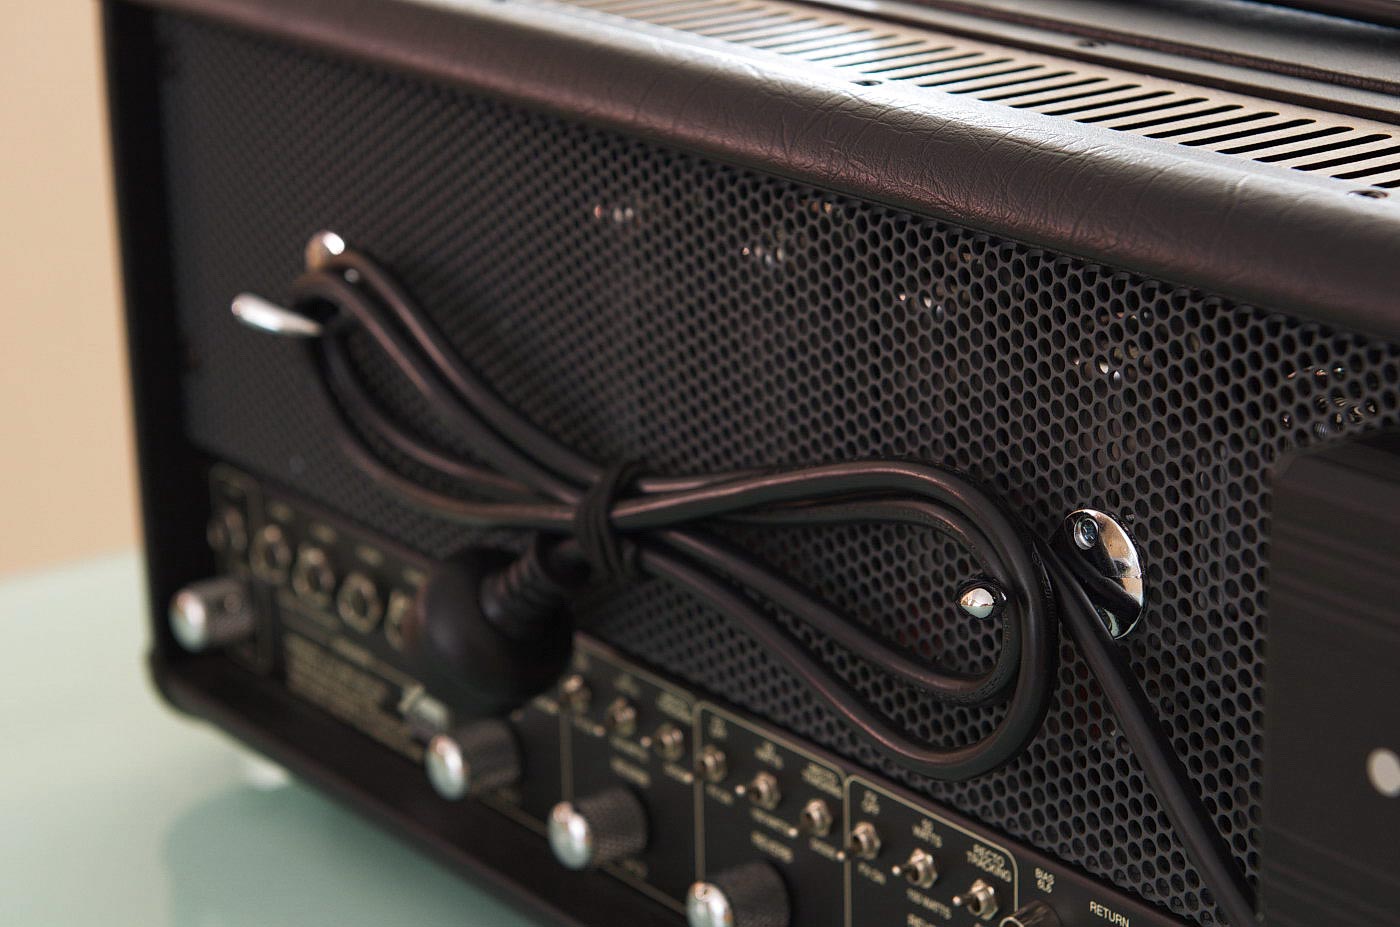
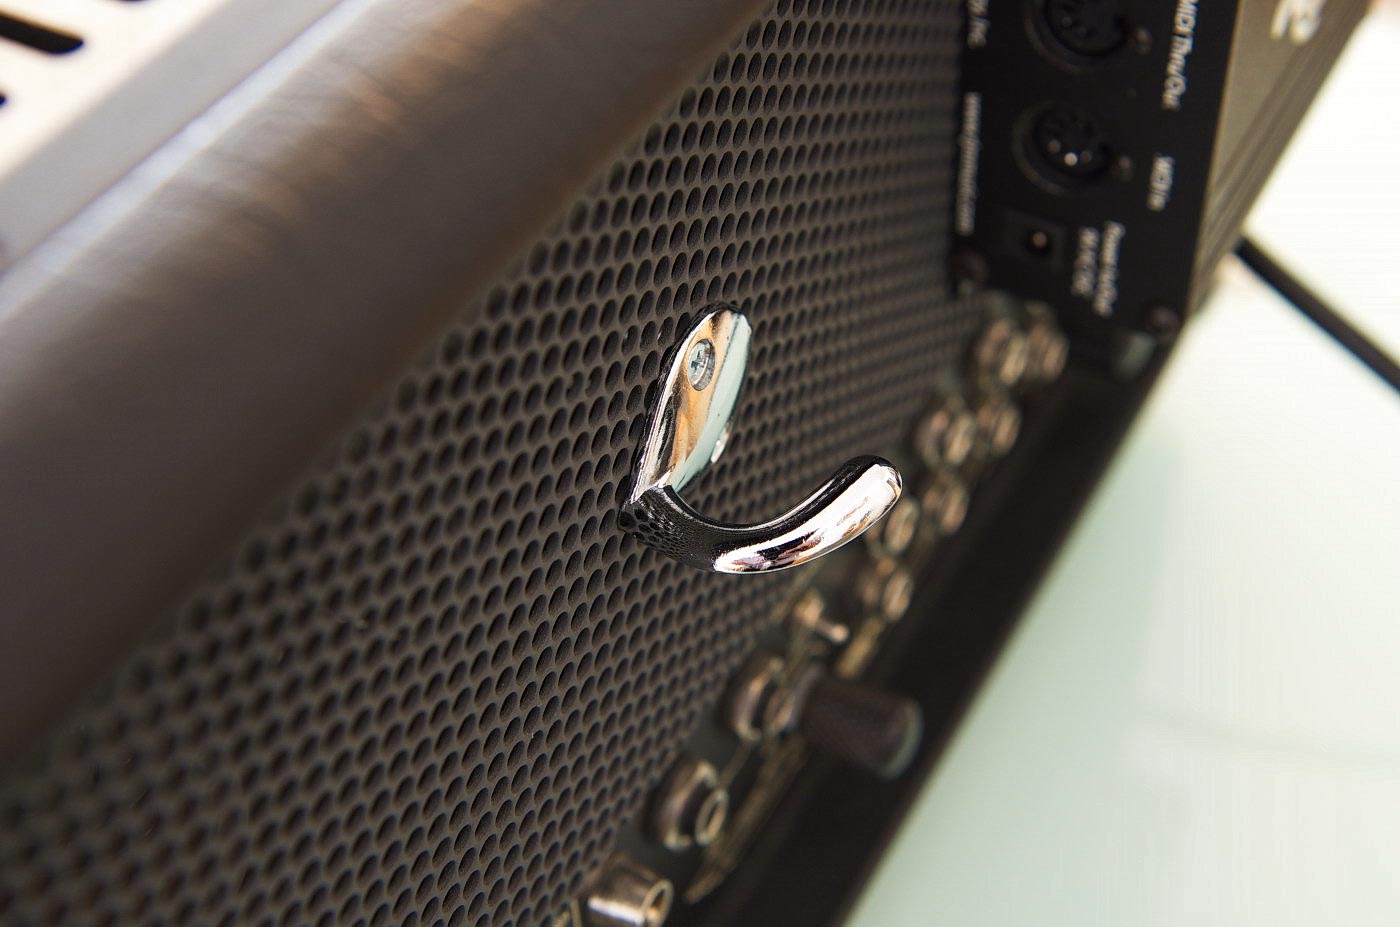
RJM unit cable tied. Power lead shown with hooks that I installed. The hooks are simple clothes hooks I bought from a hardware store. I don't understand why Mesa doesn't have hooks to wrap the power lead nice and neat. My Peavey JSX has moulded hooks as standard.

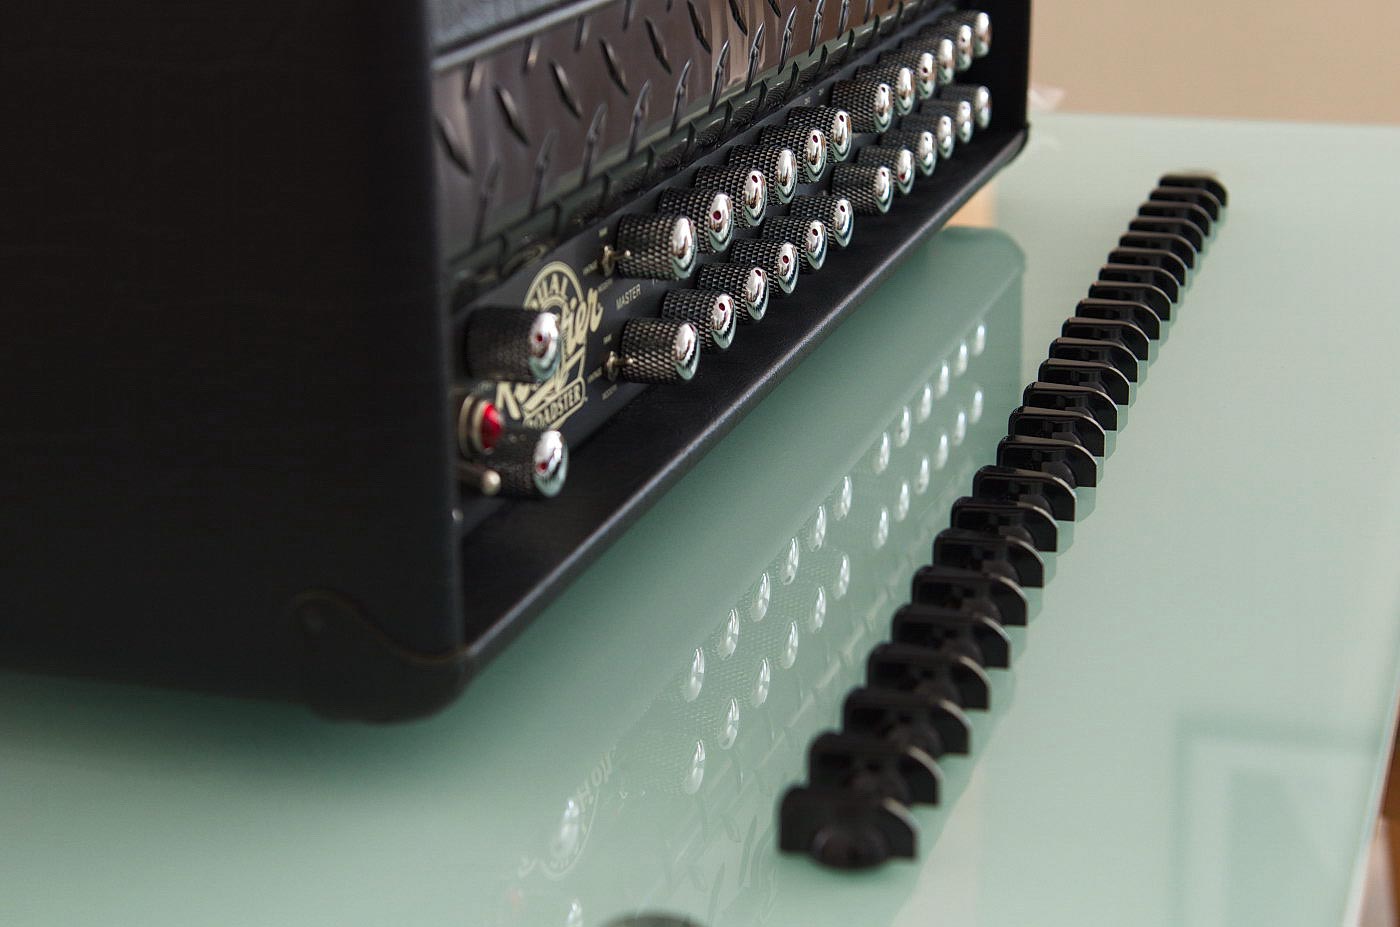
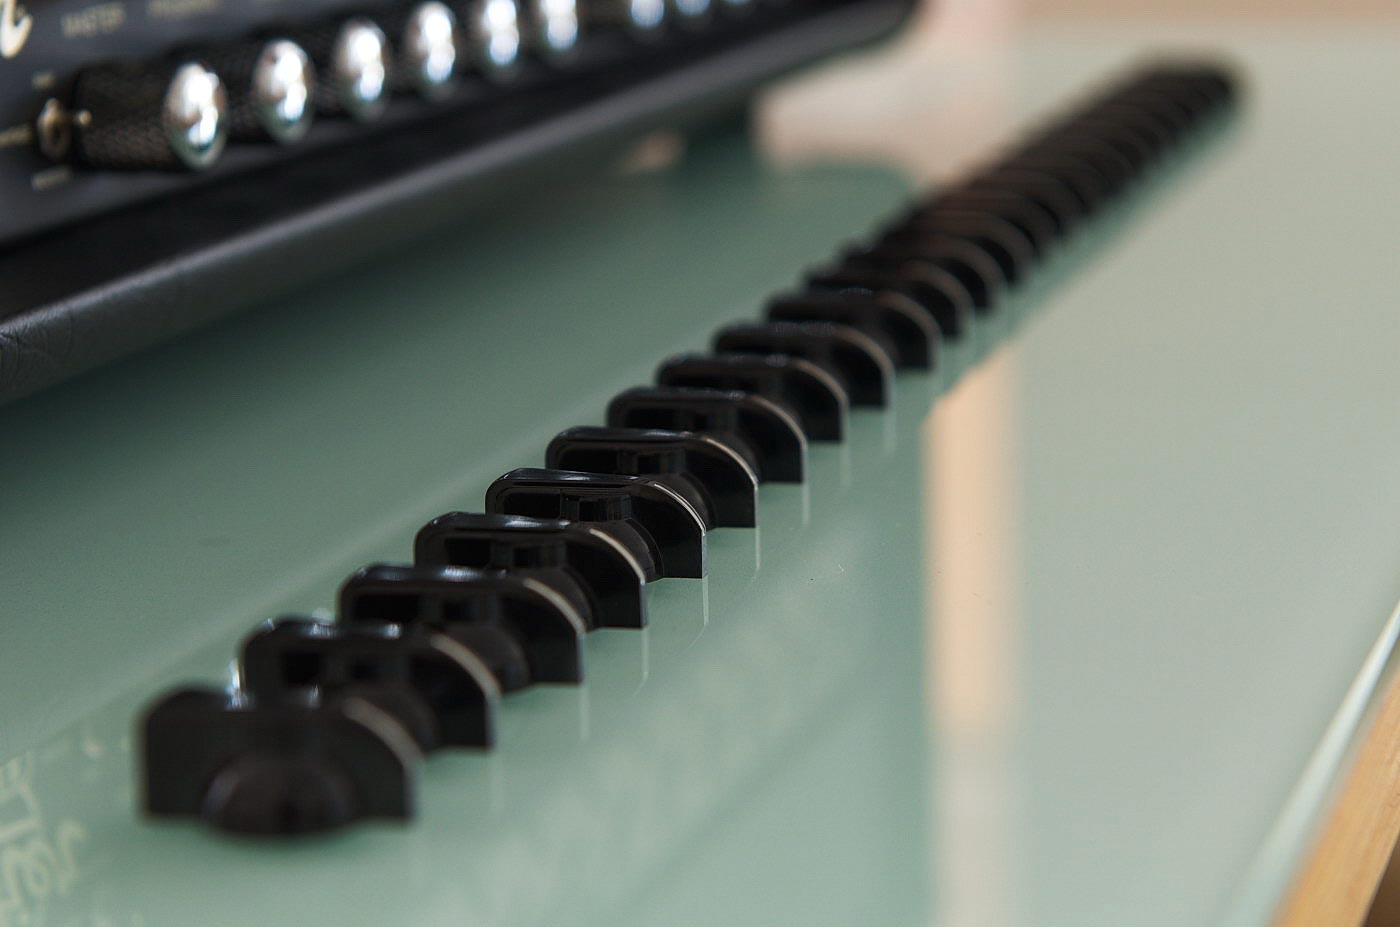
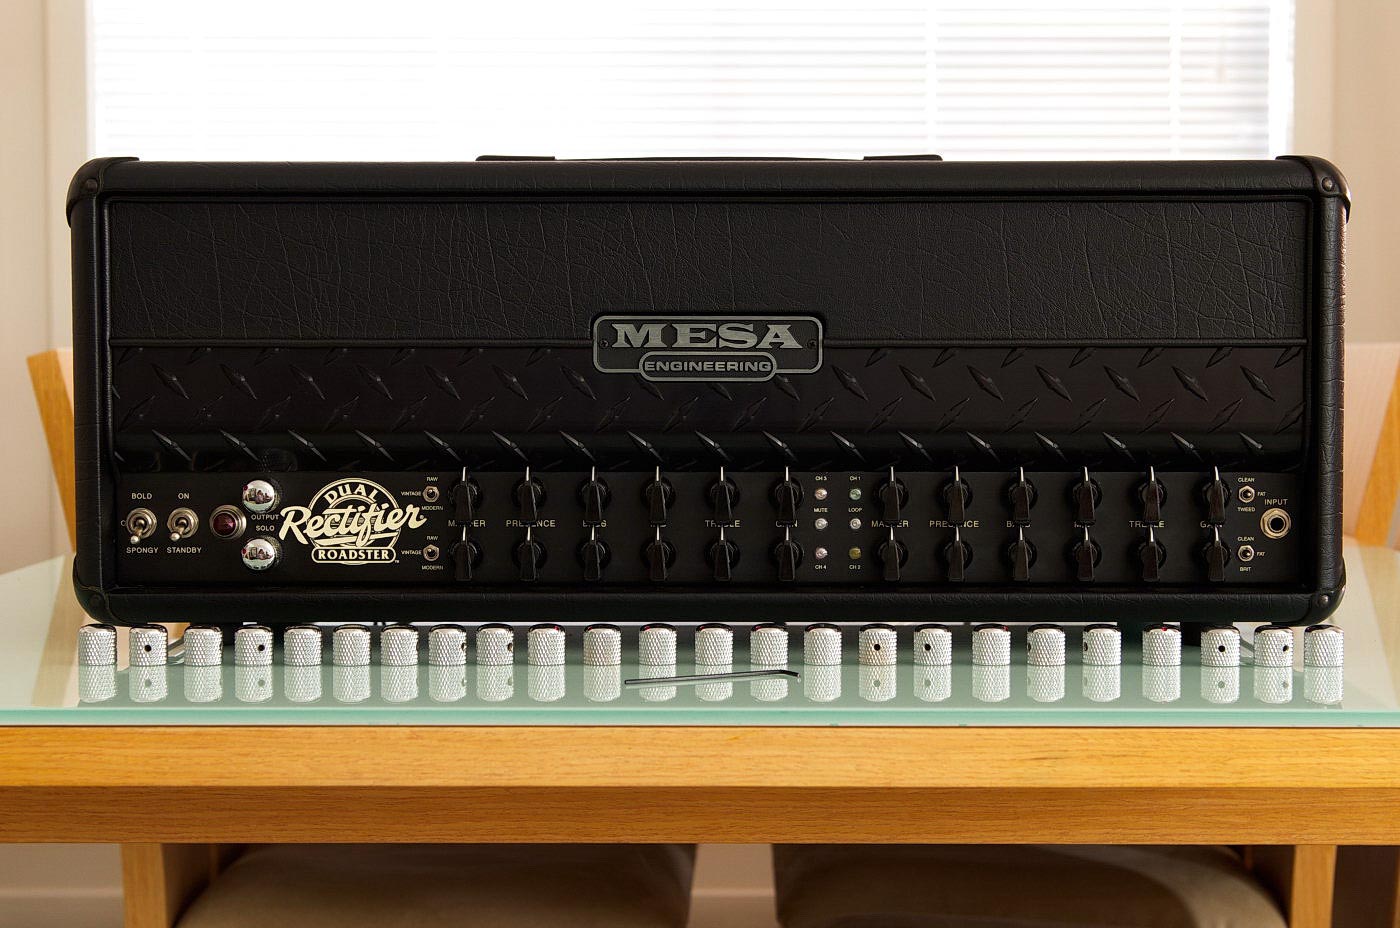
Knobs, knobs and more knobs:
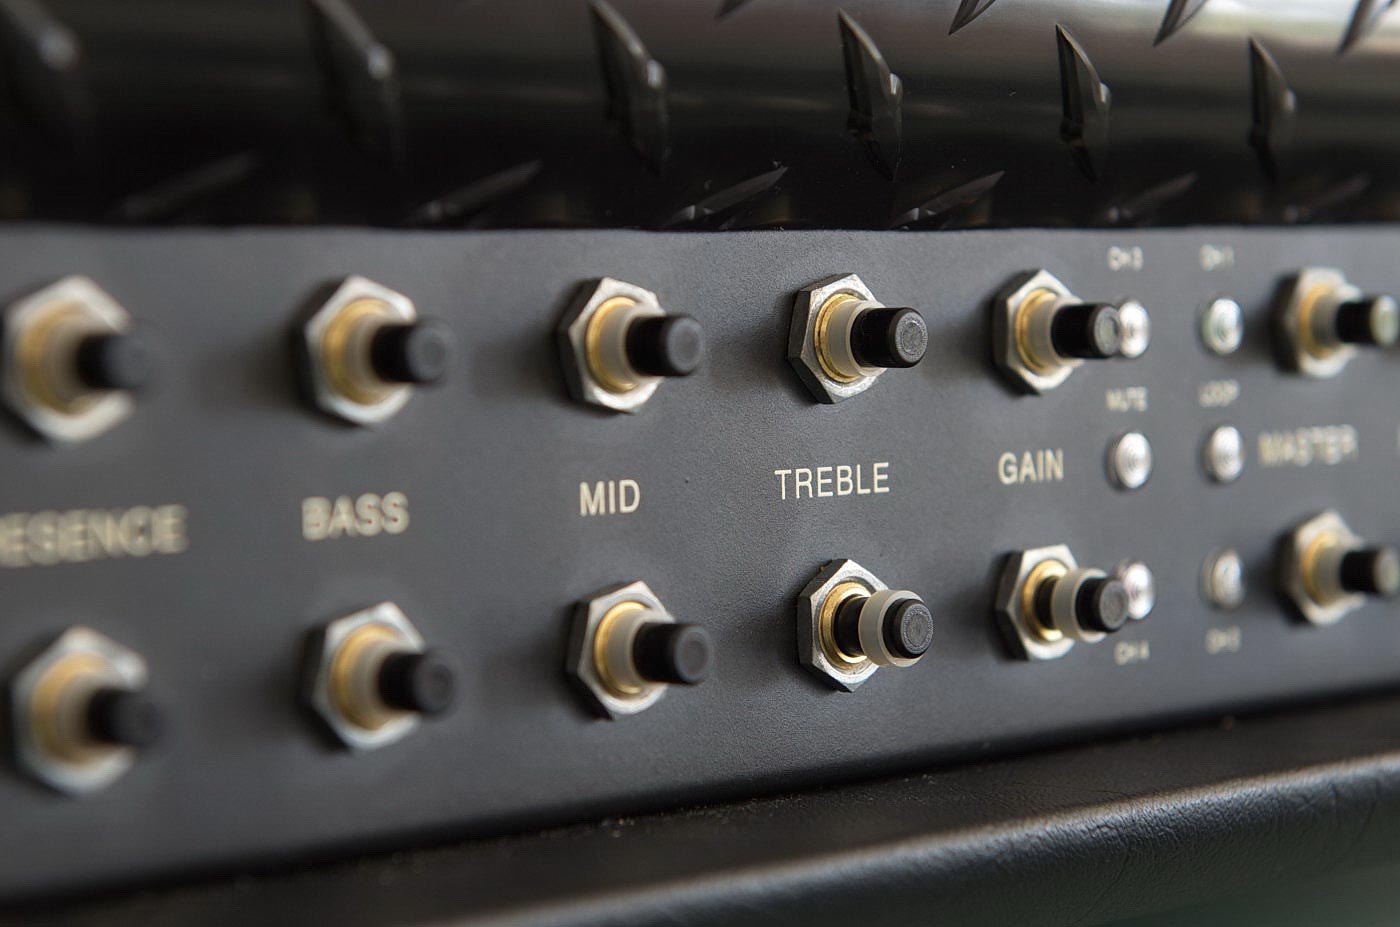
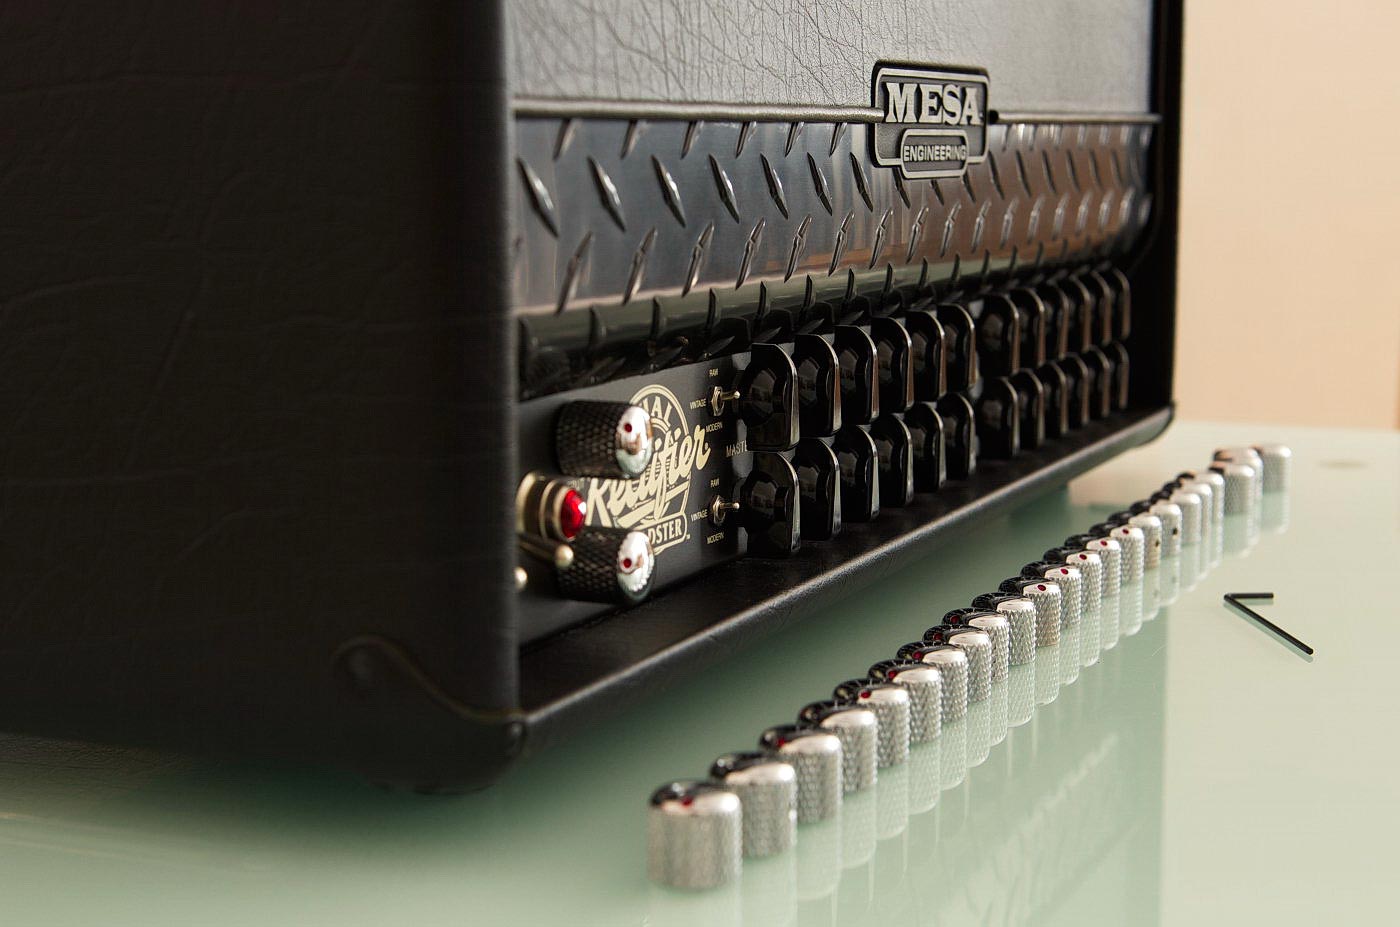
Checking first set of knobs:
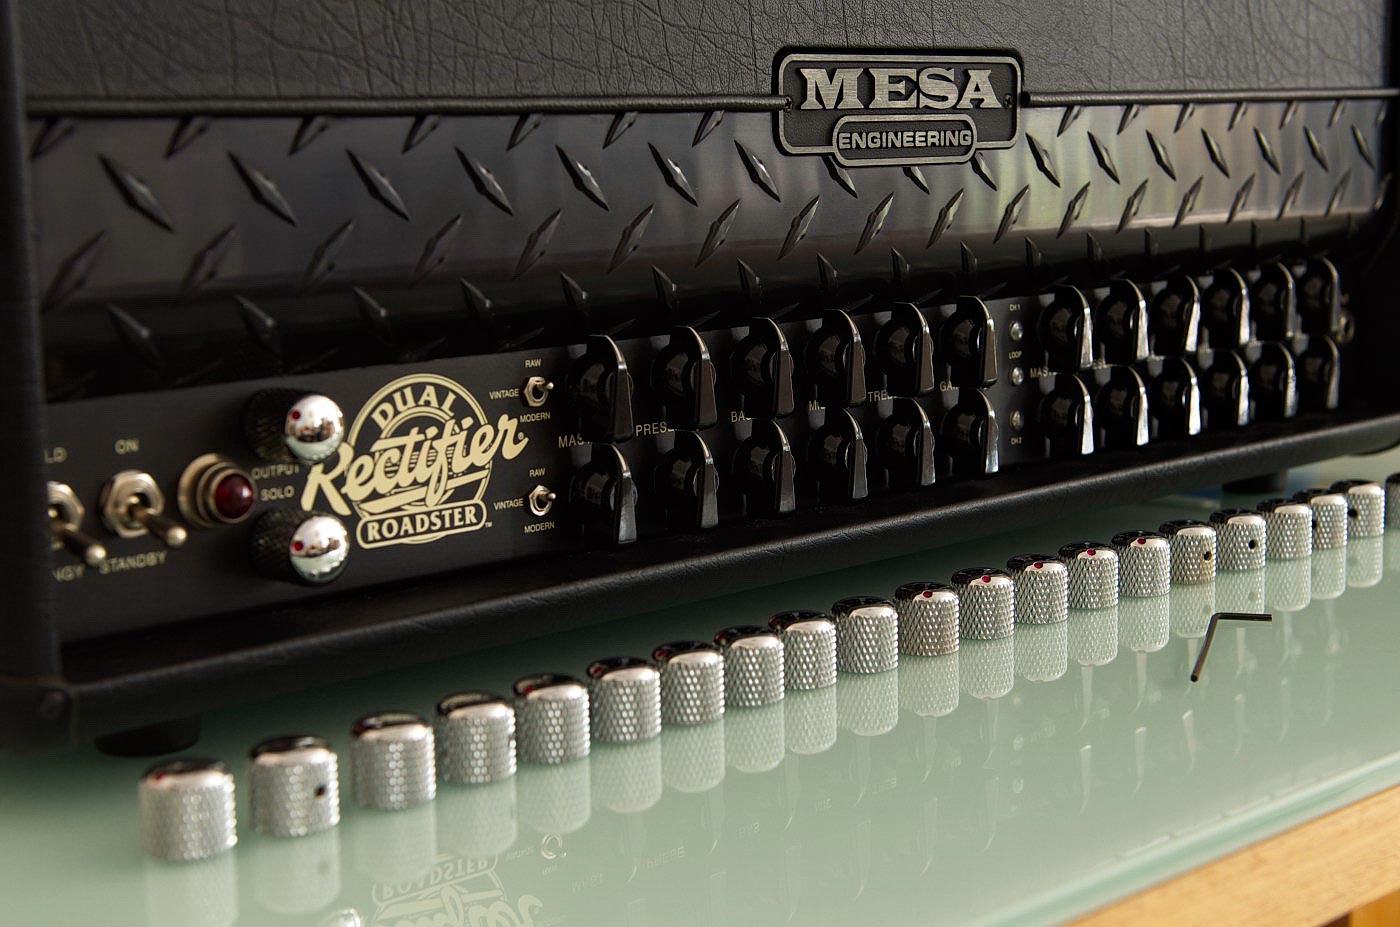
Original knobs removed. The plastic spacers are still required for the new knobs:
Ready to install the new knobs:
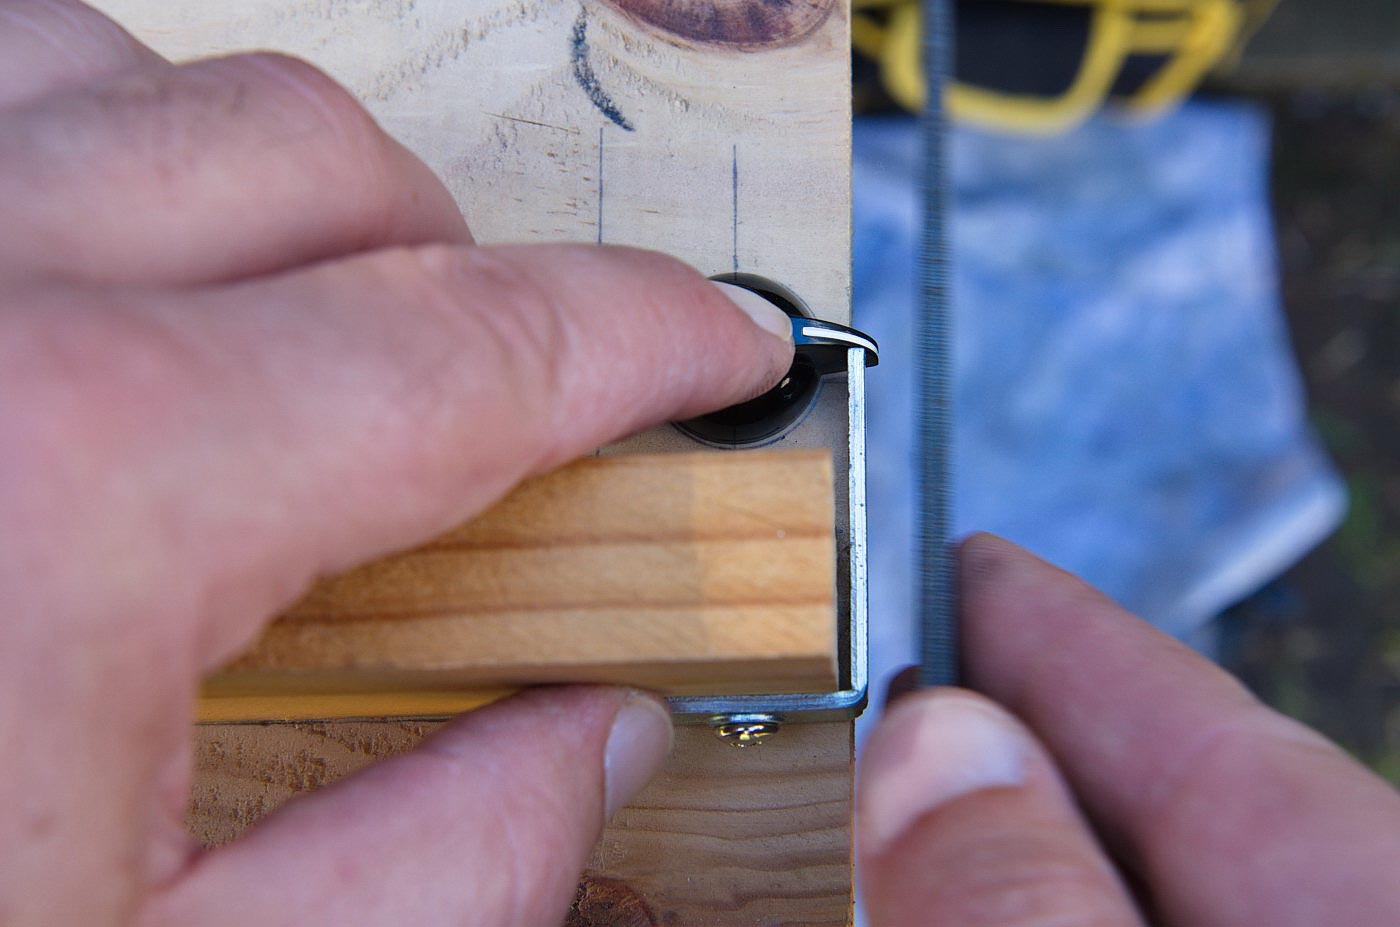
New knobs in place but not tightened down. Further clearance checks required by rotating all knobs:
The tail of one knob hits the checker plate. Not good. There was another three that did the same thing. Time to put a chamfer on the tail.
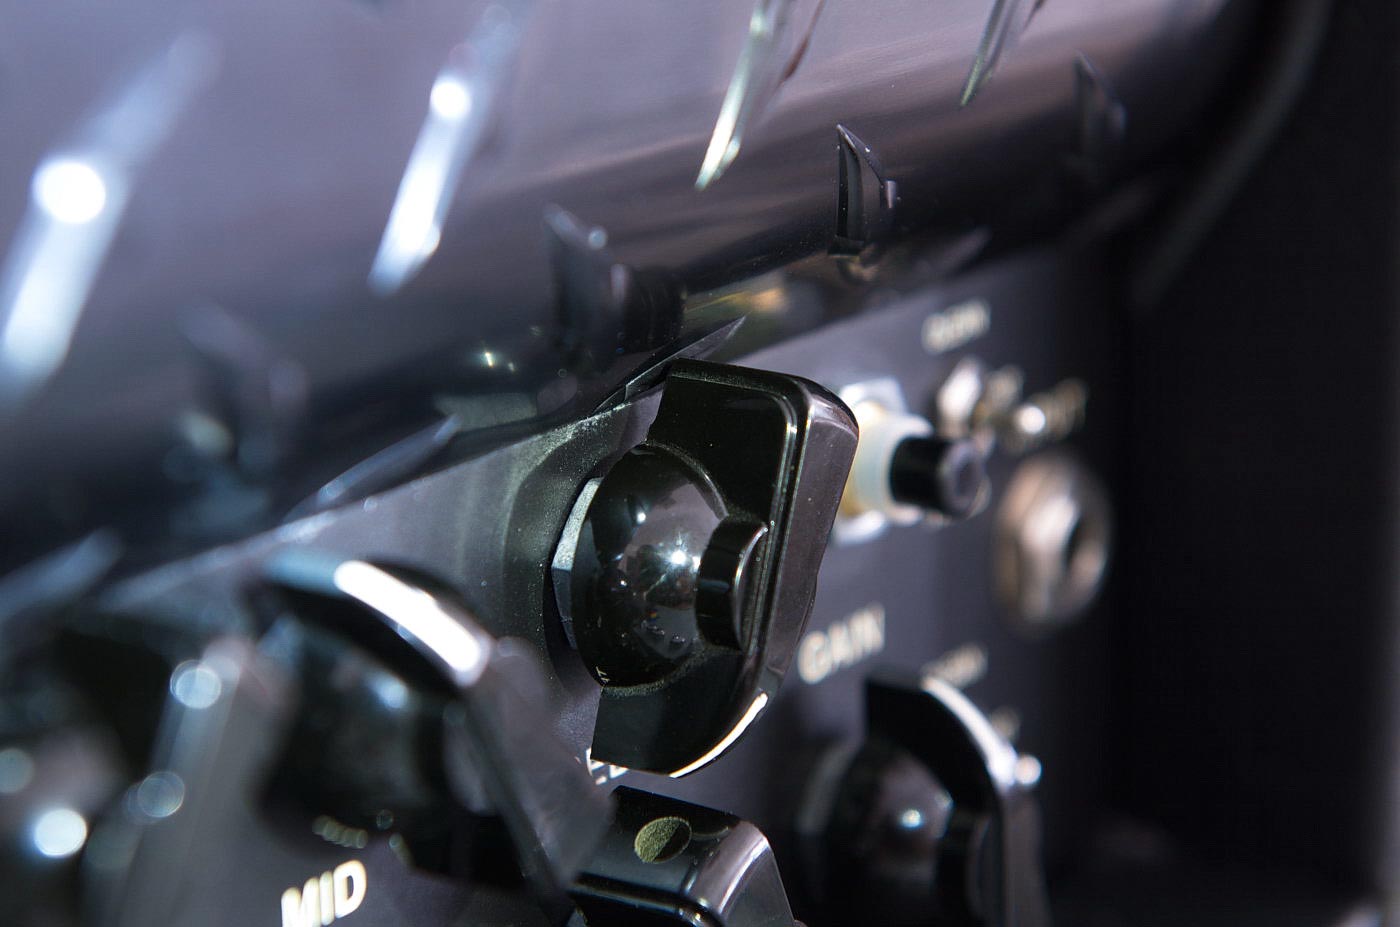
Knob modified with approximately 1.0mm x 30-45 deg. chamfer underneath tail.
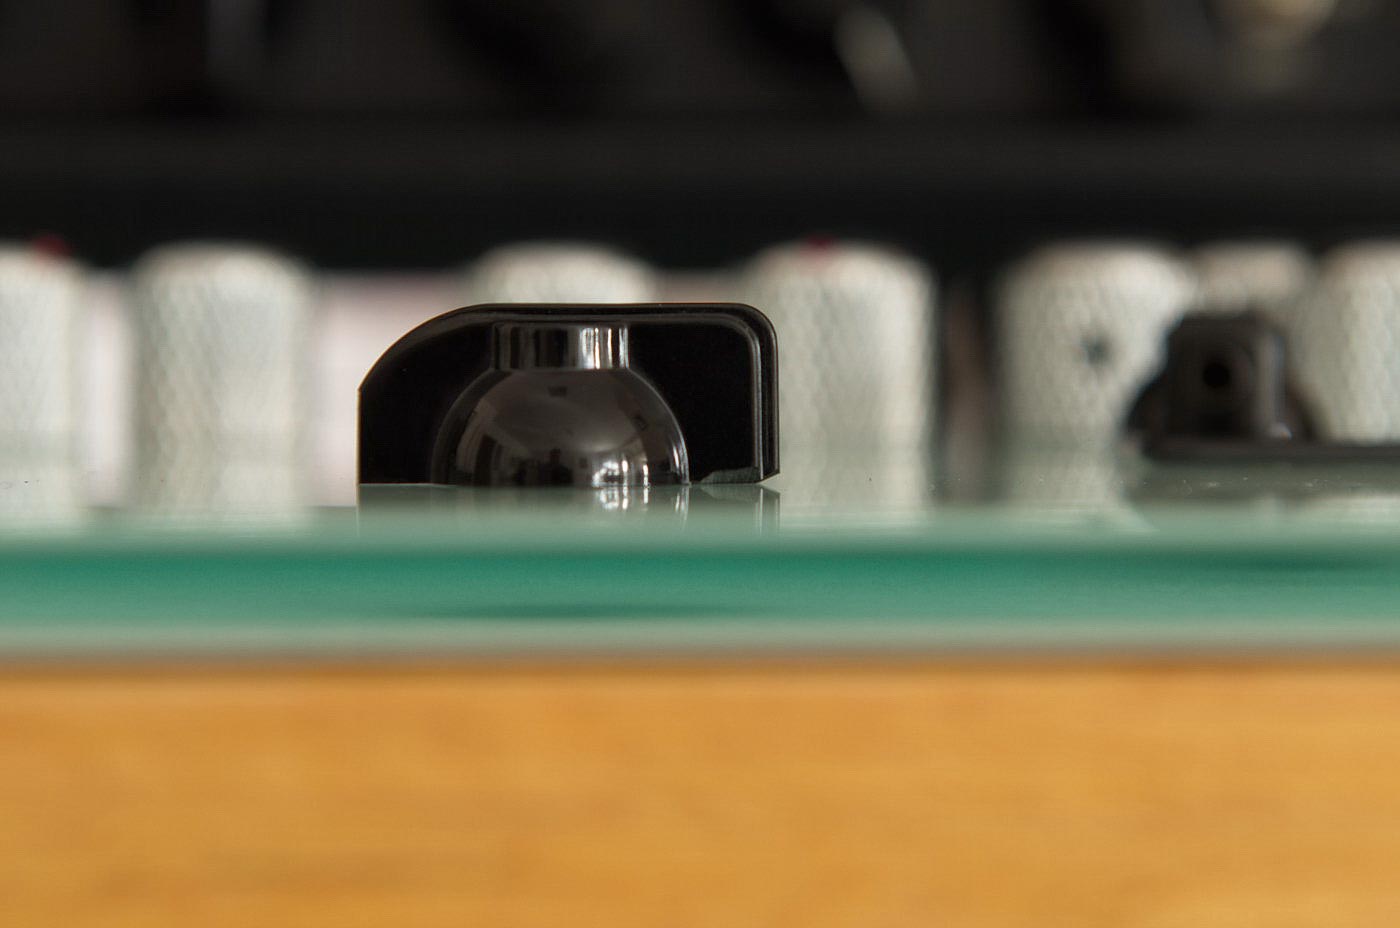
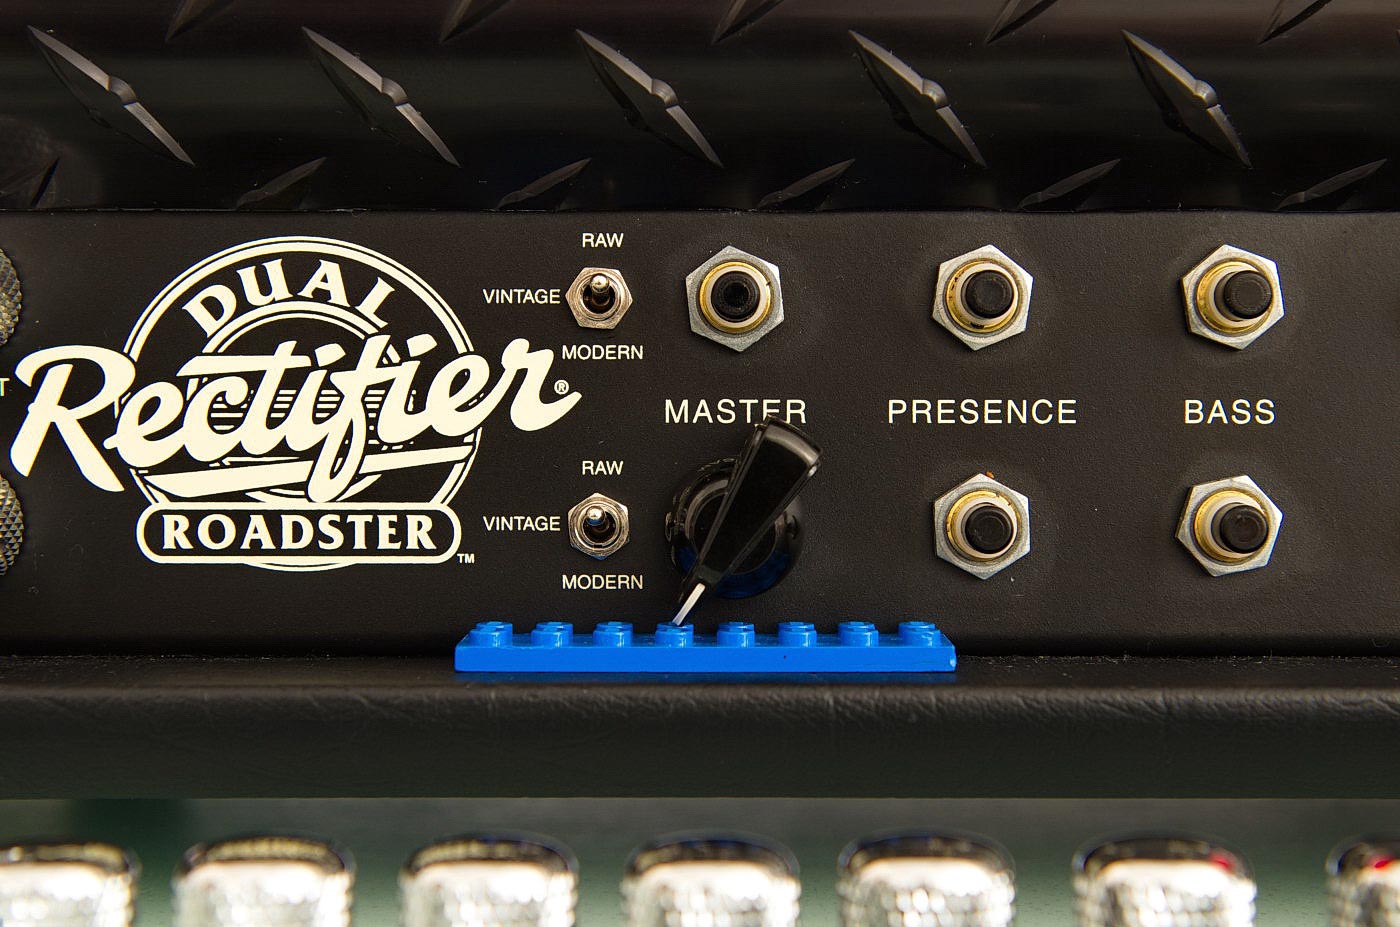
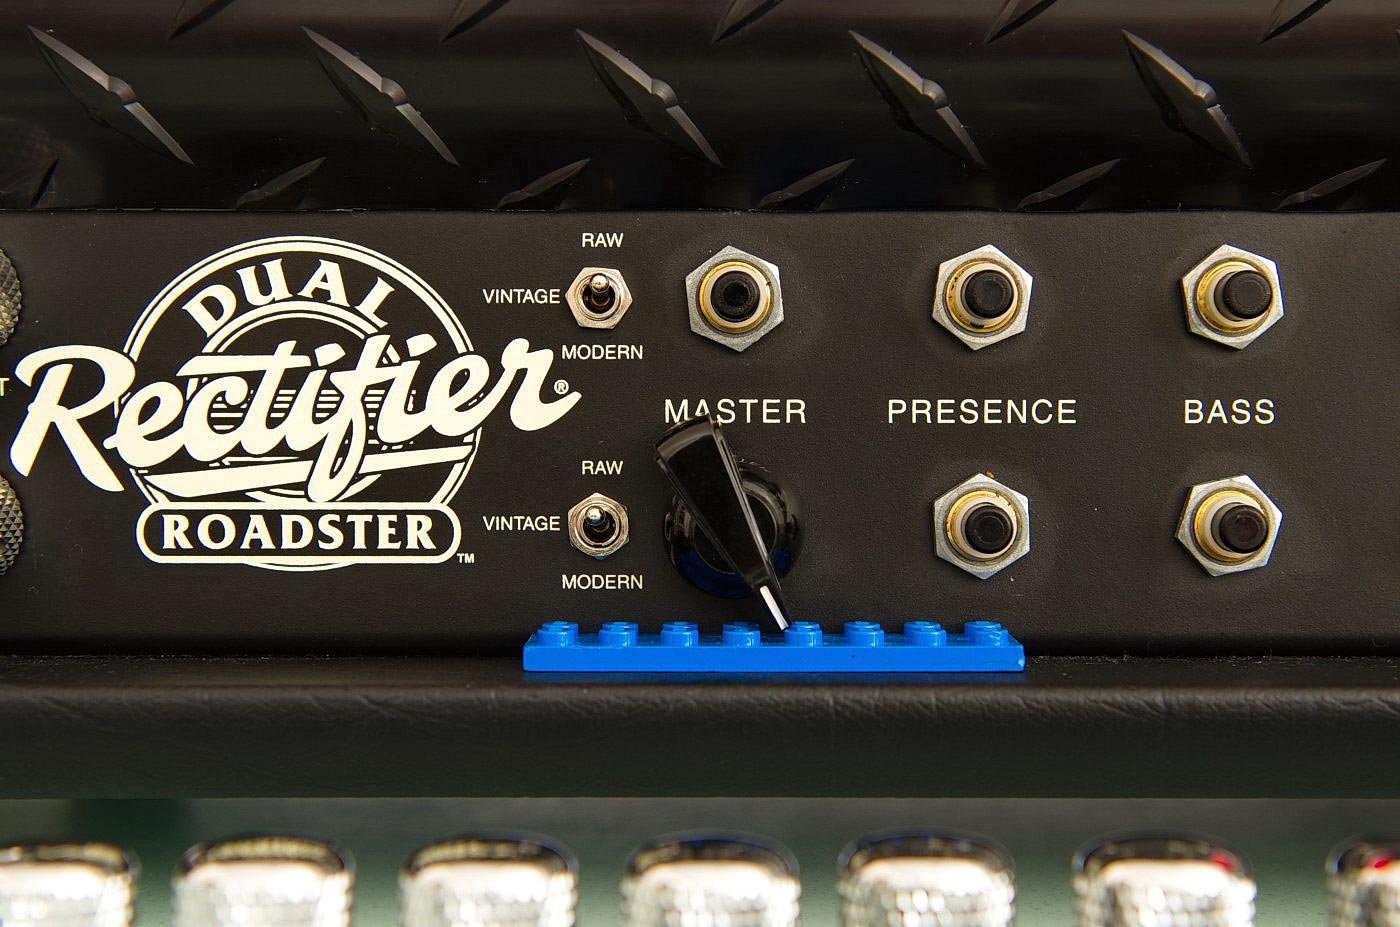
Time to install the bottom rows of knobs. Checking the full rotation angle of the knob. It needs to be even each side of 12oclock. A Lego block is a great place to start LOL. Check one side........b]
........Then check the other side. Not good. This side rotates more.
Time to get the feeler gauges out for more accurate adjustment. One side.....
...... now the other side.
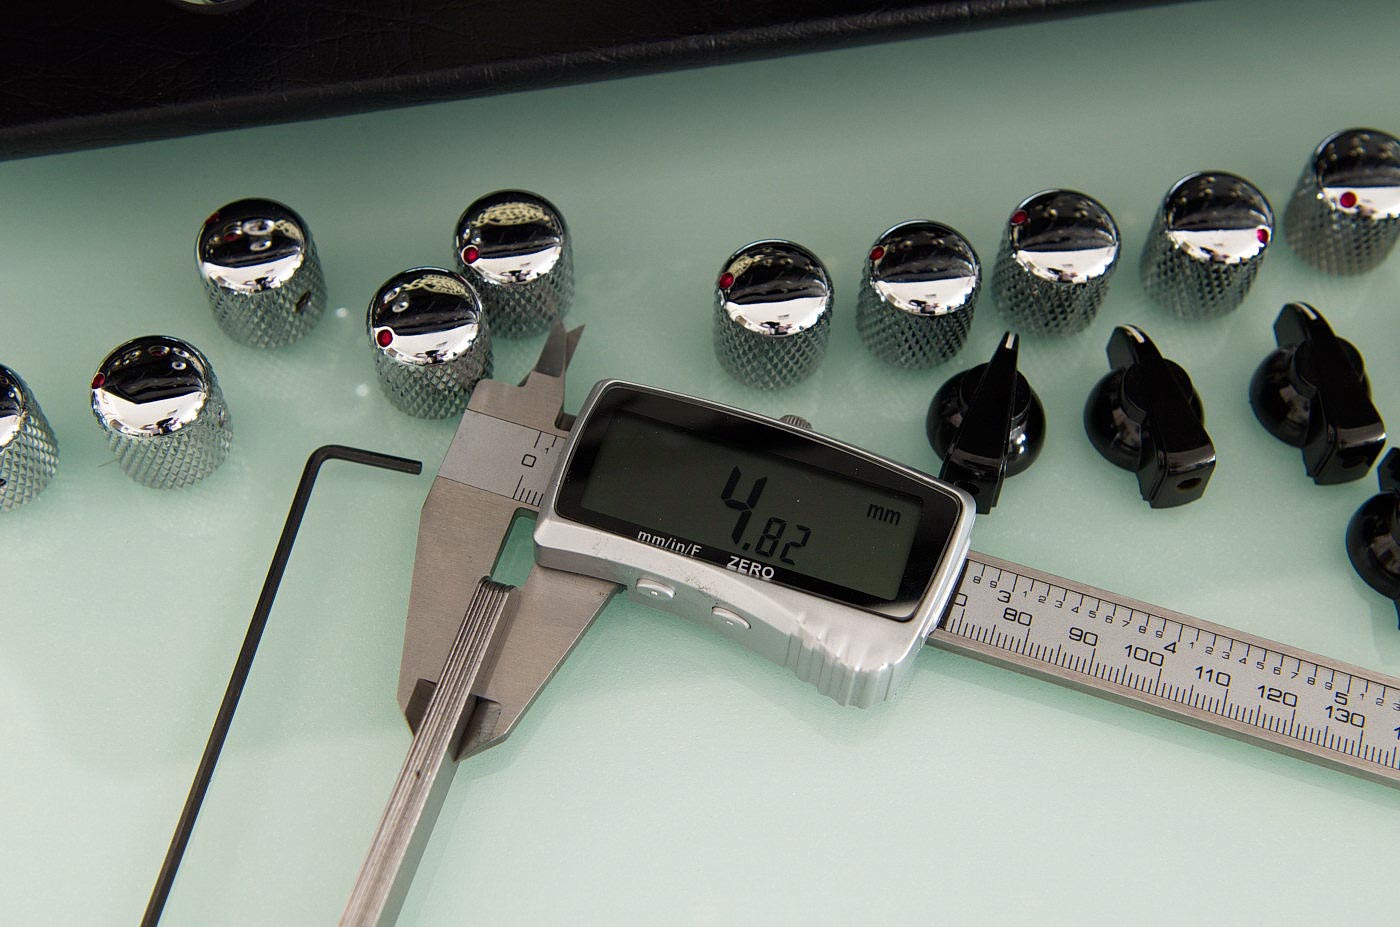
Thickness of feeler gauges measured because I felt like it:
Bottom rows of knobs installed and tightened. Now to do this all over again for the top rows. Lego to the rescue! One side checked....
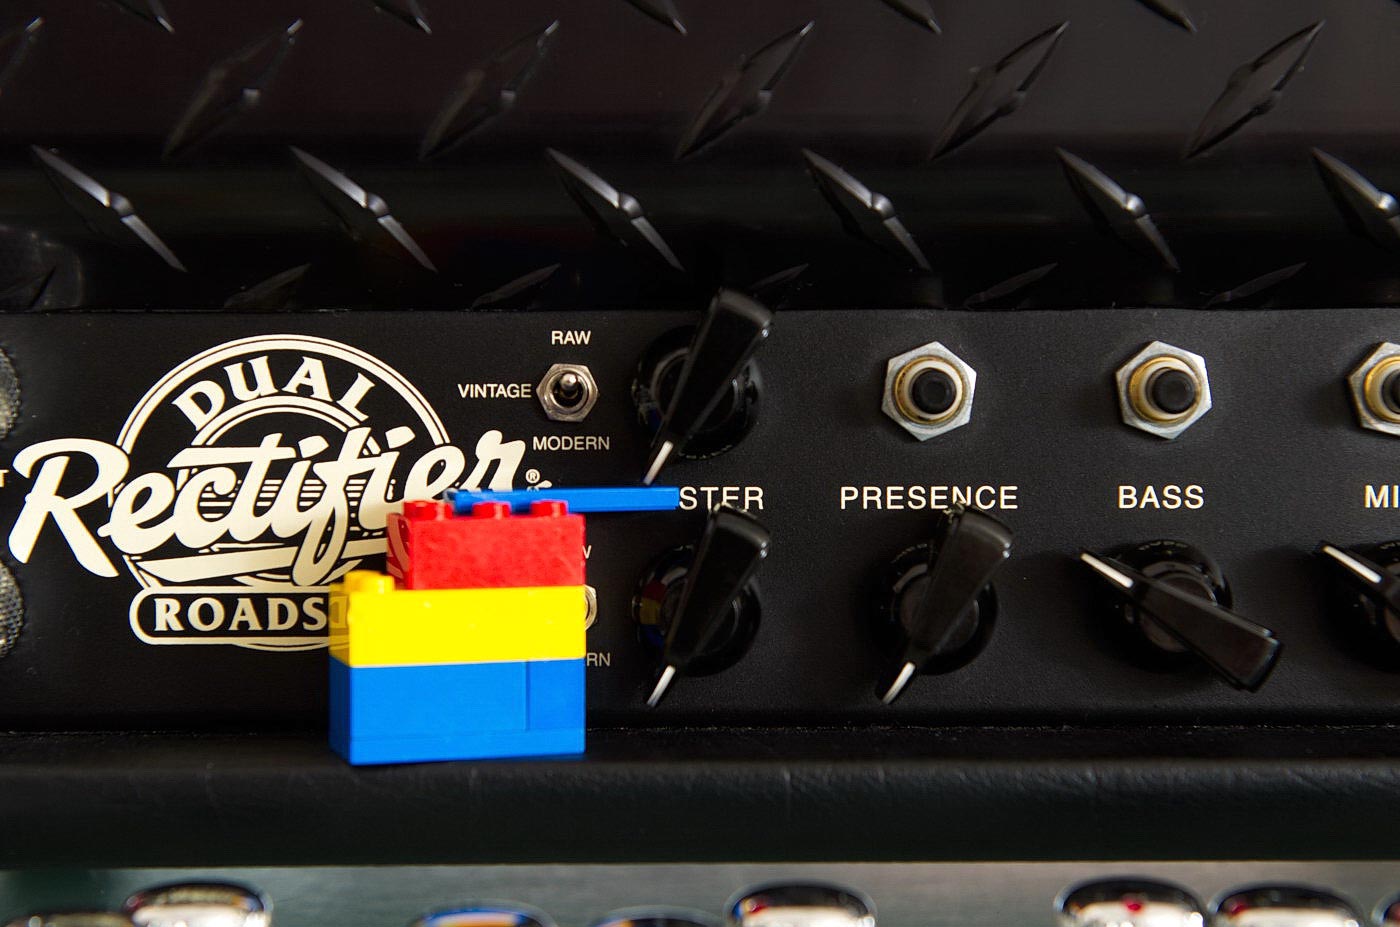
..... other side checked.... and it's even. Lego is the best and it's my jig for the top rows of knobs LOL.

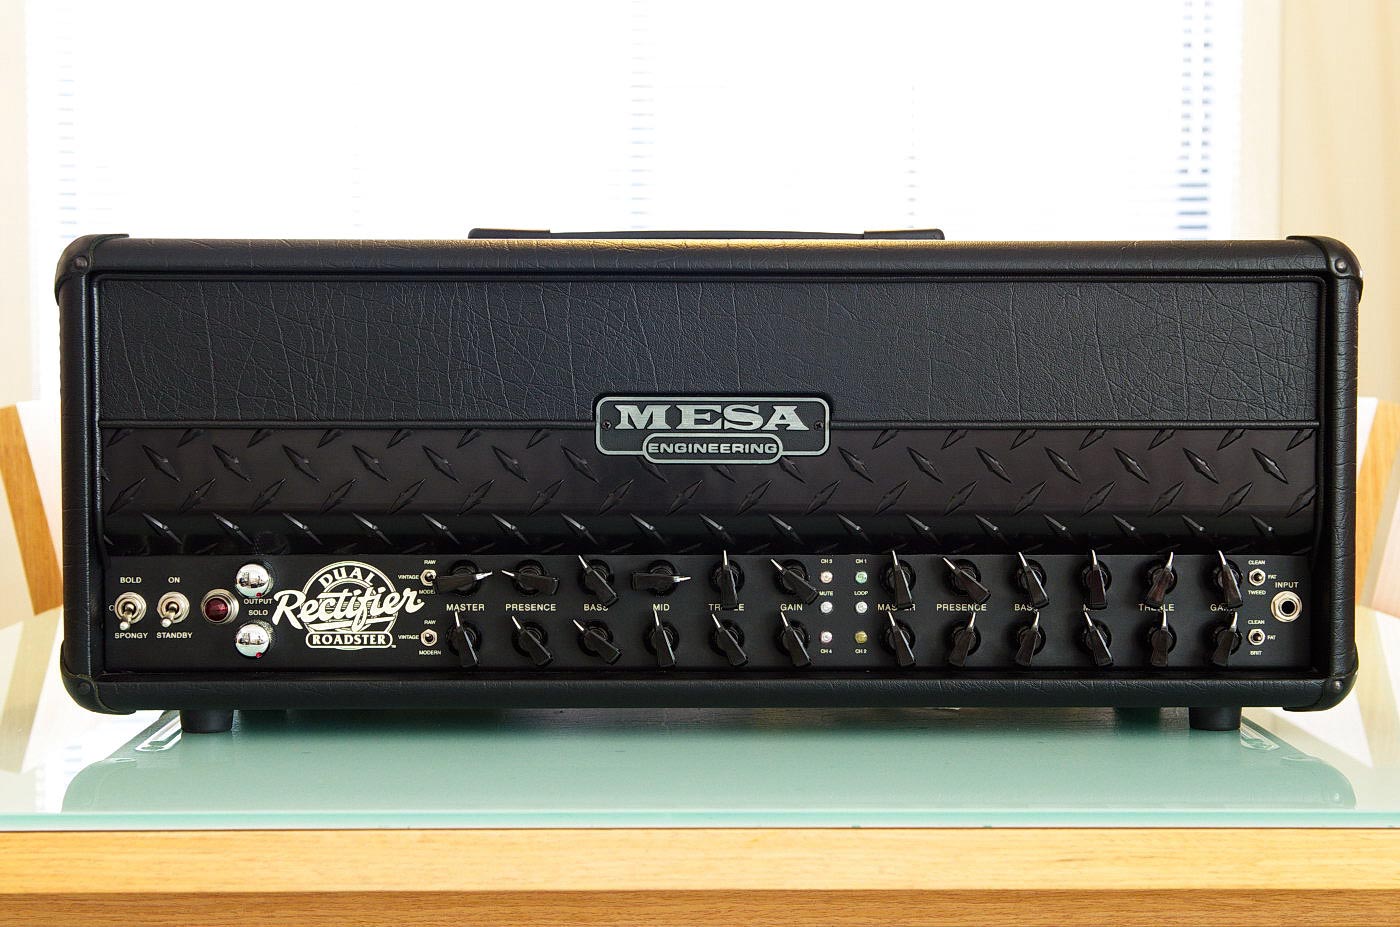
Knobs installed, all screwed down, double checked for full rotation. Success...
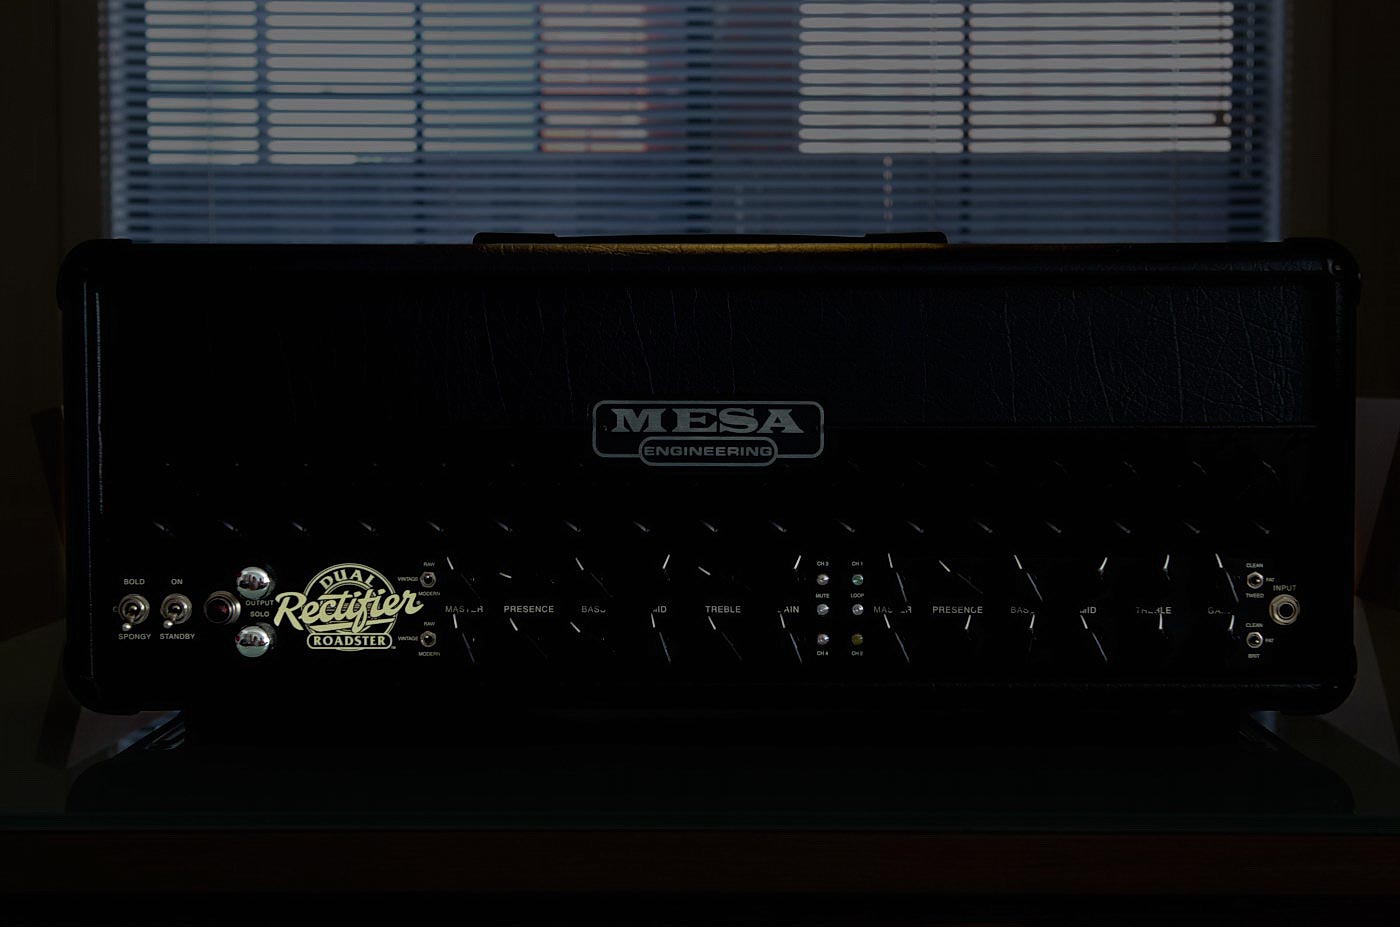
A pseudo night shot. Darkened in Photoshop. Knobs are still visible.
I'm very happy with how this worked out. I'm in two minds about changing the other two left knobs. I'll see.
I hope you enjoyed this series of photos.
-B
I've had a Mesa Rectoverb for about 3~4 years and as time went on the Roadster was in my sights, however. the price always put me off.
The short story how I got my Roadster...
I was in China last year for 3 weeks from July 1st for work reasons. Near the end of my second week I decided to check a local website for musos in Melbourne, Australia (where I live) and in the For Sale section the mighty Roadster amp is advertised for a price I couldn't believe.
I contacted the guy and told him to consider it sold on the premise the amp is in good shape. I couldn't believe he told me I was the first to contact him even though it was advertised for 3 days. The site generates a lot of traffic in the For Sale section. Oh well, suited me.
He held onto it until I got back (generous of him). I checked it out and then and there I bought it for $1500 (at the time, the AU and US dollar was on-par). It came with spare power tubes, 4 spare preamp tubes and the RJM Mini Amp Gizmo (with cable). No footswitch but the RJM takes care of all the switching anyway. I've never seen a Roadster sell for so low. They usually sell around AU$1800~$2200 second hand, amp only or with footswitch.
The amp is in great condition, as new. I changed the power tubes for TAD EL34B's (it had 6L6's) and replaced the preamp tubes:
V1 = 5751 Sylvania
V2 = 12AX7 Mesa
V3 = 12AX7 JJ
V4 is xxxx
V5 is xxxx
V6 = 12AX7LPS Sovtek
The amp sounds great and with no issues. I run it through a horizontal 2x12 Recto cab w/V30's (I have a story for that, too)
So 5 weeks ago I decided a mod was required.
One thing I never really liked was the knobs. In general, they're good high quality knobs but difficult to see the position. On the Roadster, I coloured the knob indicator with red nail polish and it helped but decided enough is enough and replaced the knobs with chicken head knobs.
The chicken head knobs are about 2mm too long on the tip end and they will hit the bottom end of the next knob or hit the checker plate when rotated. For whatever reason, Mesa has placed the knobs too close in pitch distance to each other. Other amps that I own the pitch distance is greater.
So the engineer in me said, "I need to cut the tips accurately, so make a jig!"
I thought I'd share my home made jig on modifying the chicken head knobs with photos further below. After about 45 minutes of filing 24 knobs and another 45 minutes of checking clearance on amp and making some minor tweaks to some knobs, they all work beautifully.
In total about 2.5 hours was spent replacing the knobs. This included filing, removing old knobs, checking and doing minor tweaks of new knobs and finally installing the new knobs making sure rotation travel was equal from zero to max.
Enjoy the photos.
Some knobs ready to be filed (one already filed):
Jig with knobs:
Top view of jig:
Adjustment screw to hold knob. This screw is adjusted up / down slightly to make sure the knob does not move in any direction. The screw must have a dome head that is slightly larger in diameter than the insert in the knob. As the screw is raised / lowered, this will accommodate any size difference in diameter of the inserts in the knob. If the screw is too high, the knob will rock; if it's too low, the knob will slide around. The screw has to be adjusted perfectly so the knob does not move at all.
The two nails are required to stop the knob rotating. These nails are a fine-fit with very little clearance, 0.10mm (less than a sheet of photocopy paper thickness). Where some knobs had a little play rotation-wise, I put single ply rag (an old t-shirt) between one nail and the knob. Worked great to stop rotation and didn't mark the knob surface.
The right angled bracket is adjusted forward / backward to change the cutting depth. I was lucky that the thickness of the bracket was about 1.6mm, which was pretty much the amount I had to file off; 2.0mm would have been OK, too. I rested the angled bracket against the flat face of the base timber so I didn't have to worry too much about the bracket flexing when I filed. Keep in mind you don't need to press hard; light strokes, even pressure and parallel cuts are what is the most important when filing.
The bracket is also 90 degress to the knob and the face of the bracket helps the file to cut straight and true. Once the file scrubs or sits on this face evenly as you stroke, it's time to stop filing. You don't want to file the bracket down because you'll change the surface and end up with the last few of the knobs not being the same as the first few knobs. Care is key here. You can see light filing marks on the bracket (after 22 knobs where filed).
Inserts in the knob. The size of the chamfer on the inserts varies slightly between knobs. The chamfer of the insert is what touches the dome head of the screw. I also had to change the grub screws from slotted to hex key. If they are not changed, it'll be impossible to fit the knobs on the amp unless you take the chassis out.
Held down ready to file:
Filed down:
The filed knob:
Before and after:
So, to the Mighty Roadster...........
As you all know the Roadster with original knobs. I painted the depression with some Candy Apple Red nail polish but it's still difficult to see in dark-ish conditions.
RJM unit cable tied. Power lead shown with hooks that I installed. The hooks are simple clothes hooks I bought from a hardware store. I don't understand why Mesa doesn't have hooks to wrap the power lead nice and neat. My Peavey JSX has moulded hooks as standard.
Knobs, knobs and more knobs:
Checking first set of knobs:
Original knobs removed. The plastic spacers are still required for the new knobs:
Ready to install the new knobs:
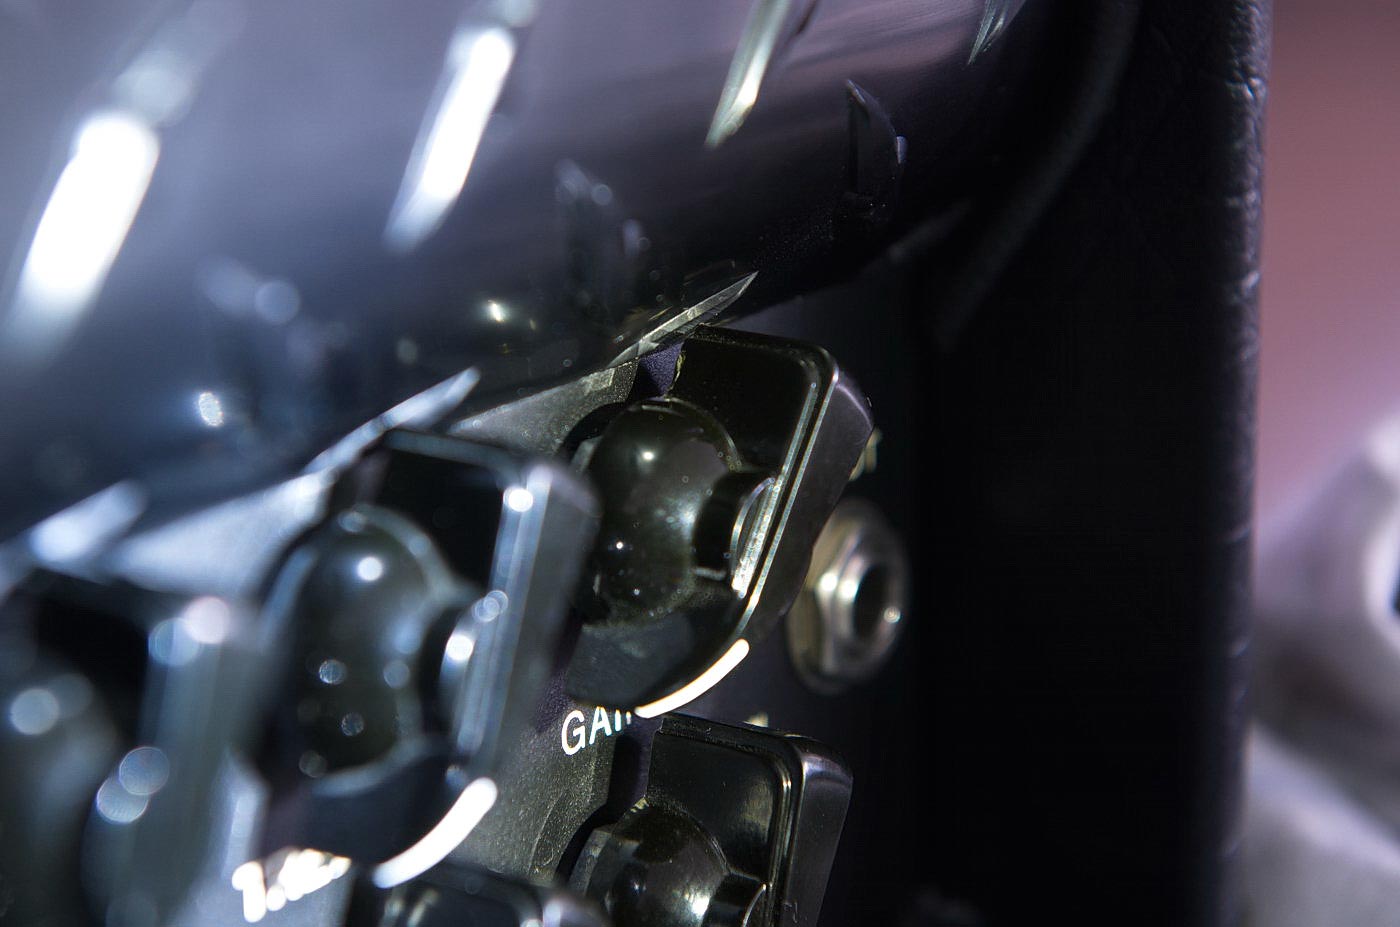
New knobs in place but not tightened down. Further clearance checks required by rotating all knobs:
The tail of one knob hits the checker plate. Not good. There was another three that did the same thing. Time to put a chamfer on the tail.
Knob modified with approximately 1.0mm x 30-45 deg. chamfer underneath tail.
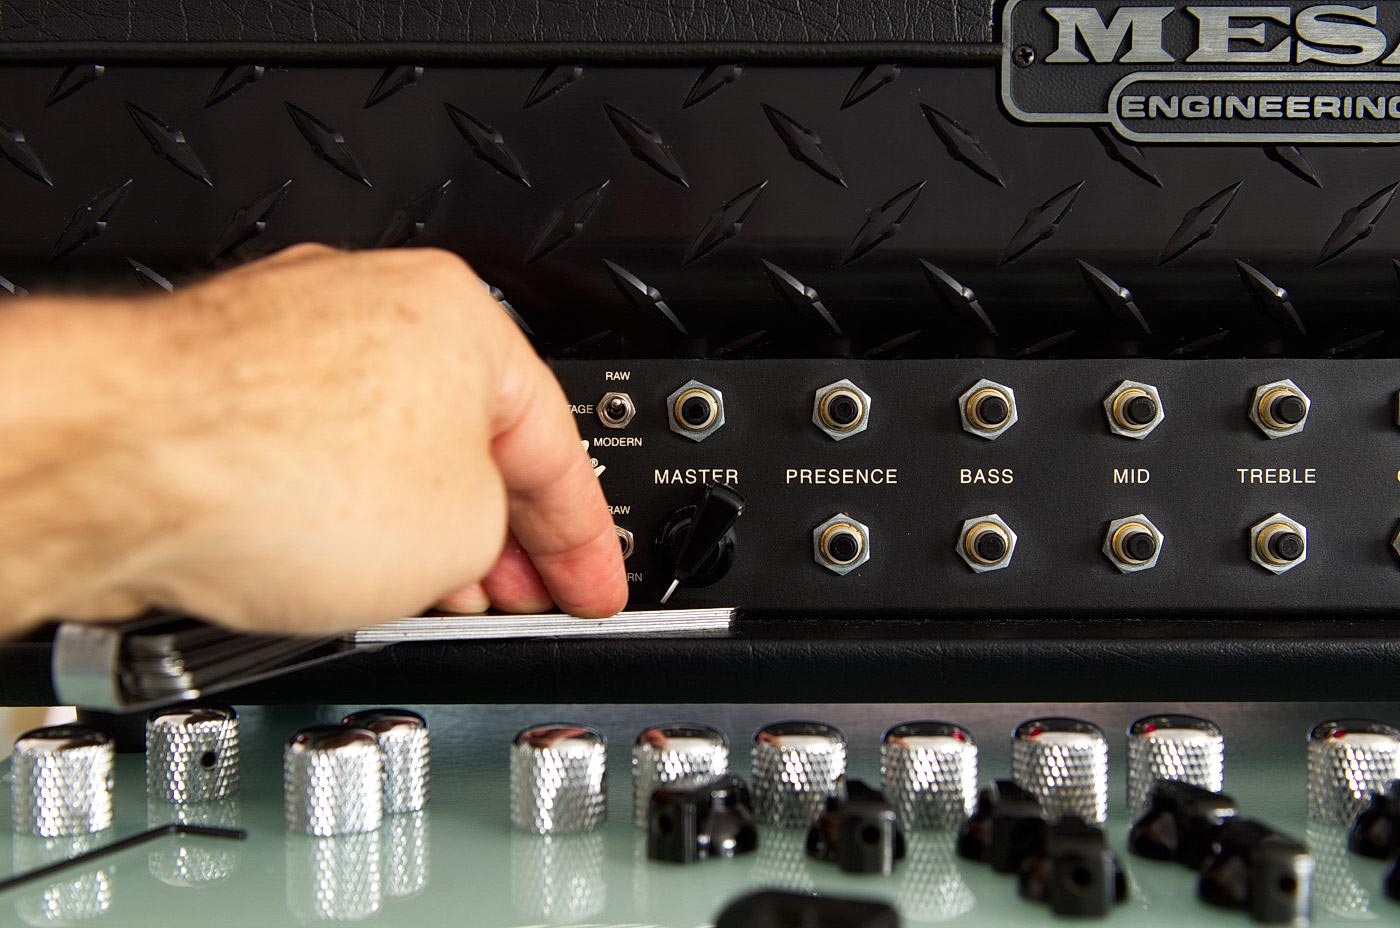
Time to install the bottom rows of knobs. Checking the full rotation angle of the knob. It needs to be even each side of 12oclock. A Lego block is a great place to start LOL. Check one side........b]
........Then check the other side. Not good. This side rotates more.
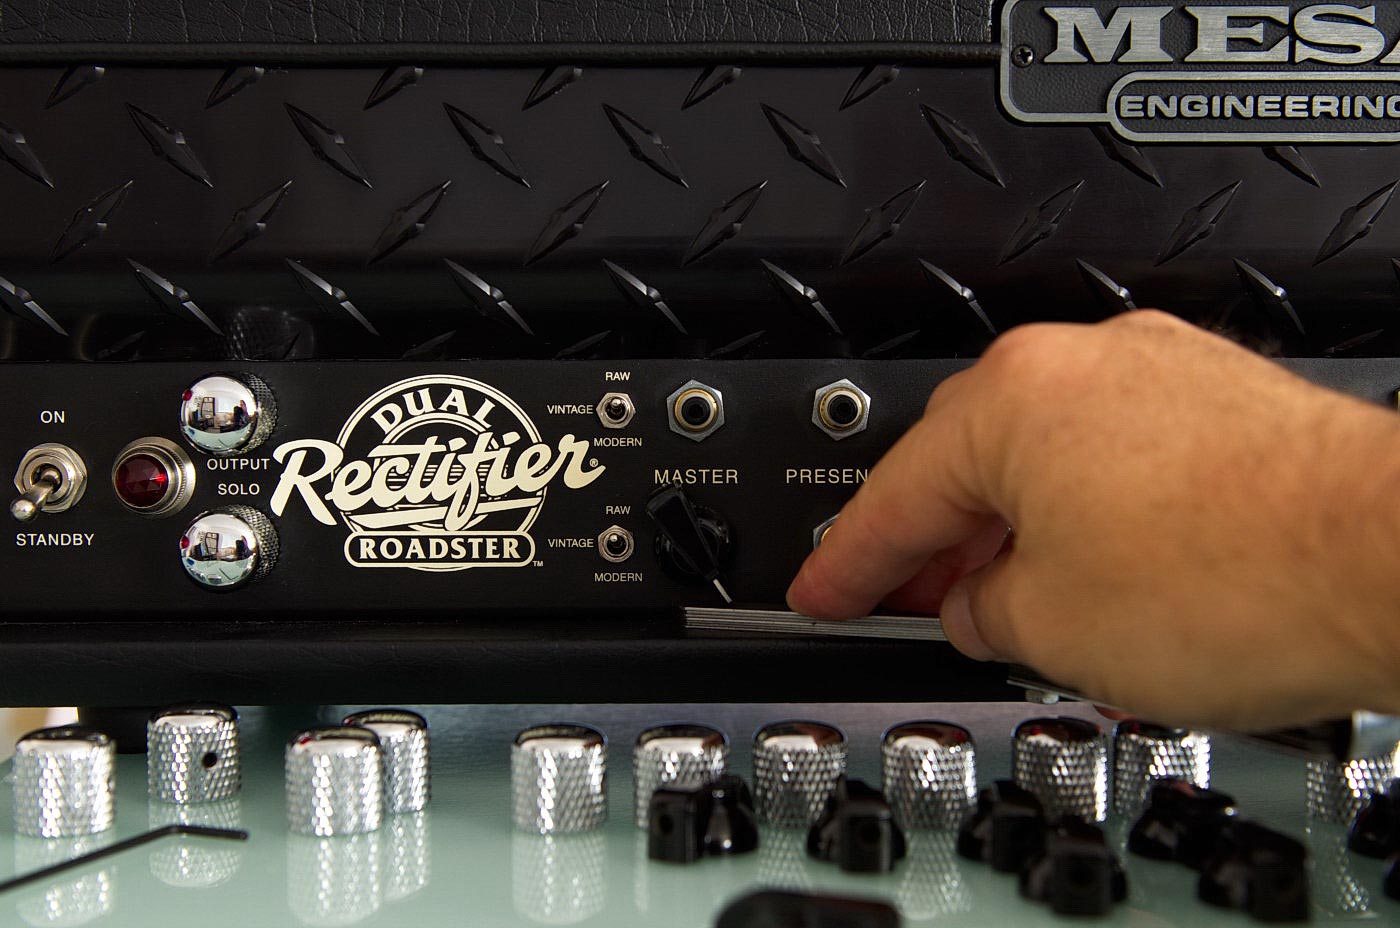
Time to get the feeler gauges out for more accurate adjustment. One side.....
...... now the other side.
Thickness of feeler gauges measured because I felt like it:
Bottom rows of knobs installed and tightened. Now to do this all over again for the top rows. Lego to the rescue! One side checked....
..... other side checked.... and it's even. Lego is the best and it's my jig for the top rows of knobs LOL.
Knobs installed, all screwed down, double checked for full rotation. Success...
A pseudo night shot. Darkened in Photoshop. Knobs are still visible.
I'm very happy with how this worked out. I'm in two minds about changing the other two left knobs. I'll see.
I hope you enjoyed this series of photos.
-B